Step
Overview
Steps are individual actions or instructions that make up a Scenario, and multiple steps can be associated with a single scenario. A step can also be reused across different scenarios within the same Project. There are no limitations on the type of steps you can add in a scenario as long as they are part of the same project. Any changes made to a step in a flow will be reflected across all flows where that step is reused.
If you want to prevent any changes to a step from affecting other Flows, you can use the Clone Step or Clone Scenario option at the test flow level. By assigning a unique name to the cloned steps or scenarios, you ensure that any future changes to the original will not impact the cloned entities.
View
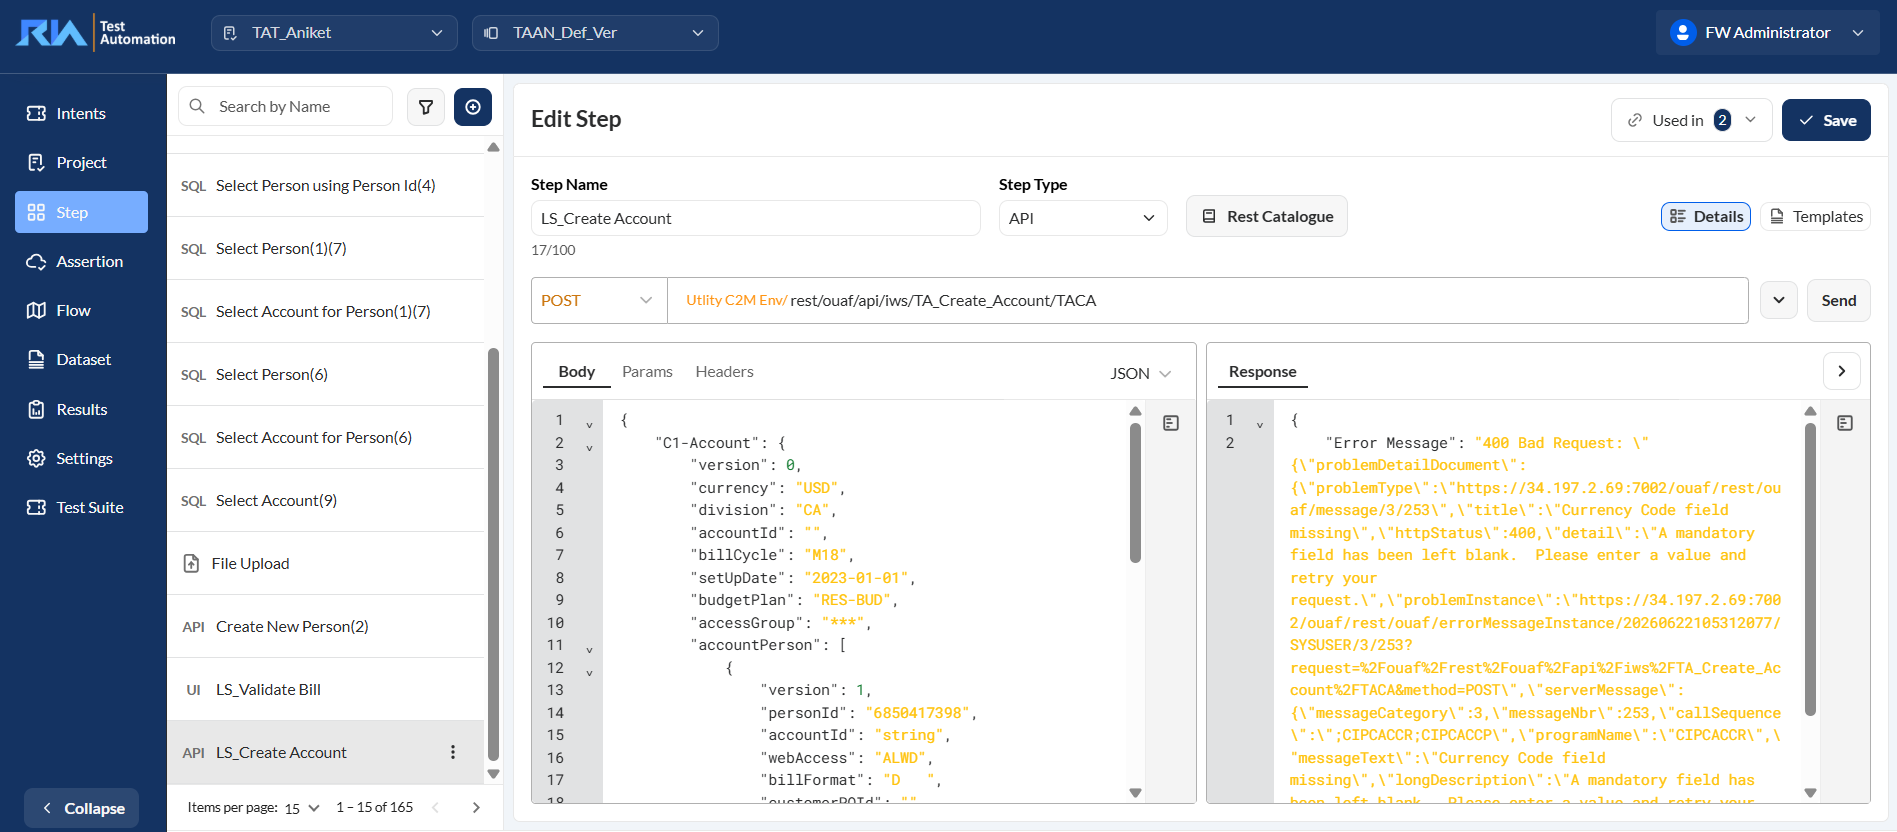
In the upper left corner, select your project from the Select Project dropdown list and the version from the Version dropdown list. Only the steps associated with the selected project and version are displayed on the left pane.
Edit a step
To view or modify the details of a step, select the step from the left pane. You can change any detail by directly editing the corresponding field. Ensure to click Save after making your modifications.
Search
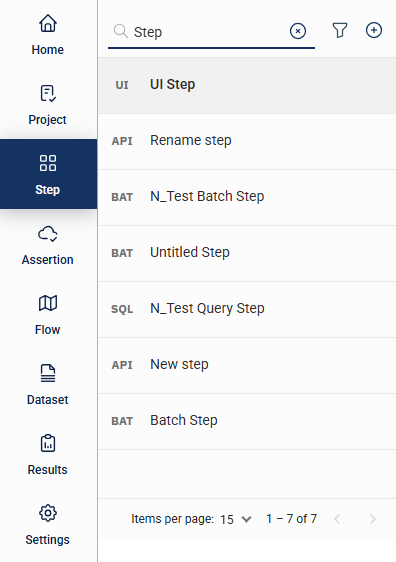
The search feature allows you to find a specific step by entering a keyword or the full name of the step on the textbox. Only the steps that match the provided keyword or name will be displayed in the view.
Filter
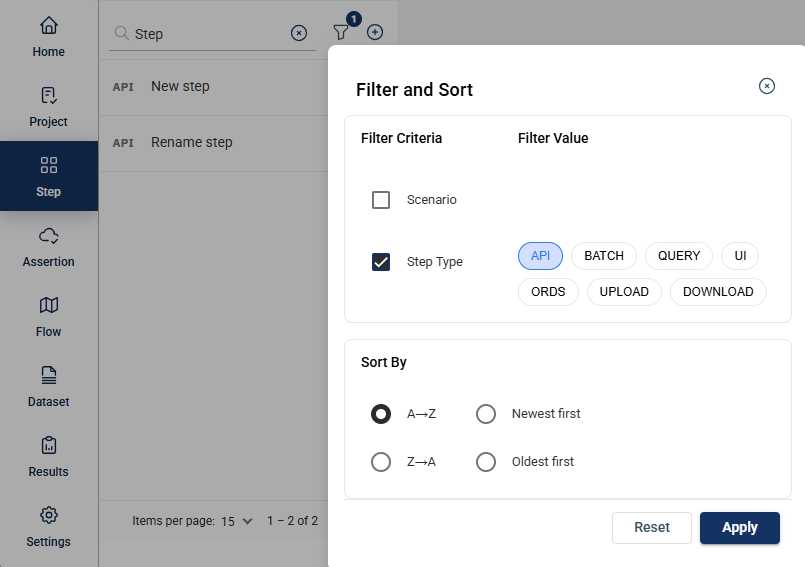
Click the  icon to display additional filtering and sorting options. For filtering, a dropdown list of available filter parameters will show all associated values for the selected project and version.
Create a step
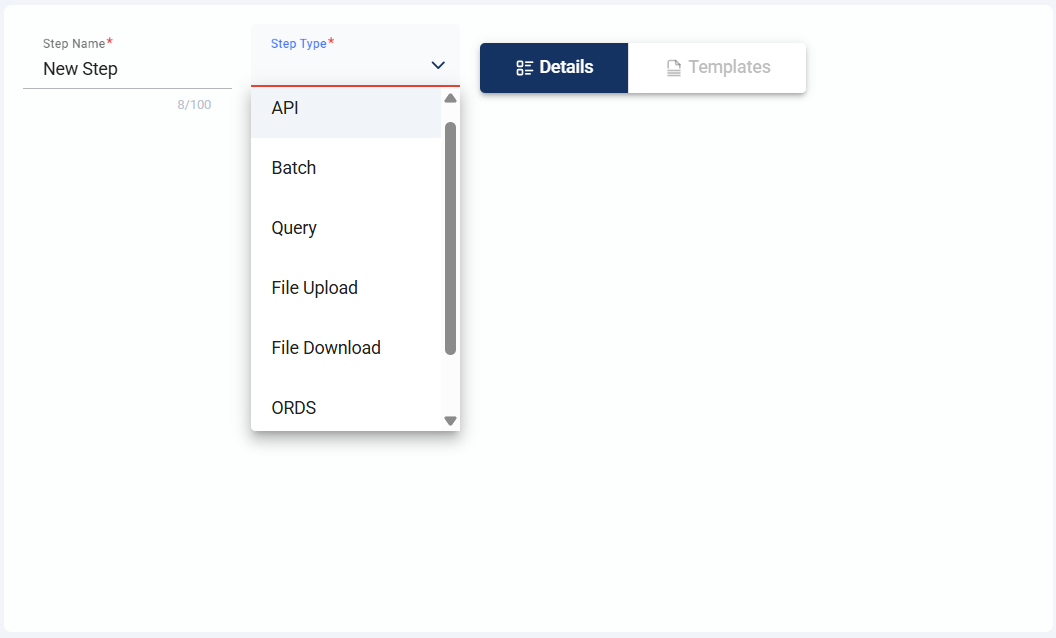
To create a step, click on the Create Step button and enter valid values to the following fields. To create a step, click on the Create Step button and enter valid values to the following fields.
| Field Name | Description |
|---|---|
| Step Name | Name of the step. It should be a minimum of 5 characters long. Mandatory: Yes |
| Step Type |
Specifies the type of step. The following are the possible values: Mandatory: Yes |
Create an API step
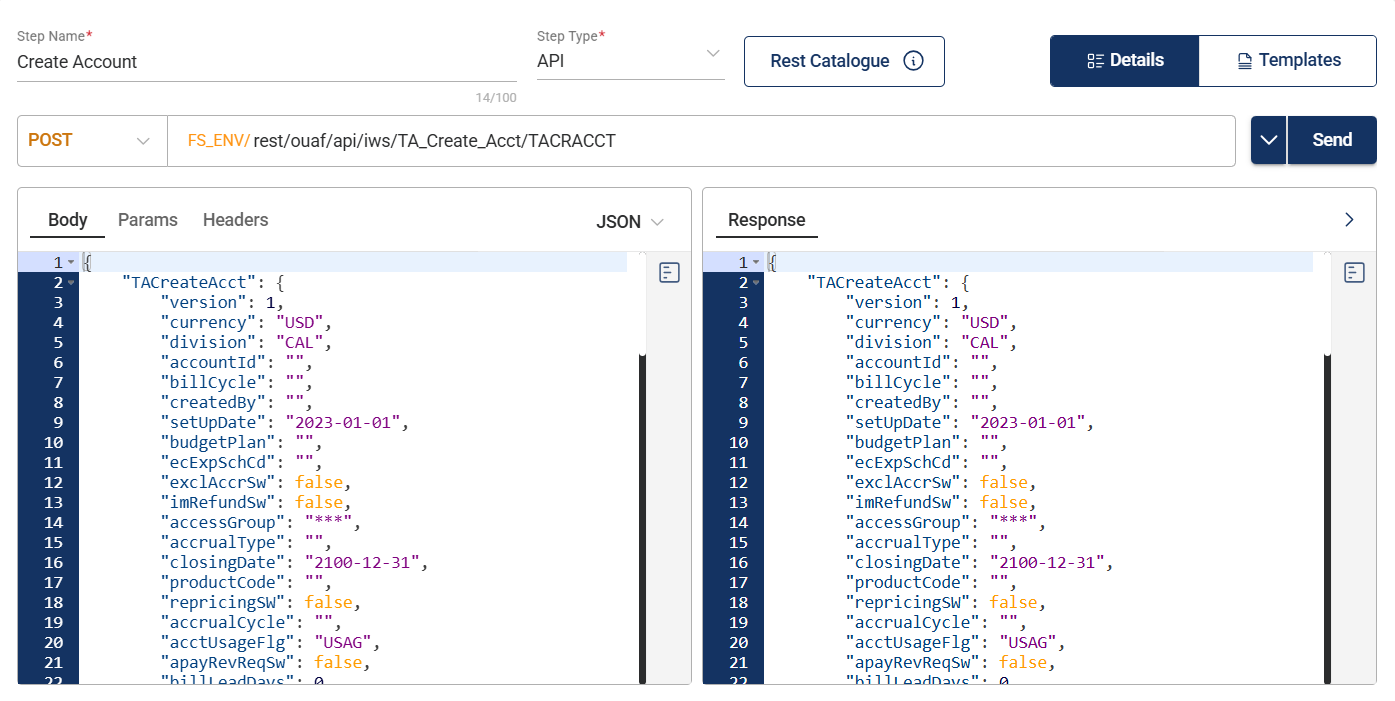
To create an API step, enter valid values in the following fields:
| Field | Description |
|---|---|
| HTTP Method |
Specifies the action to be performed by the external system on your server. The following values are supported:
Mandatory: Yes |
| URL |
Specifies the API URL used for validation. It consists of two parts:
Mandatory: Yes |
| Params |
Specifies the parameters used for query execution and data retrieval. Parameters can be configured in the following ways:
Mandatory: No |
| Body |
Specifies the payload details of the step. The following formats are supported:
Mandatory: No |
| Headers |
Specifies the HTTP headers included in API requests or responses. Headers provide important metadata such as content type, authentication details, and instructions for processing data. |
| Template |
Specifies the template for the request payload. For more information, see Template. |
| Response |
Displays the data returned by the server in response to an API request. Responses contain the information or results of the request, such as user data, search results, or confirmation messages. |
Template
A request payload template simplifies dataset configuration by defining the structure of the request body, including JSON nodes and parameters like path or query parameters.
The purpose of the template is to declare fixed values once and reuse them in datasets. Only the varying fields need to be populated when the template is reused.
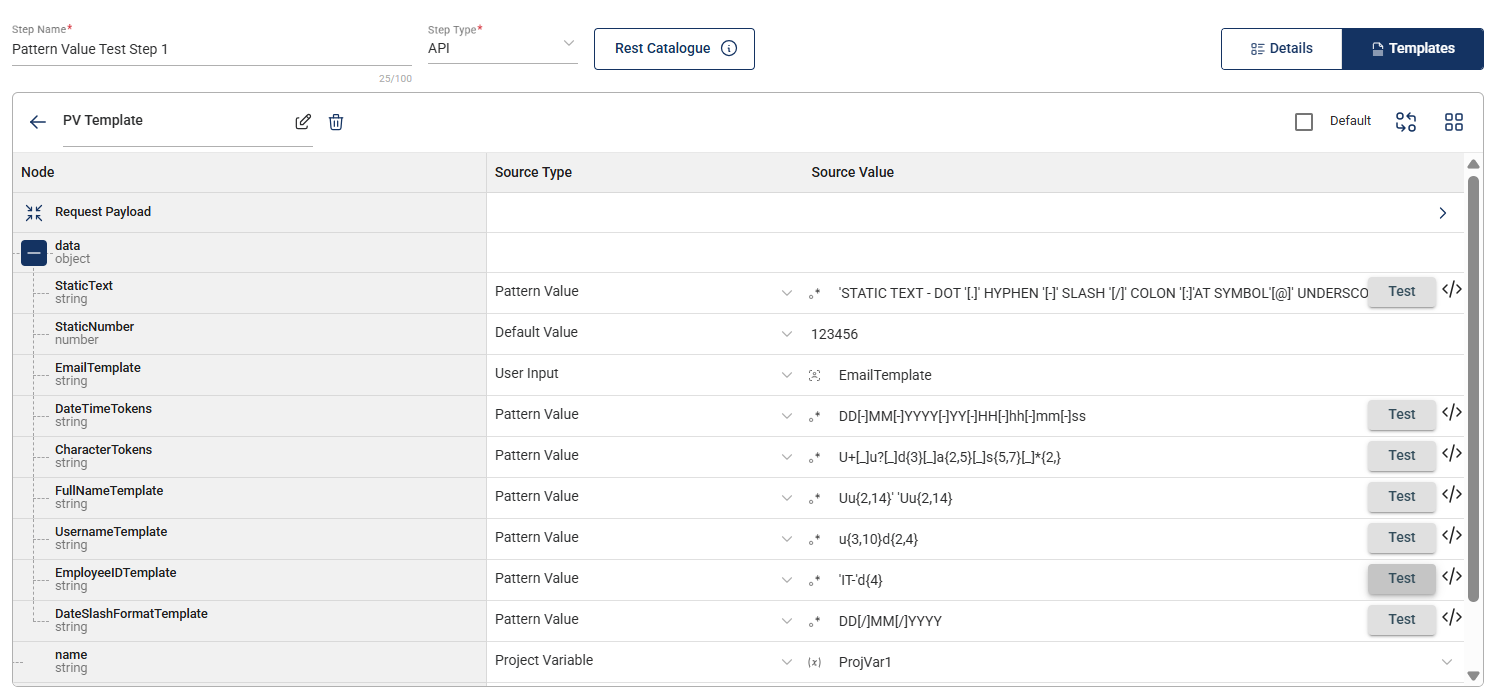
The values in the template can be any of the following:
- Default value: The same value is used every time the dataset is used.
- Project variable: The value of the project variable assigned to the node is used.
- User input: The user provides the value each time the dataset is configured.
- Pattern value: A validation pattern is defined for the source input. Users must provide a value each time the dataset is configured, and the value must conform to the specified format or regular expression.
To quickly access supported pattern formats, click the </> icon to open the list of available pattern templates. You can browse the list or use the search field to locate a specific format.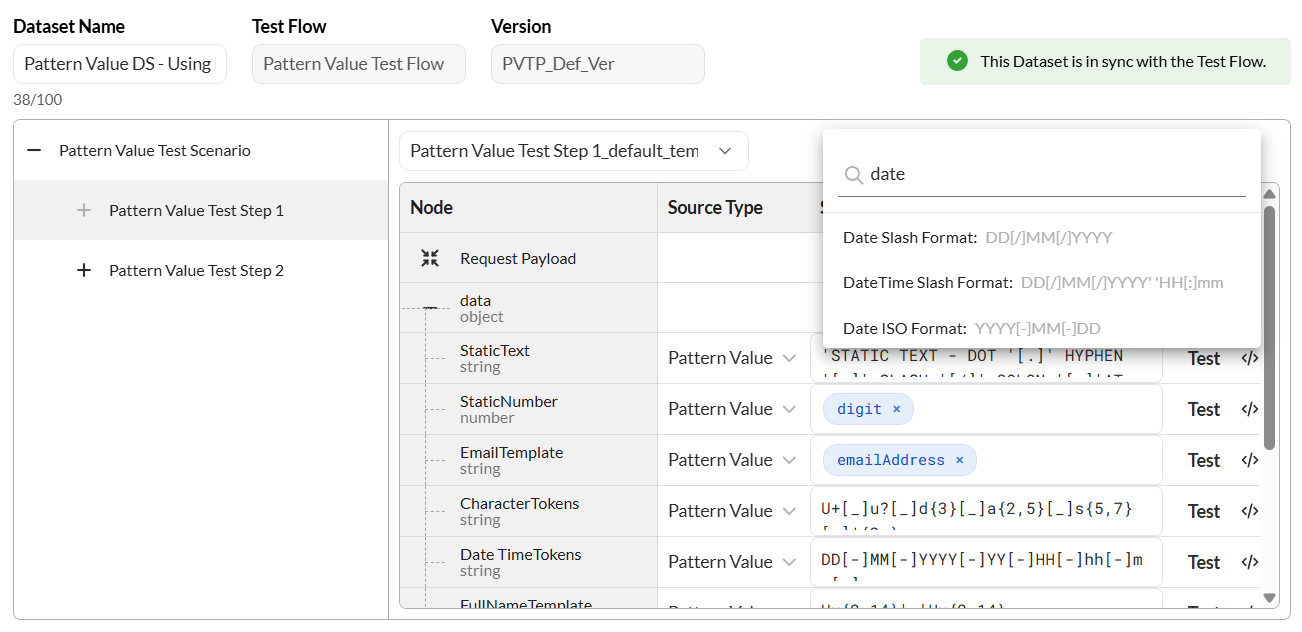
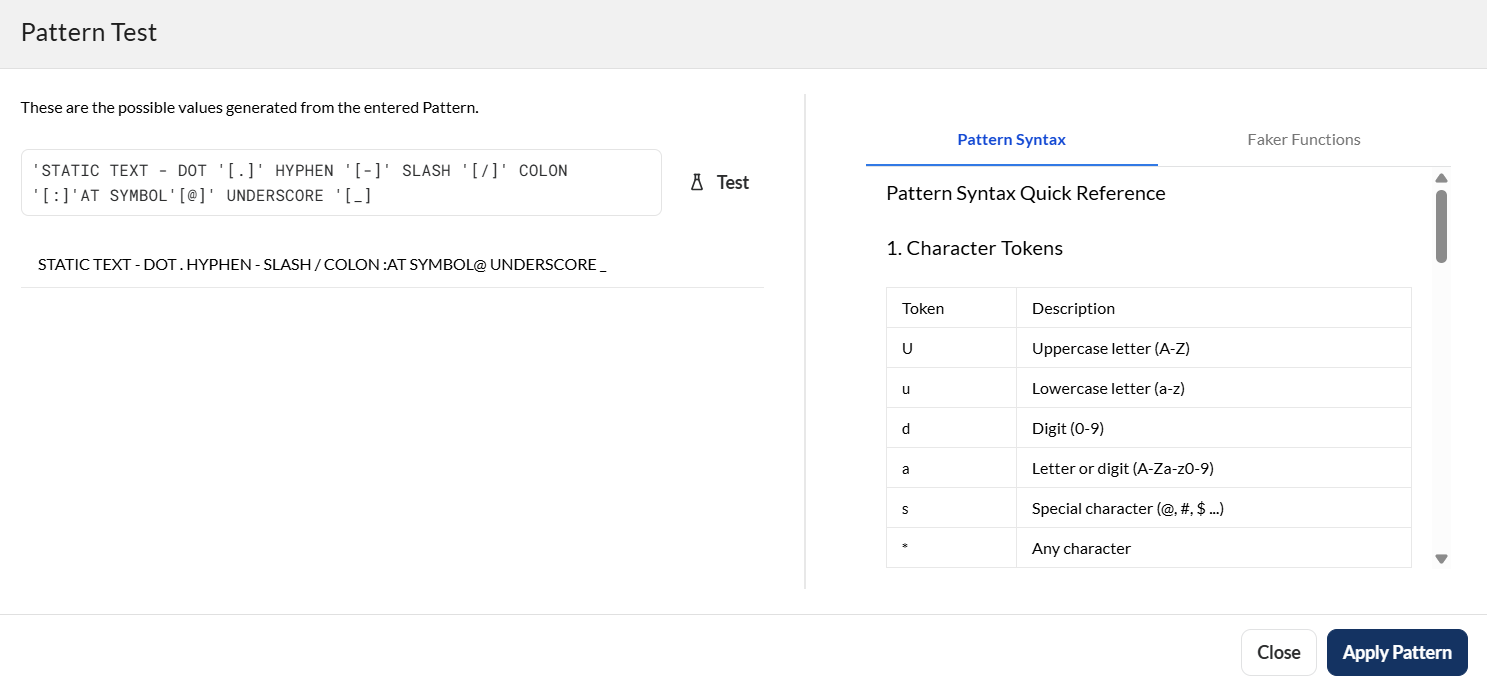
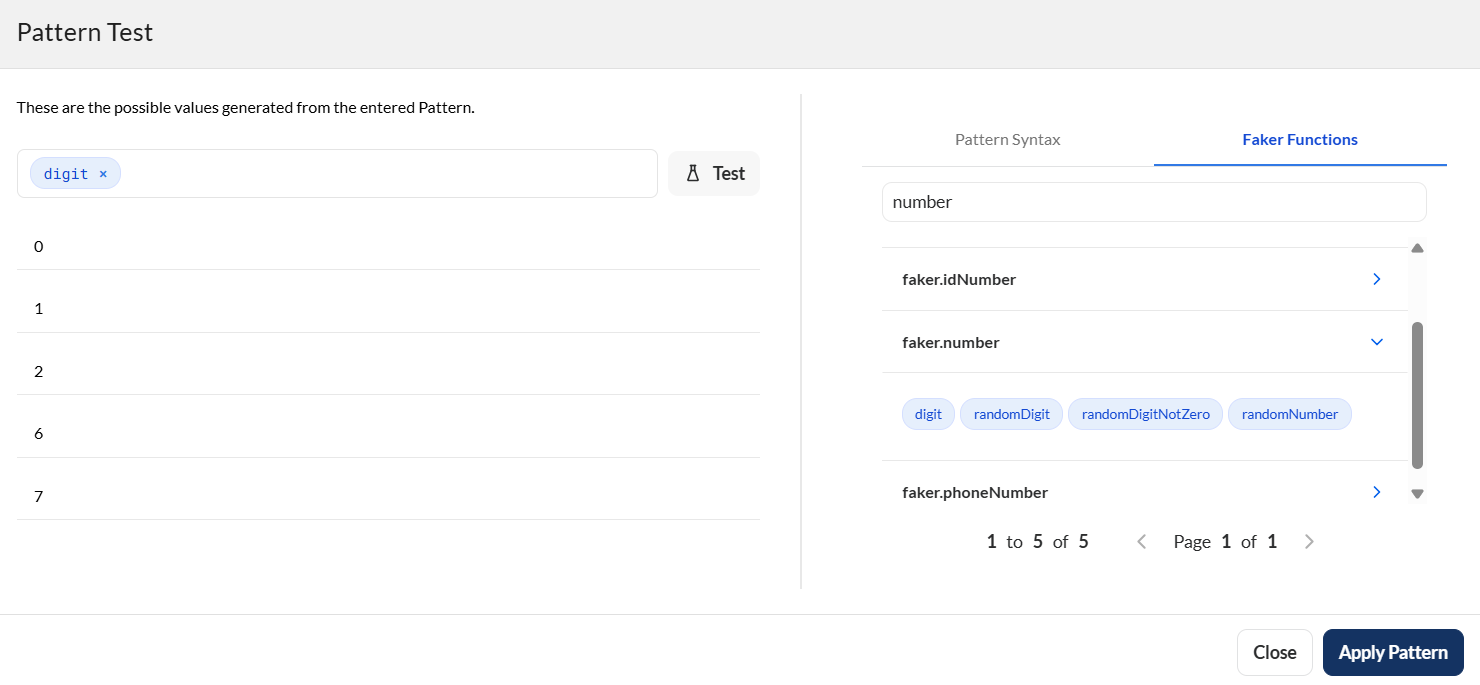
If the required pattern is not available in the template list, click Test to open the Pattern Test dialog. You can define and validate a pattern using either of the following options:
- Pattern Syntax – Enter the desired pattern syntax in the textbox on the left pane. You can refer to the syntax reference in the right pane for guidance. Click Test to validate the pattern against sample values, then apply it if the results are correct.
- Faker Functions – Browse the list of supported faker functions that generate realistic sample data for testing. Search for the function you want to use, then click Test to validate the generated values and apply the pattern.
Form data
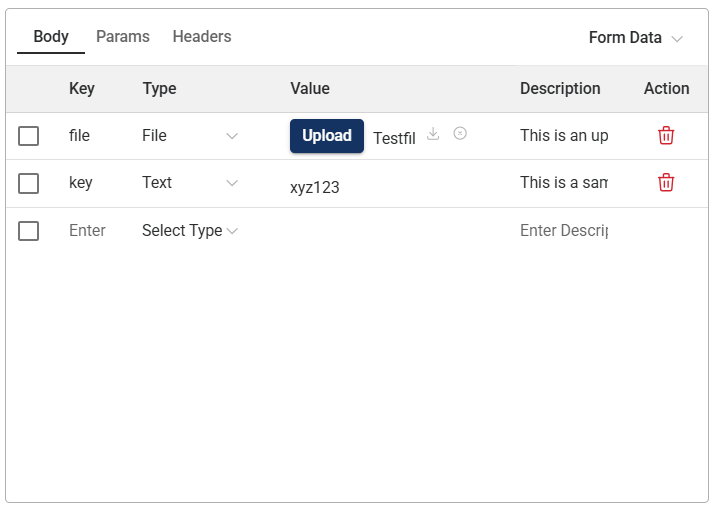
Form Data allows you to define request parameters as key-value pairs. It is used to send a single request with a single or multiple parameters. Each parameter is represented as a separate key with a corresponding value.
| Column | Description |
|---|---|
| Select | Checkbox used to select the form data row. |
| Key | Name of the form data parameter sent in the request. |
| Type | Data type of the parameter value, such as Text or File. |
| Value | Value assigned to the parameter key. |
| Description | Purpose of the parameter. |
| Action | Delete icon to remove the selected parameter key. |
Create a Batch step
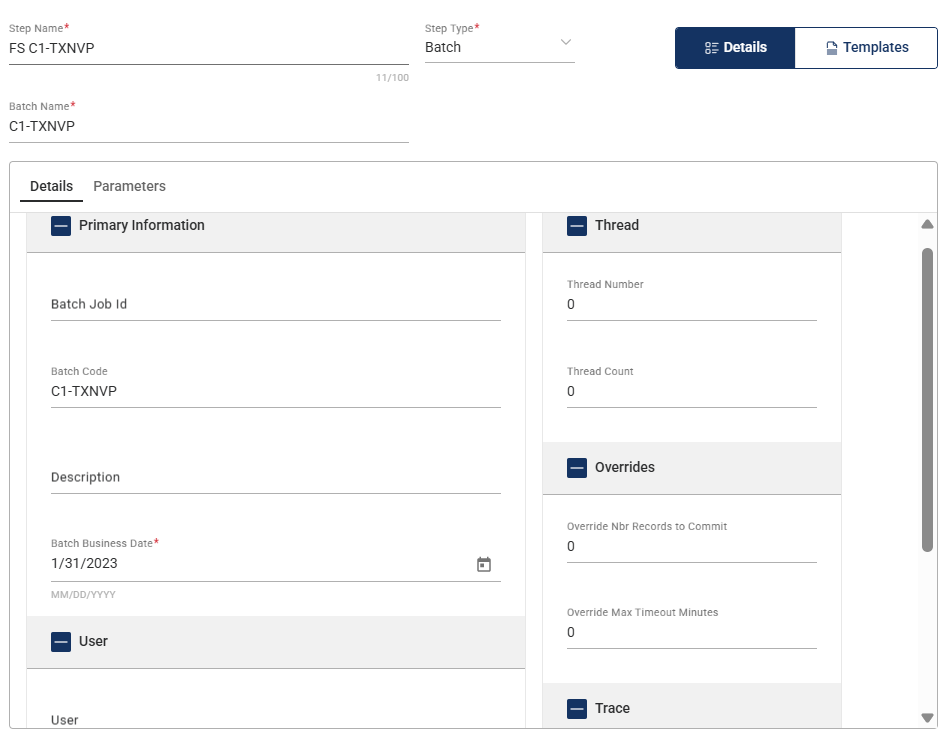
To create a batch step, select a batch from the Batch Name dropdown field and enter valid values in the following fields:
| Field | Description |
|---|---|
| Batch Job ID |
Unique identifier of the batch job. Mandatory: Yes |
| Batch Code |
Unique code associated with the batch job. Mandatory: Yes |
| Description |
Description of the batch. Mandatory: Yes |
| Thread Number |
Thread within the batch process. Mandatory: Yes |
| Thread Count |
Total number of threads used for parallel processing within the job. Mandatory: Yes |
| Batch Rerun Number |
Run number of the re-execution of a batch process in ORMB. Mandatory: Yes |
| Batch Business Date |
Specific date for ORMB transactions to be processed. Mandatory: Yes |
| Override Nbr Records to Commit |
Total number of records that can be manually overridden and committed to the database during a batch process in ORMB. Mandatory: Yes |
| Override Max Timeout Minutes |
Maximum time limit for a process to run before it times out. Mandatory: Yes |
| User |
User account used to log in to ORMB. Mandatory: Yes |
| Language |
Language or locale settings used to process and display data, messages, and invoices in ORMB. Mandatory: Yes |
| Email Address |
Email address of the user. Mandatory: Yes |
| Trace Program Start |
If enabled, detailed logs are captured at the beginning of a trace process. Default: Disabled |
| Trace Program Exit |
If enabled, end logs are captured to mark the completion of a trace process. Default: Disabled |
| Trace SQL |
If enabled, SQL queries executed during a trace process are captured and logged. Default: Disabled |
| Trace Output |
If enabled, all trace output, including logs and reports about the execution flow, SQL queries, and performance metrics, is generated. Default: Disabled |
Parameters
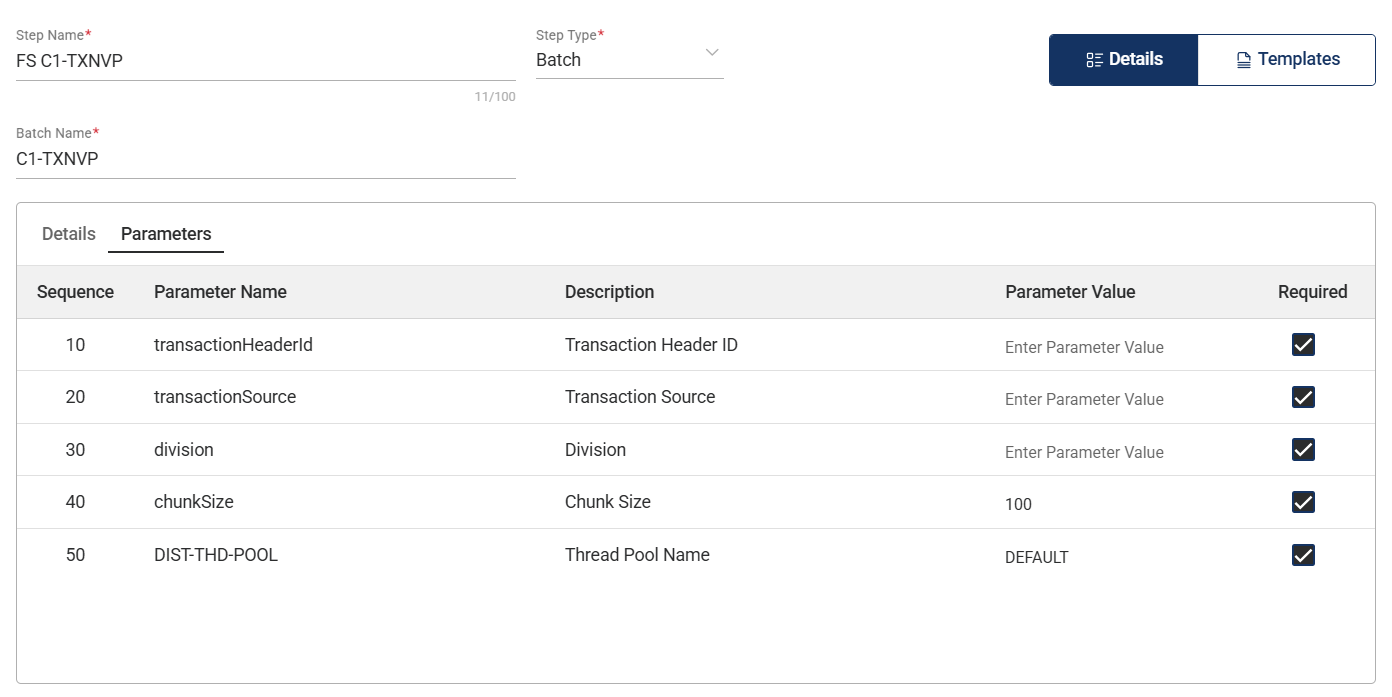
| Field | Description |
|---|---|
| Sequence |
Unique values used to identify the parameter. |
| Parameter Name |
Name of the parameter. |
| Description |
Description of the parameter. |
| Parameter Value |
Specifies the value of the parameter. |
| Required |
Indicates whether the parameter is required for a batch job to run. |
Create a Query step
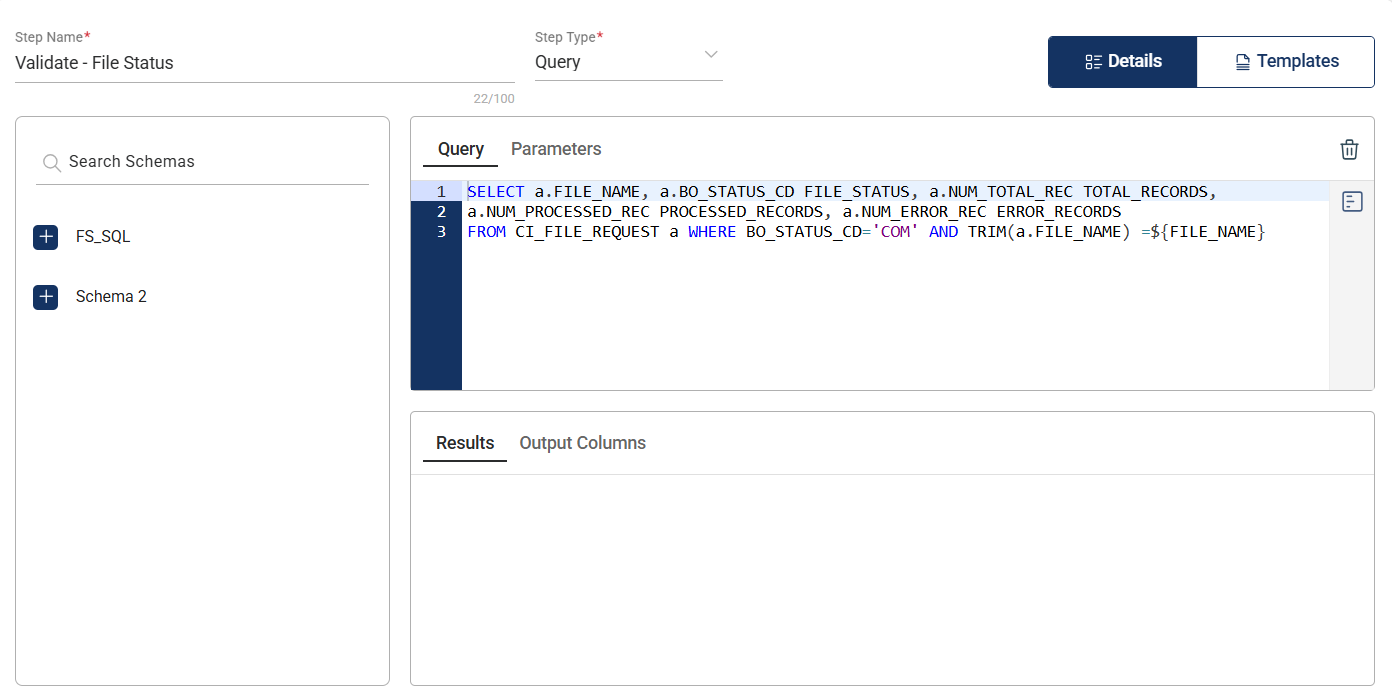
| Section | Description |
|---|---|
| Schema |
Specifies the schema of the database where the query will be executed. This is automatically populated from the configured database at the environment level and only needs to be selected at the assertion level. |
| Query |
Defines the query being executed to get results for validation. |
| Parameters |
Lists the input key-value pairs extracted from the provided query. |
| Result |
Specifies the expected result after running the query. |
| Output Columns |
List of database columns included in the expected result after running the query, along with their data types. |
Create a File upload step
To create a new file upload step, follow these steps:
- Enter a valid value in the Step Name field.
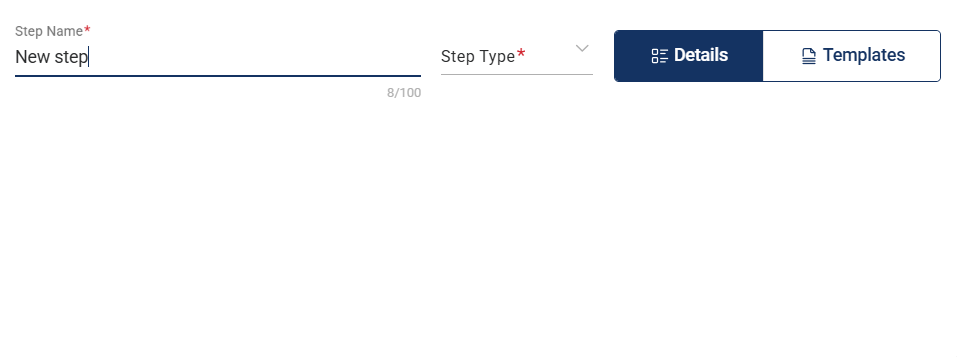
- Select
File Uploadin the Step Type dropdown field.
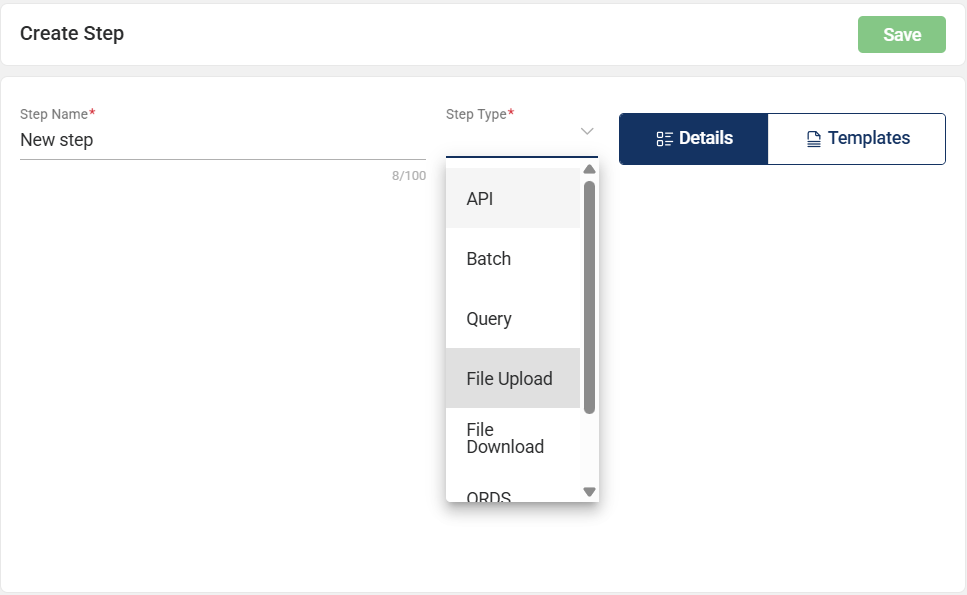
- Select a new environment from the Environment dropdown if you wish to use a different one other than the default.
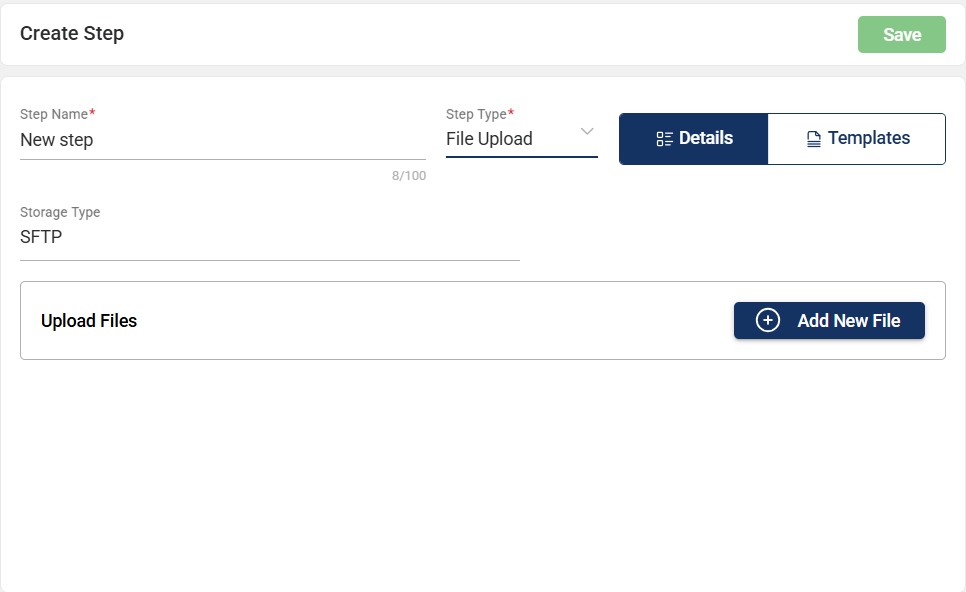
- Click the Add New File button.
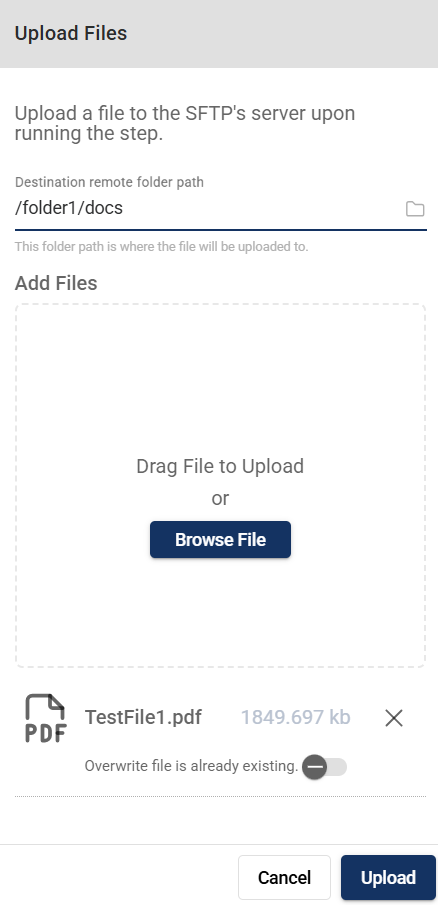
-
Specify the Destination remote folder path.
-
Drag or browse the files to upload. You have an option to overwrite an existing file.
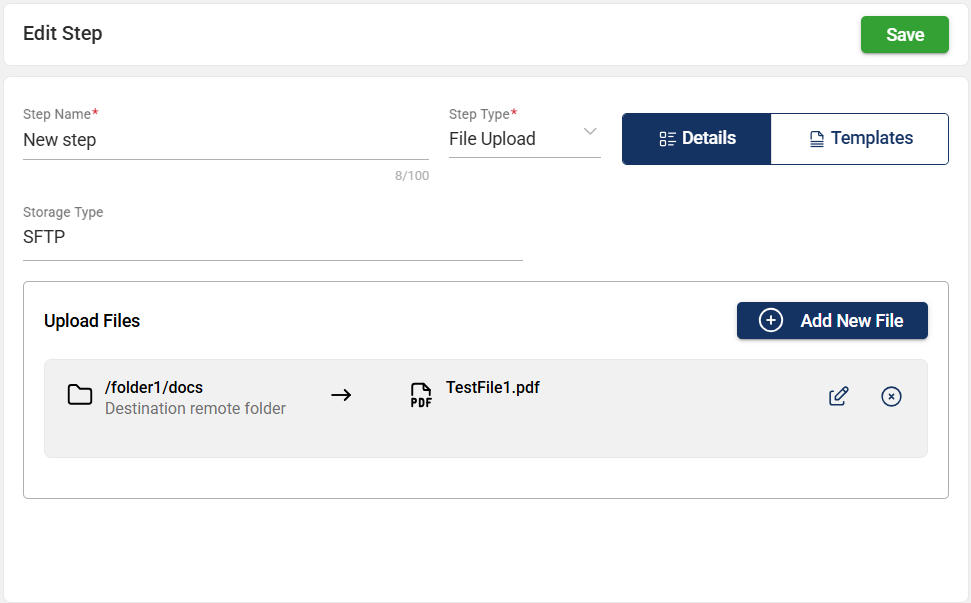
- Click the Upload button.
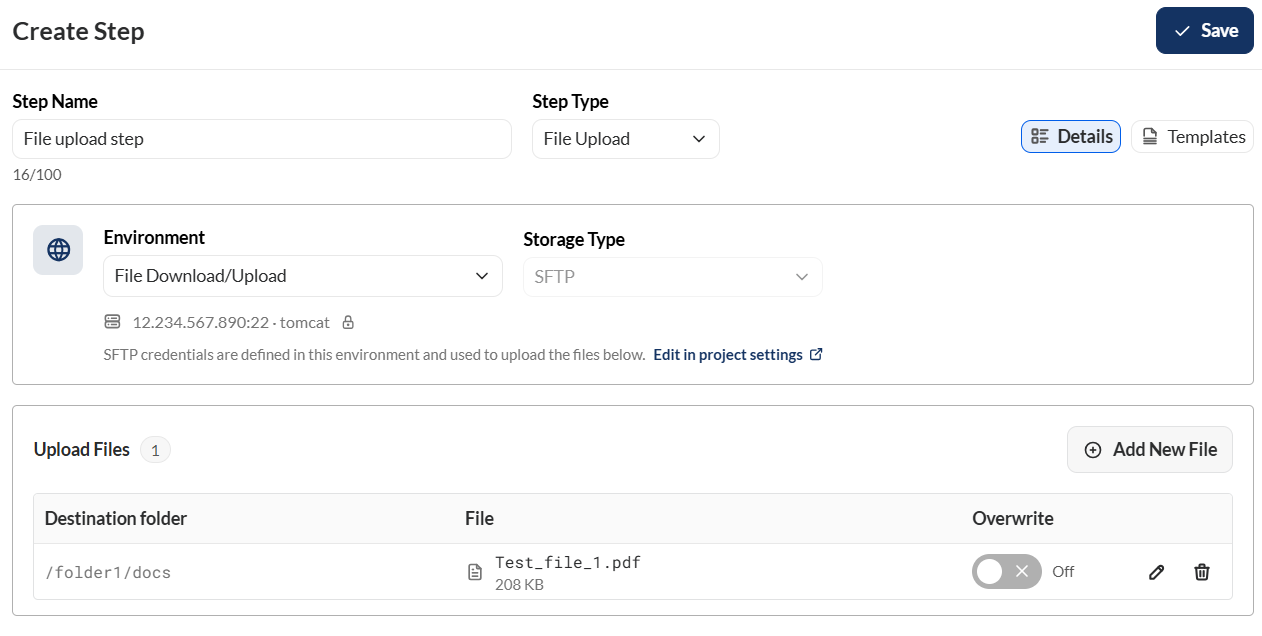
- Click the Save button.
Create a File download step
To create a new file upload step, follow these steps:
- Enter a valid value in the Step Name field.
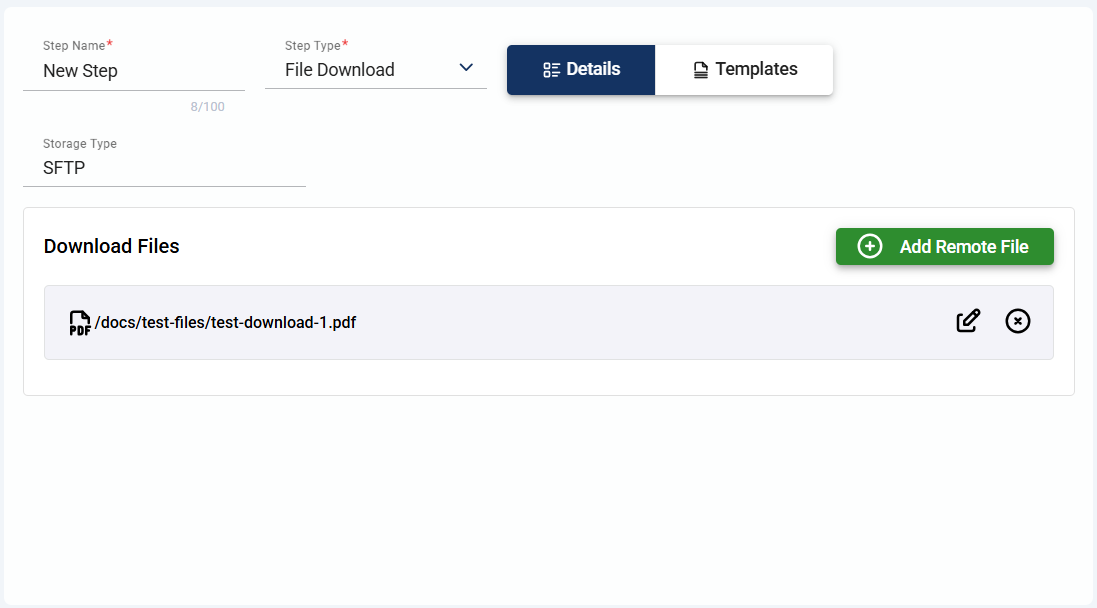
- Select File Download in the Step Type dropdown field.
- Select a new environment from the Environment dropdown if you wish to use a different one other than the default.
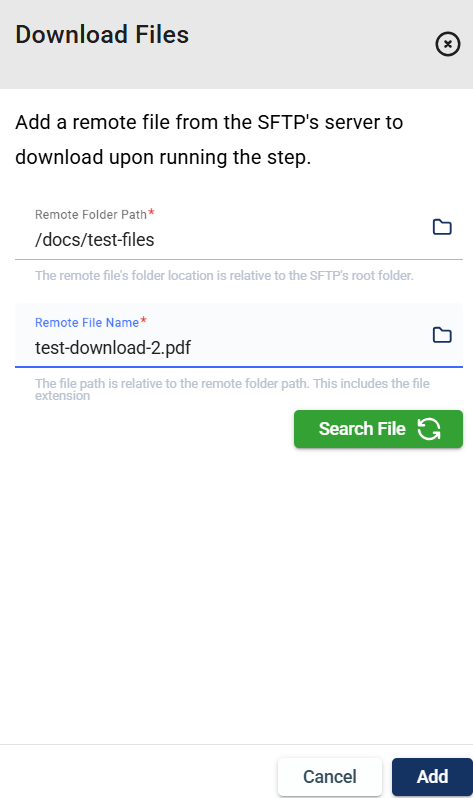
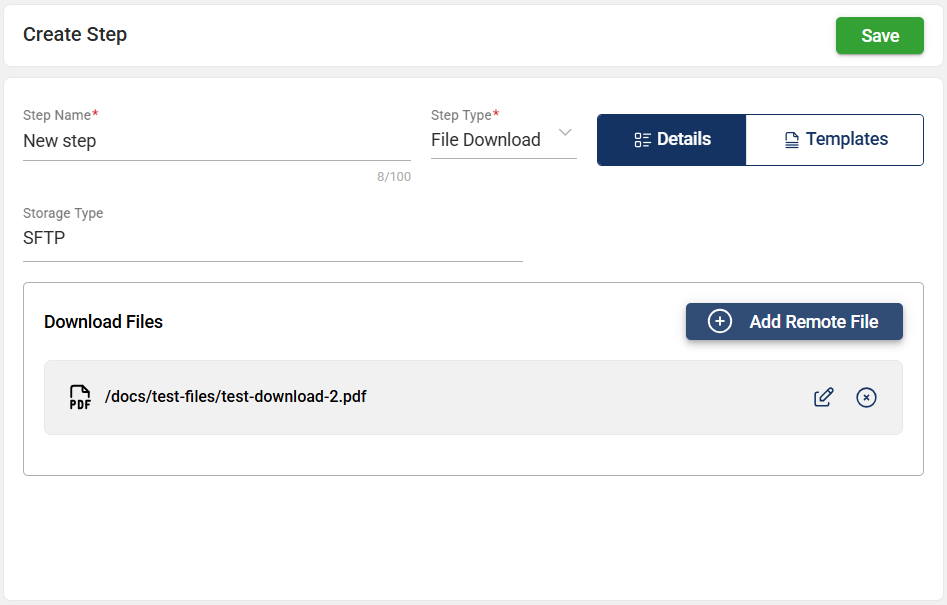
- Click the Add Remote File button.
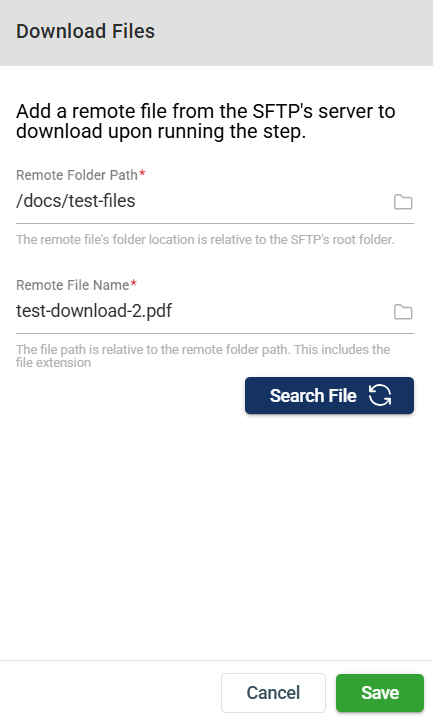
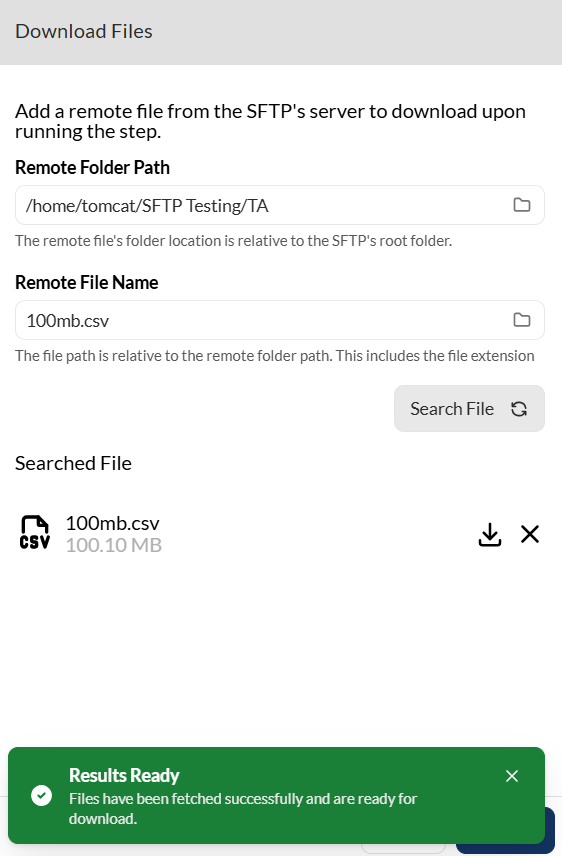
- Enter values in the Remote folder path and Remote File Name fields.
- Click the Search button to confirm that the file is available in the specified path.
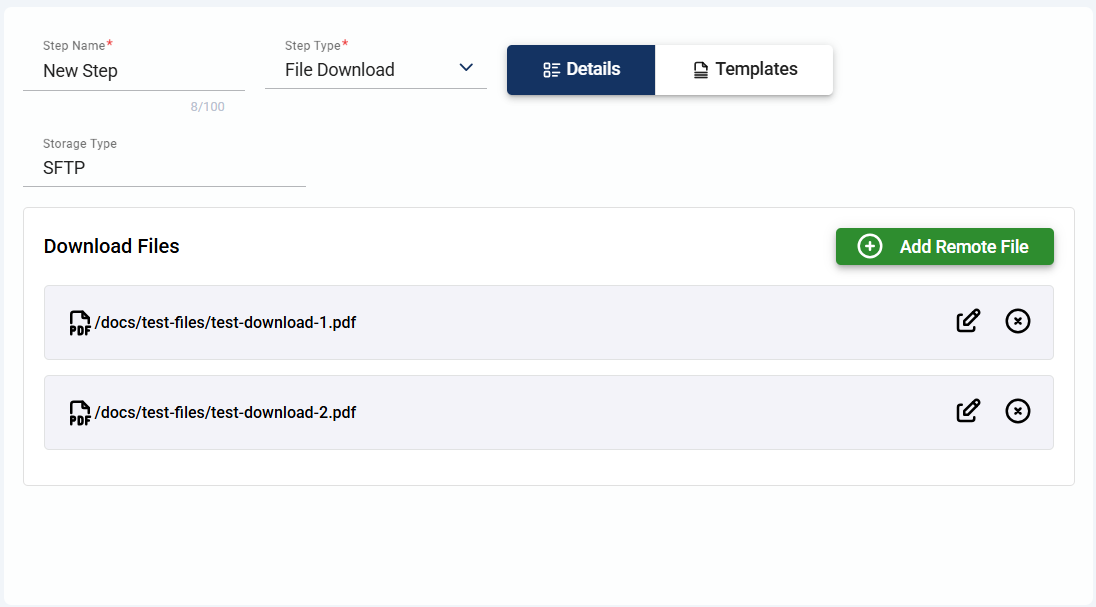
- Click the Save button in the Download Files window.
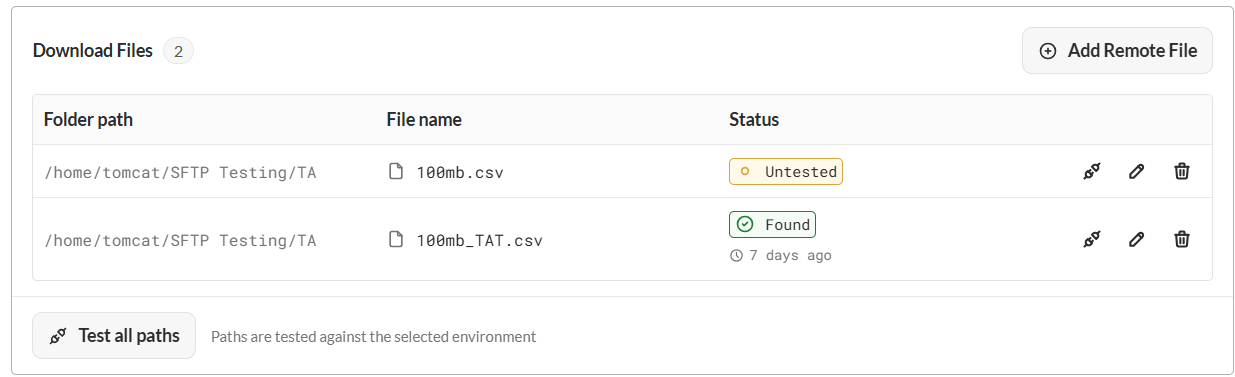
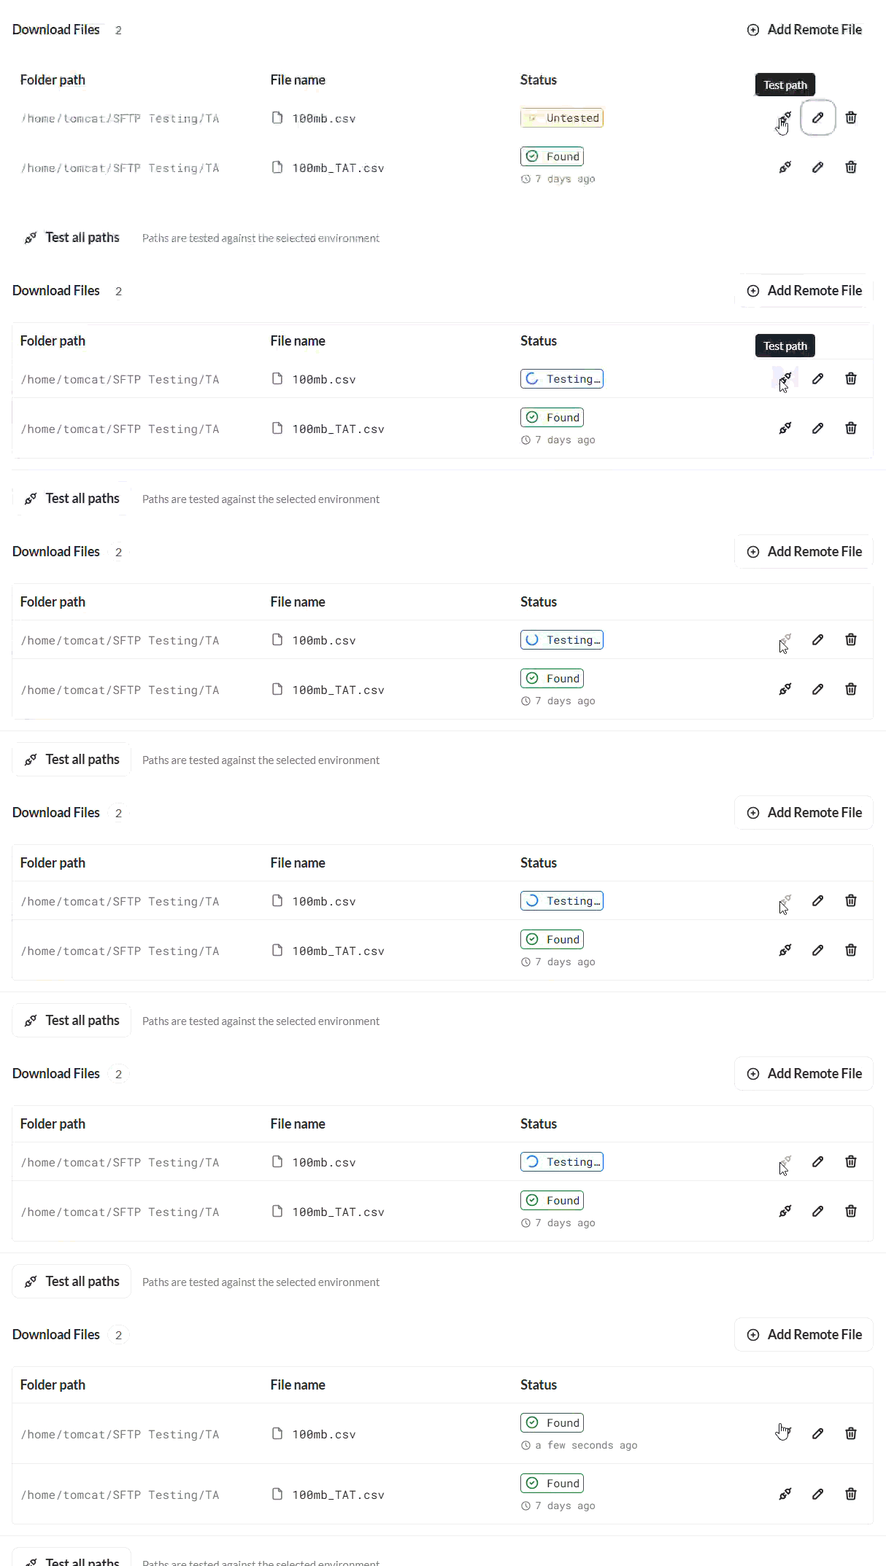
- Click the Test Path icon to change the status of the newly-added file from
UntestedtoFound.
- Click the Save button.
Create a UI step
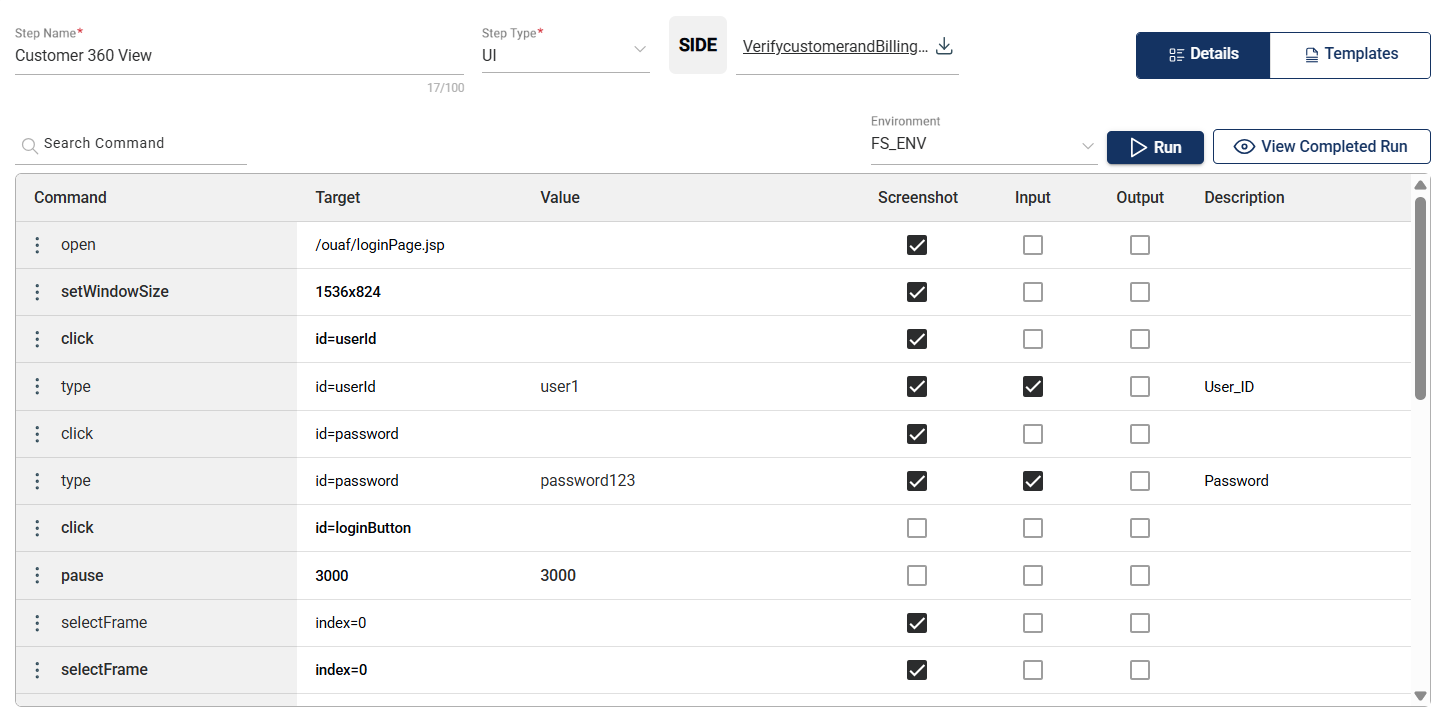
To create a UI step, upload your .side file in the designated upload box.
Once uploaded, a table with the following columns is displayed:
| Column | Description |
|---|---|
| Command |
Describes the command or action to be performed on the target. Mandatory: Yes |
| Input |
Indicates whether a value is necessary to be supplied to the target element for the command to be executed. Mandatory: No |
| Target |
Specifies the xpath of the target. Mandatory: Yes |
| Value |
Specifies the value to be supplied to the target element. Mandatory: Only if the Input box is checked. |
| Description |
Describes the command. Mandatory: Yes |
| Screenshot |
Indicates whether a screenshot will be captured during the execution of the command. Mandatory: No |
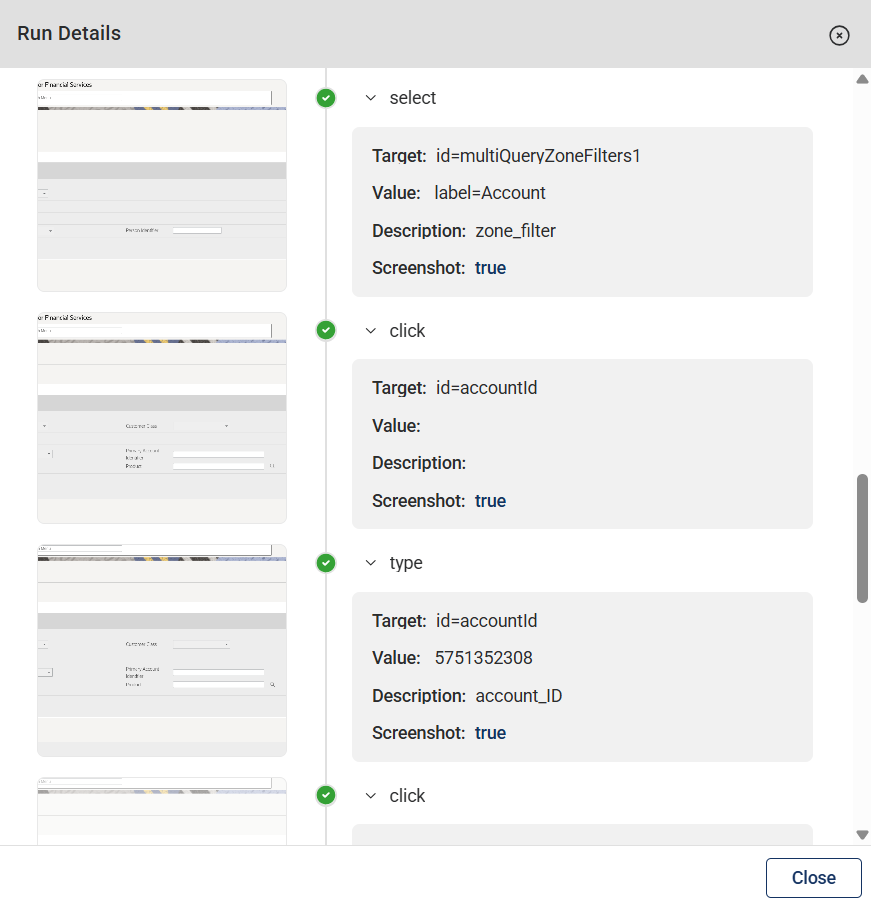
Run Details
After uploading a side file, you can click the Run button to preview the execution details of the commands defined in the uploaded file.
Input value
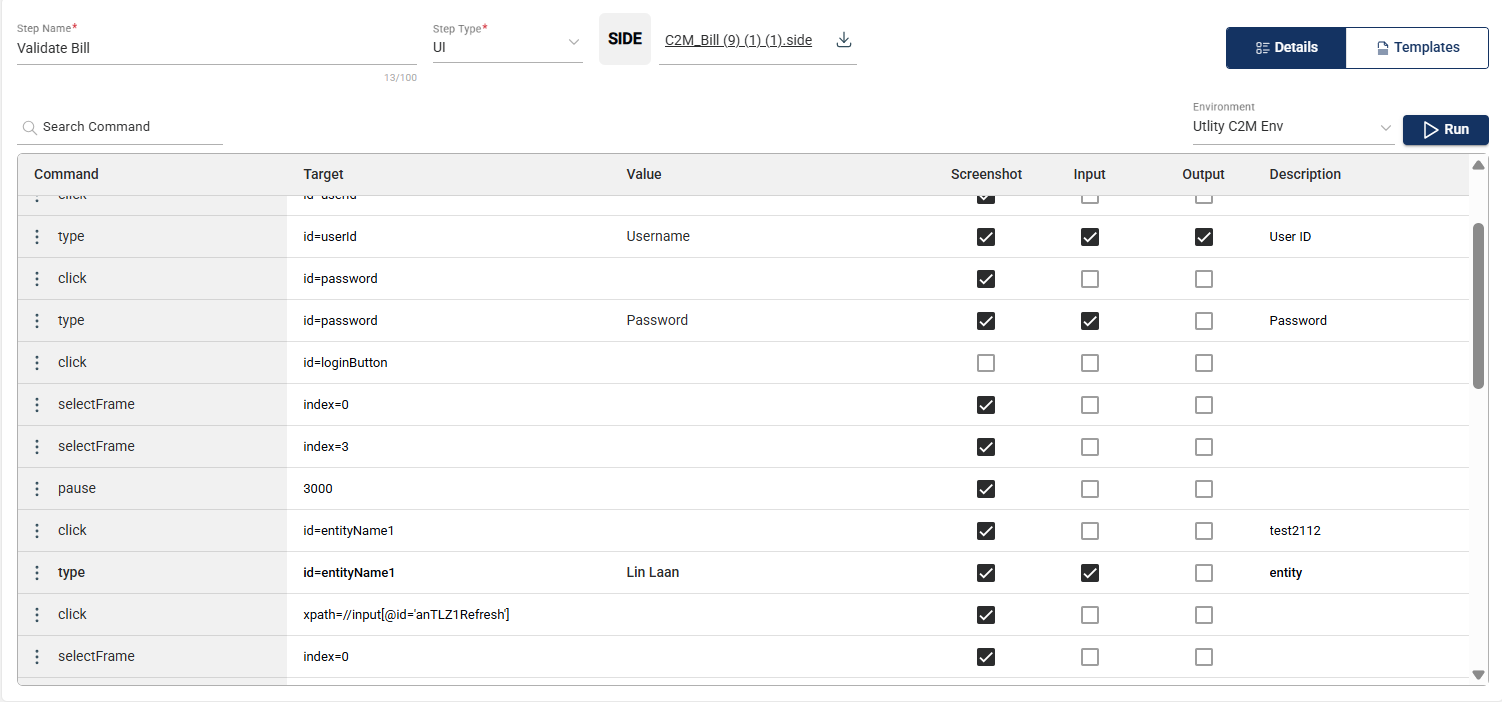
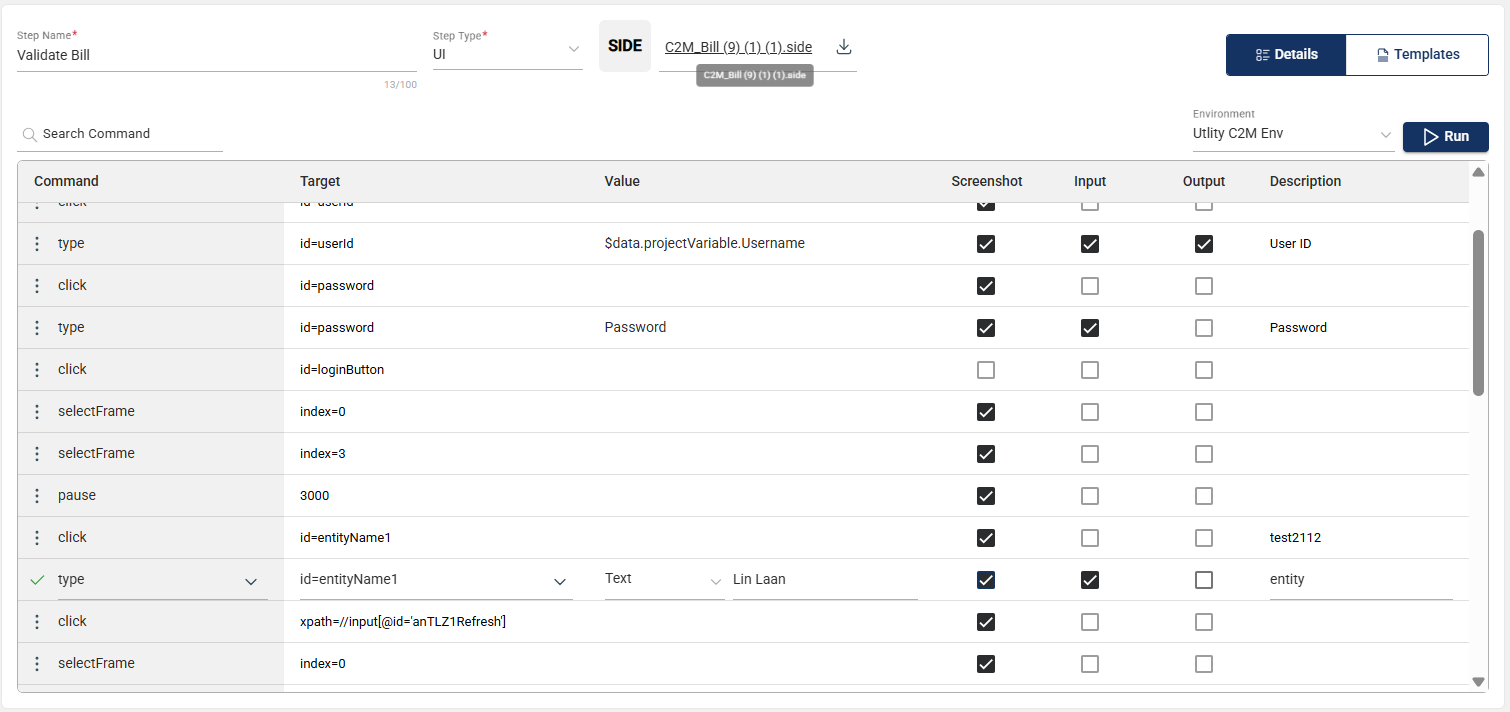
If the Input checkbox is ticked, you must supply a value to the target. A value could be one of the following:
-
Text — Enter any text manually.
-
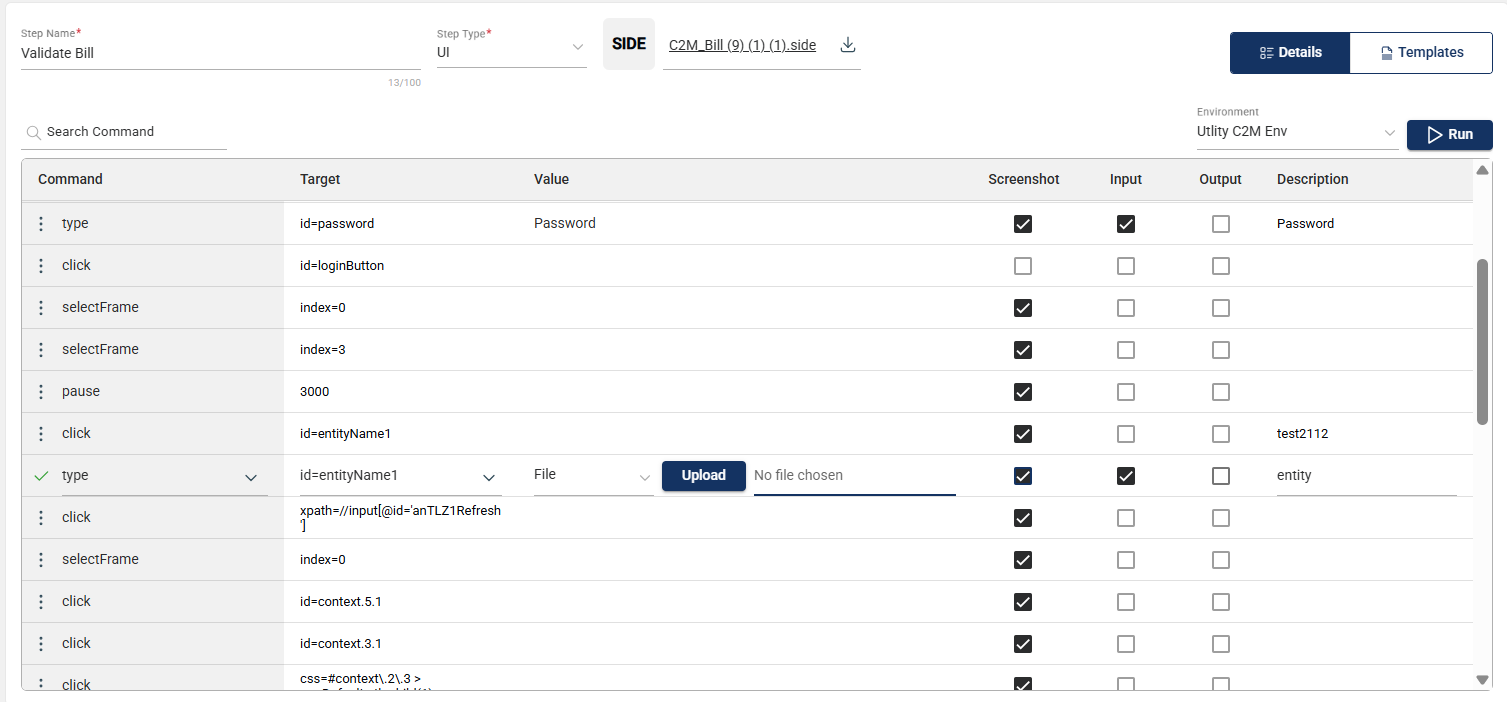
File — Upload a file to use as the input value.
-
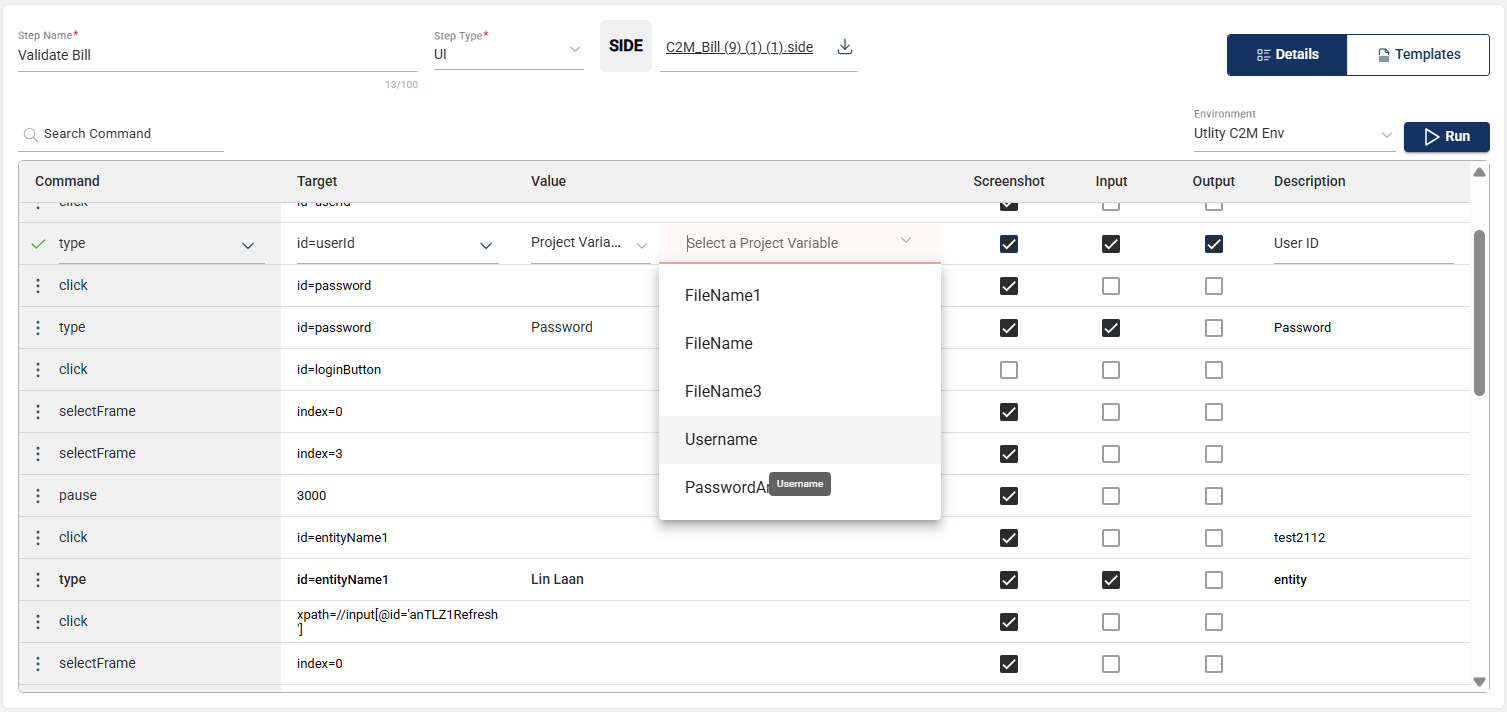
Project Variable - Select from the list of variables configured for the project.
Delete a step
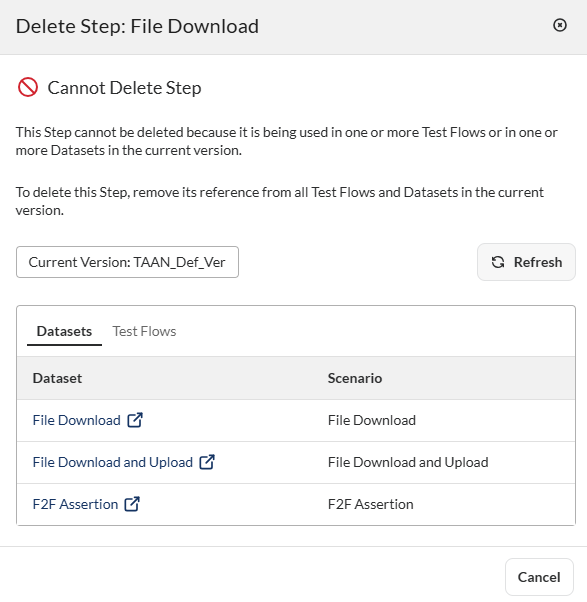
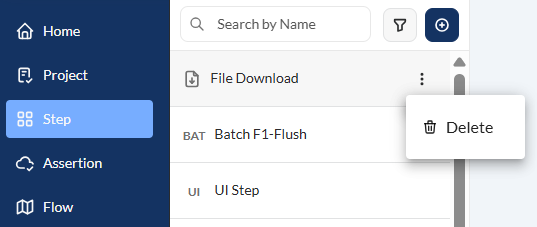
To delete a step, hover over the step you want to remove. An icon will appear. Click on this icon and select Delete.
If a step is used in a flow or a dataset, a warning message will be displayed indicating that it cannot be deleted.
To delete the step, you must first remove it from any flows or datasets where it is being used.