Assertion
Overview
The Flow modules allow you to use the assertions defined in the Assertion module or add a new step to the project within the module.
Create an assertion in the Flow module
To create a new assertion in the Flow module, follow these steps:
- Select the assertion type you wish to add.
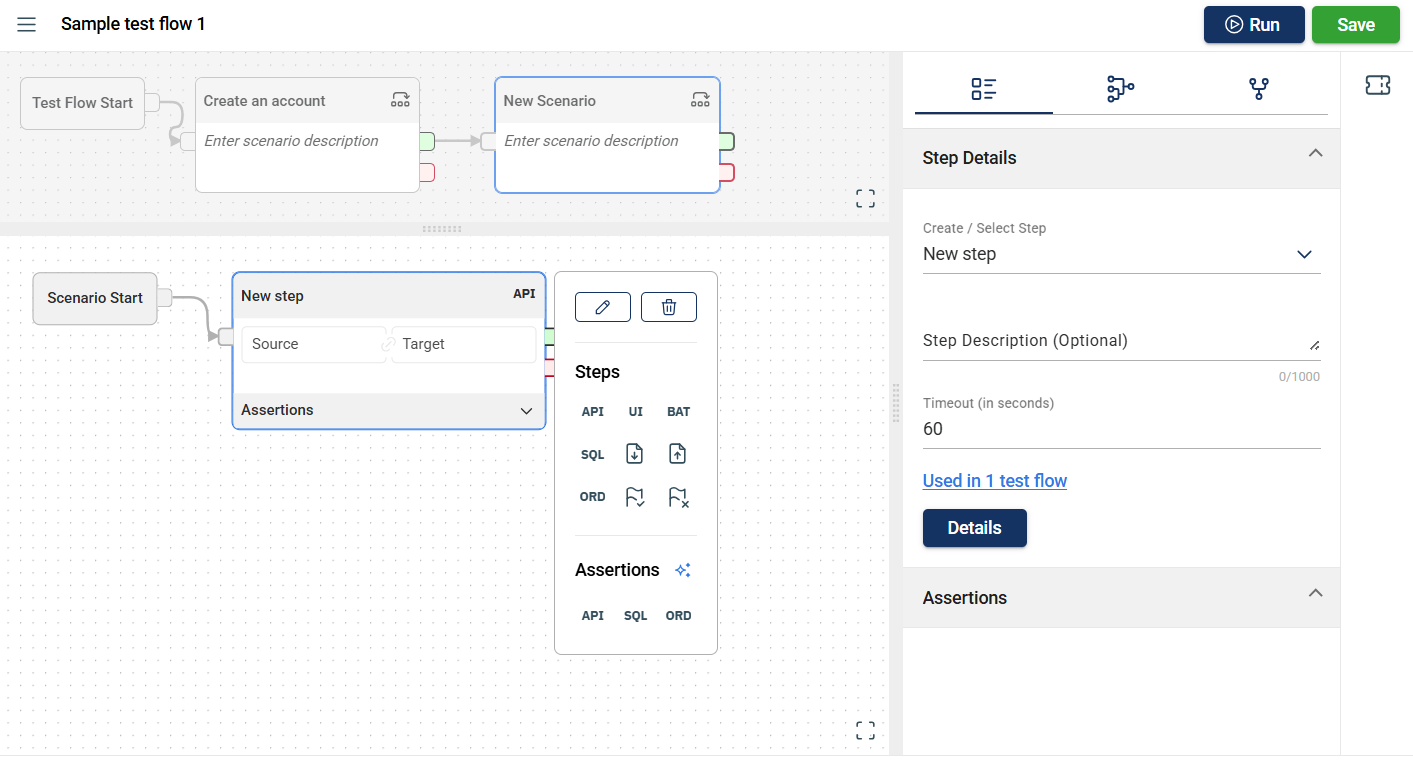
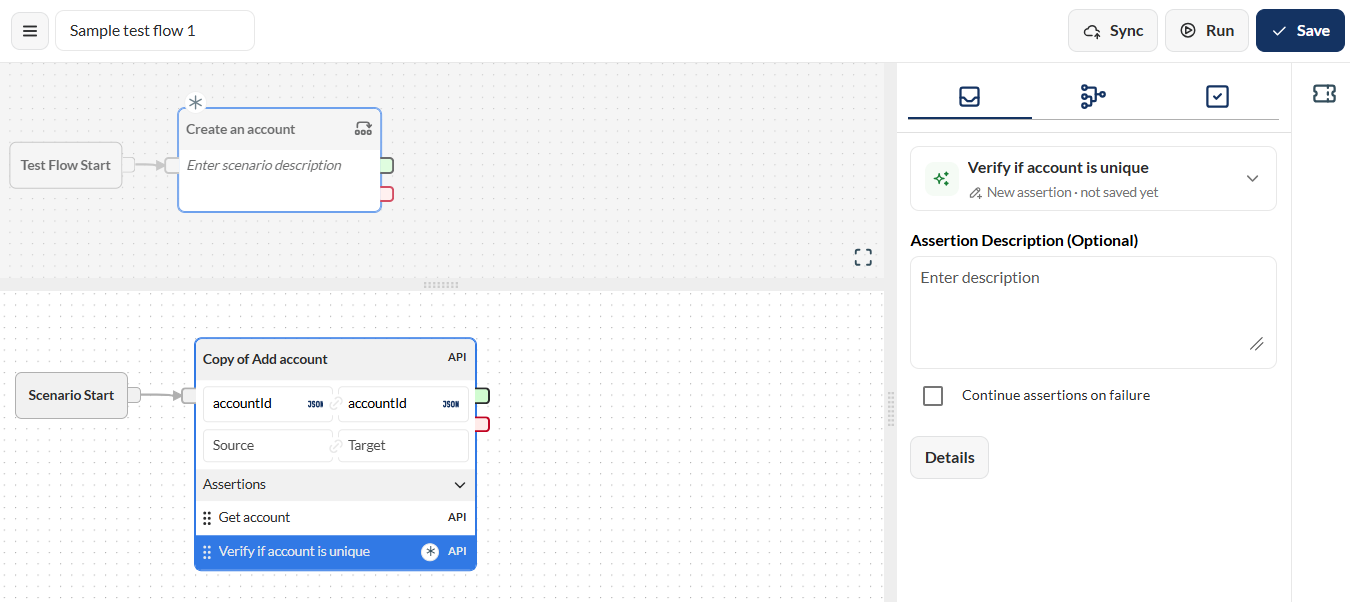
- Select the newly-created step node to see the details.
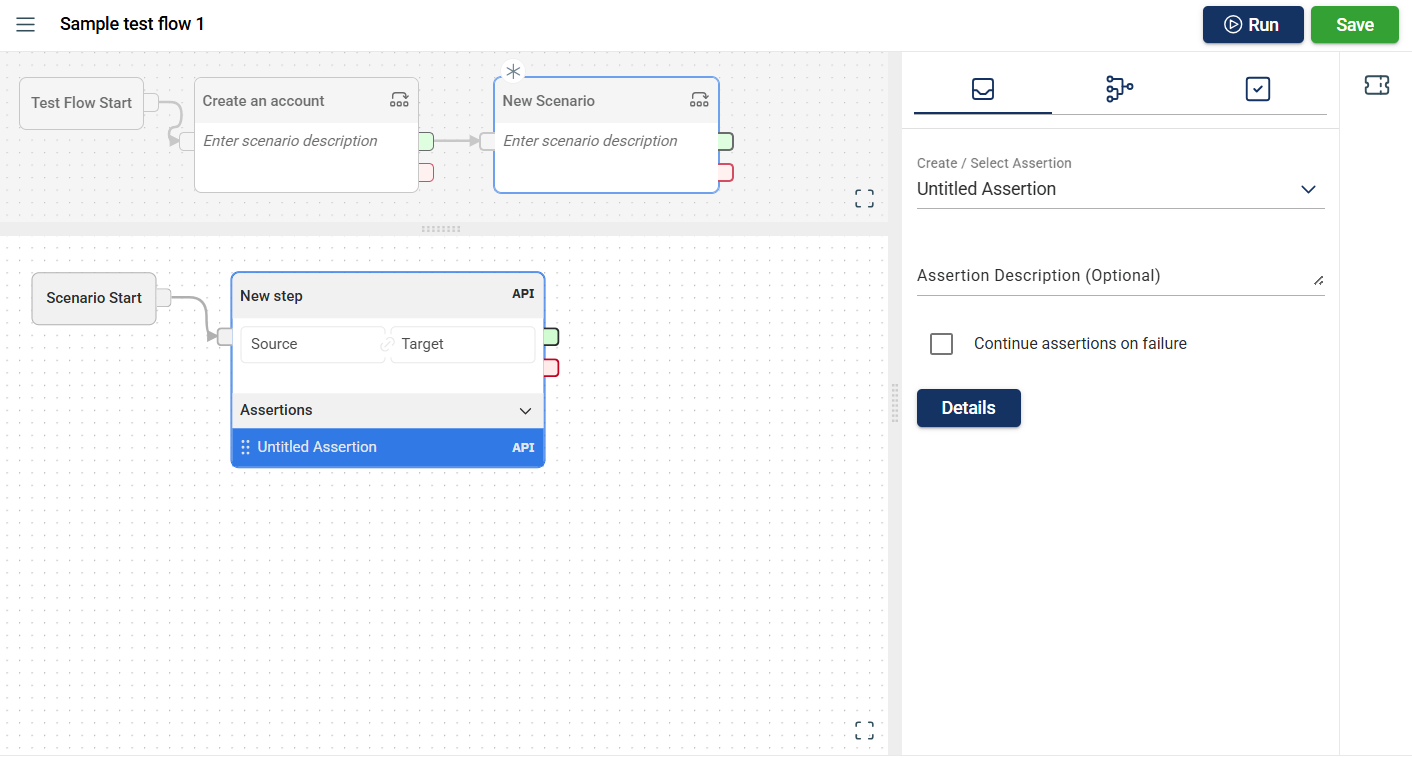
- Rename the step node.
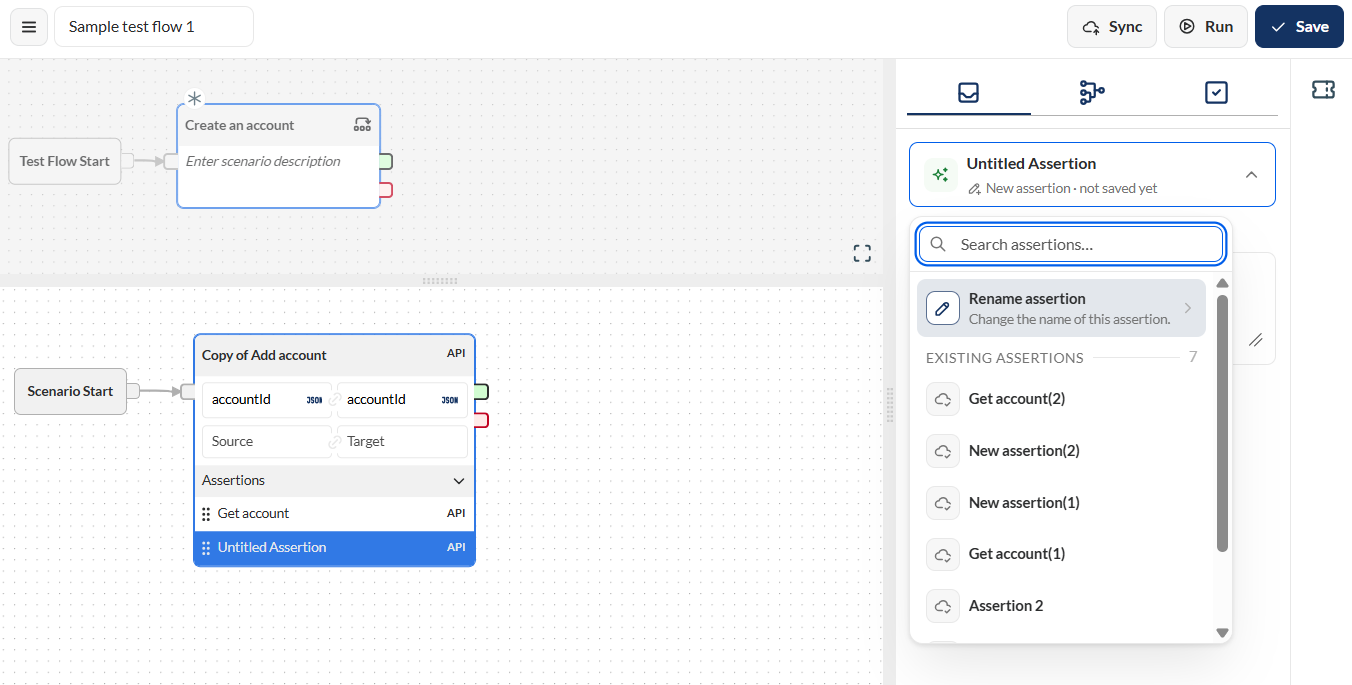
- Enter a valid name in the Step name field.
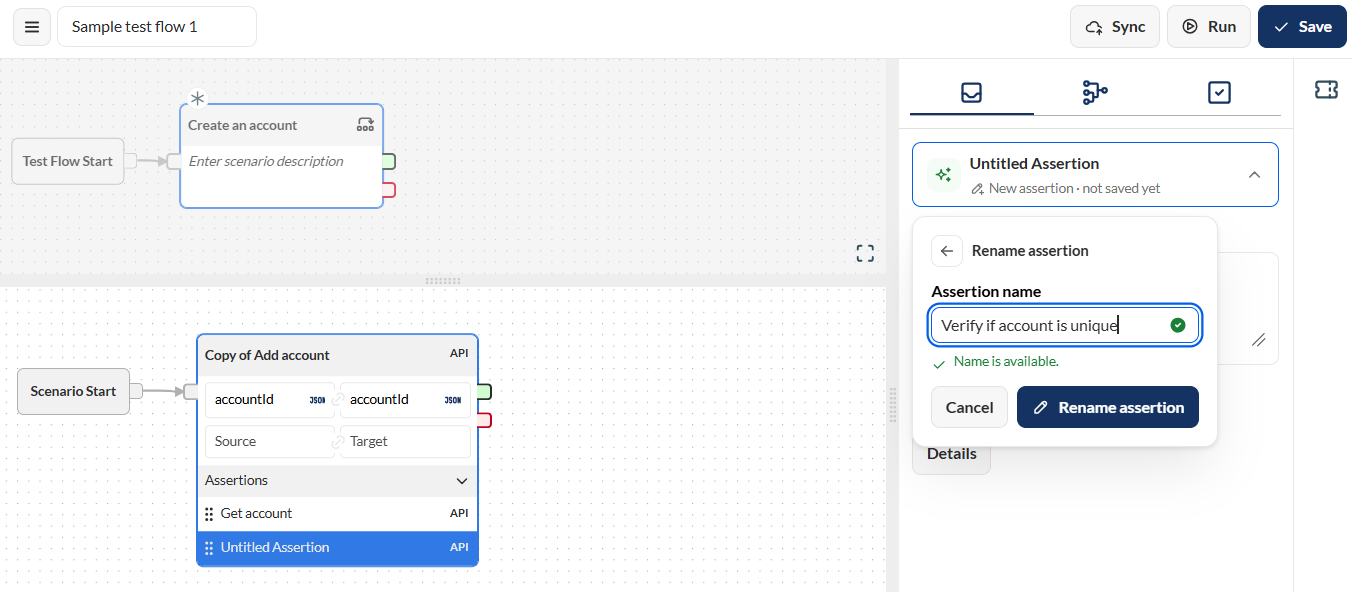
- Click the Rename button.
-
Click the Details button.
-
Add valid values to the necessary assertion parameters. For more information, see
- Create an API assertion
- Create a Query assertion
- Create an ORDS assertion
- Create a File to File assertion

-
Click the Save button.
Disable/Enable an assertion in the Flow module
In the Flow module, you can disable an assertion for a specific scenario, preventing it from executing during flow execution.
To disable an assertion, follow these steps:
- Click the more options icon beside the assertion you wish to disable.
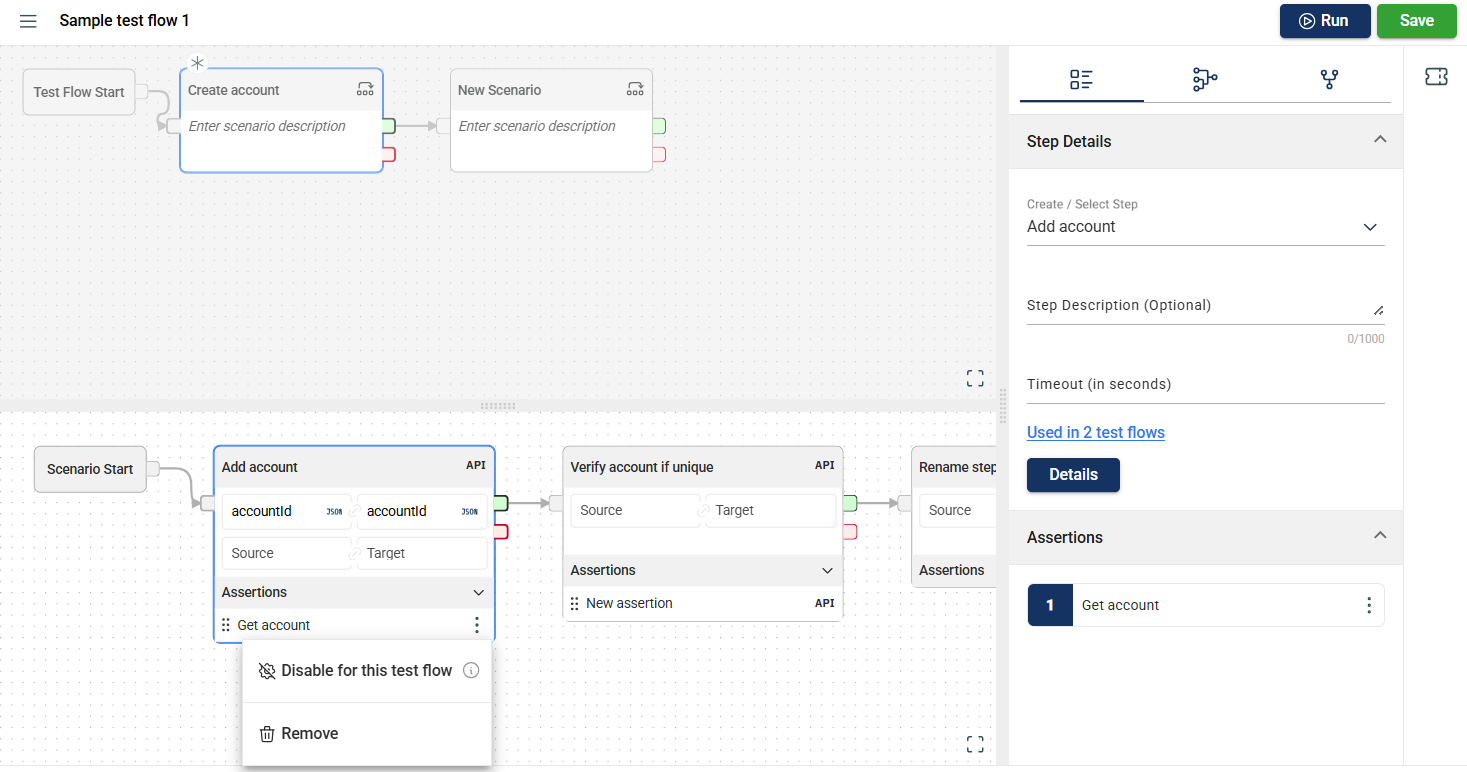
- Click Disable for this test flow.
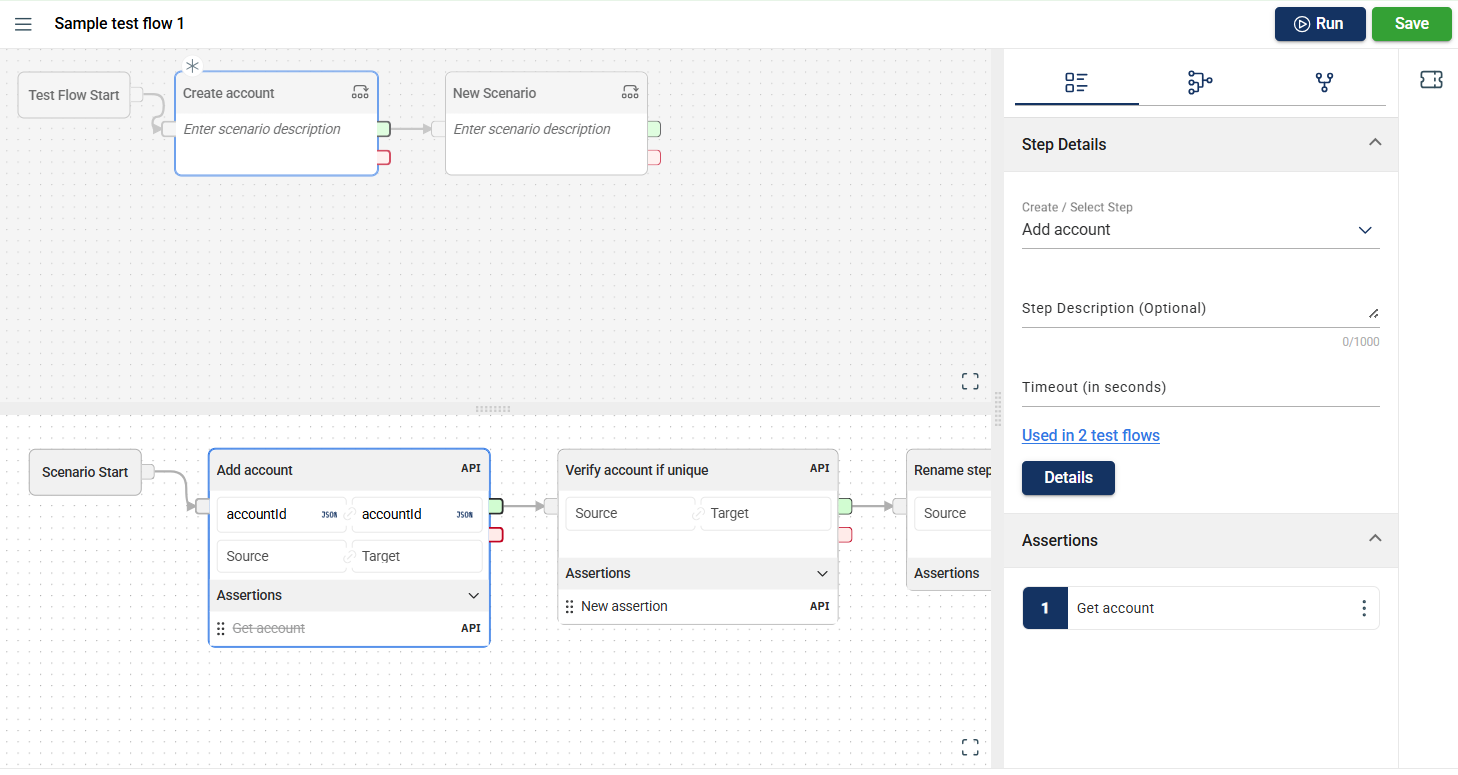
The disabled assertion will also be automatically be disabled in the associated dataset.
To enable it back, follow these steps:
- Click the more options icon beside the assertion you wish to enable.
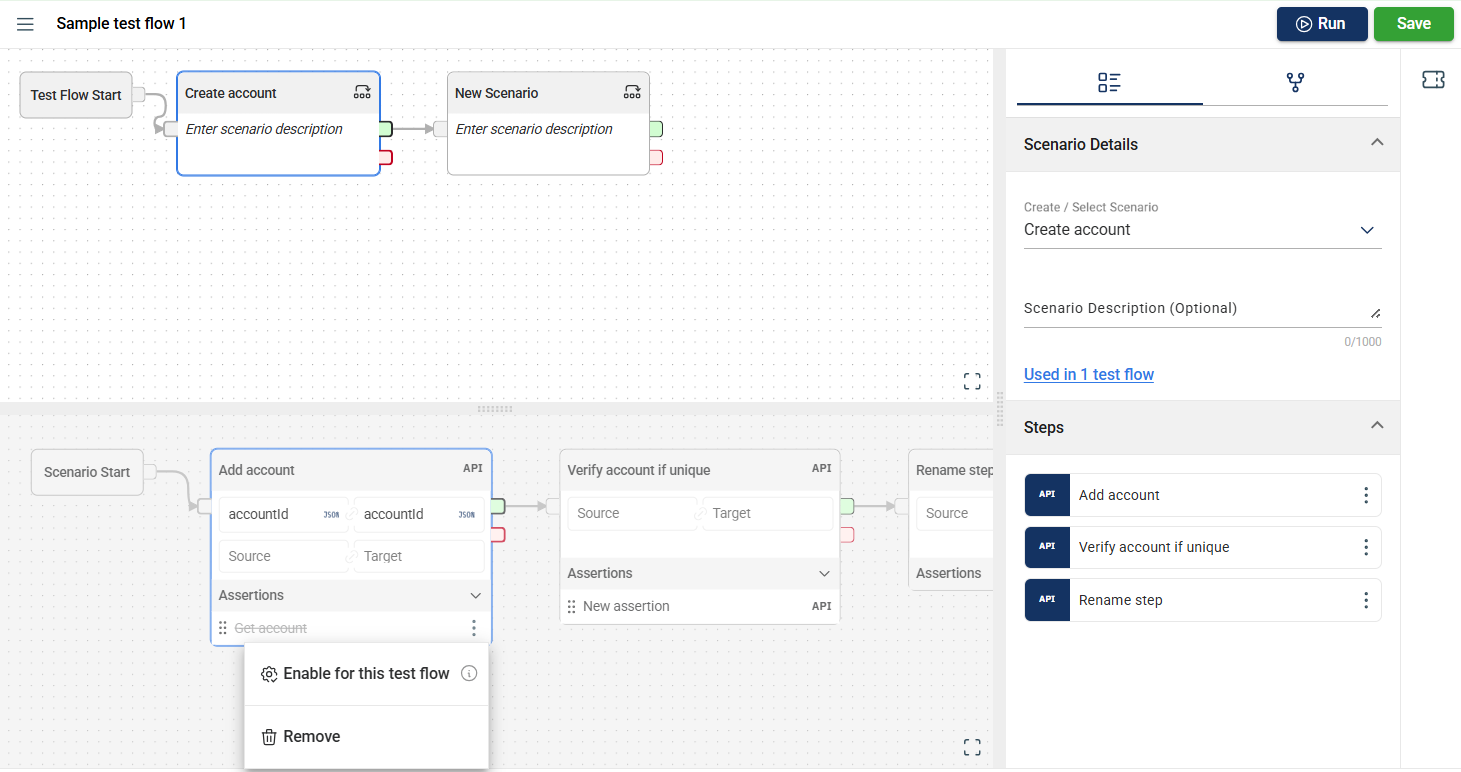
- Click Enable for this flow.
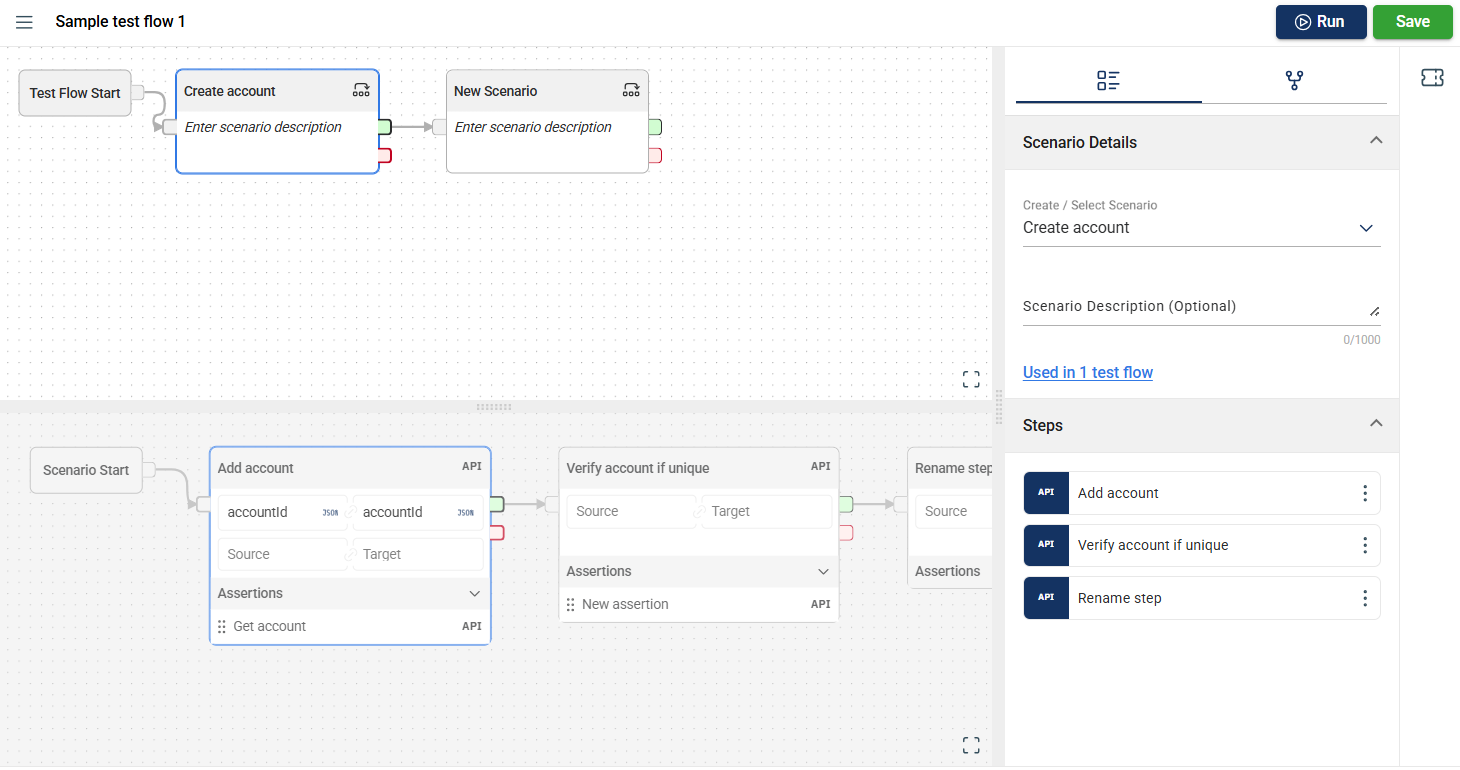
The enabled assertion will also be automatically enabled in the associated dataset.
Remove an assertion from a step
To remove an assertion from a step, follow these steps:
- Click the more options icon beside the assertion you wish to remove.
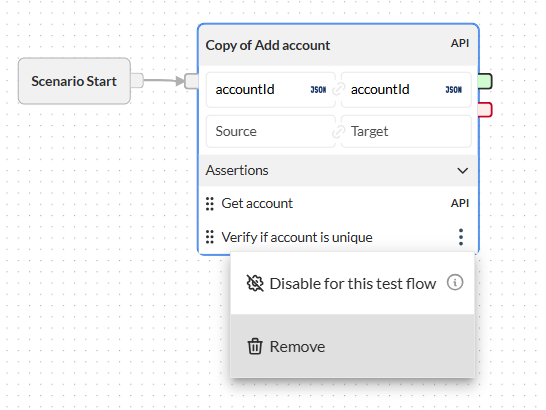
- Click Remove and confirm the action.
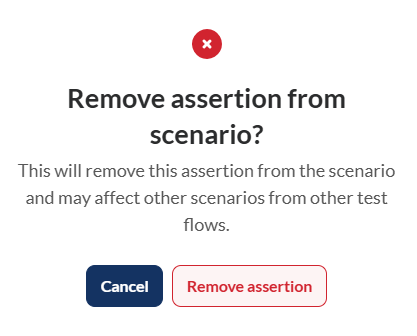
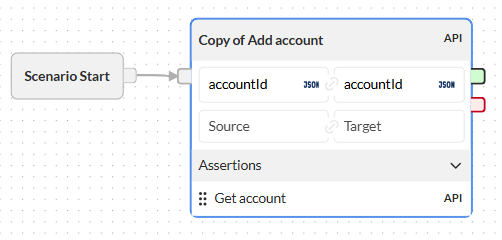
The assertion will be removed from the step, but it will remain in the Assertion module.
Dynamic row validation
Dynamic row validation allows you to validate queries that return multiple rows of output data.
Traditionally, query assertions only validate the first row of actual data against the expected conditions defined in assertion validations. With dynamic row validation, you can configure conditions to validate multiple rows using one of three evaluation modes: Fixed row, Any row, or All rows.
Configure a row validation
To configure a row validation, follow these steps:
-
Select the assertion your wish to configure.
-
Click on the Assertion Details tab.
-
Add your required inputs.
-
Click the Validations button in the Validations section.
-
Select the validation type.
-
Depending on the validation type, follow the specified steps in
- Configure a fixed row validation
- Configure an any row validation
- Configure an all rows validation
Fixed row
A fixed row validation validates the query response at a specific, pre-configured row index. The system extracts the row at the defined index and compares its attribute values against your conditions.
For example, if a query returns 10 person records and the assertion is configured for Fixed Row mode at index 4, the system isolates the 4th record. If your conditions dictate that ENTITY_NAME must be Quinn,Tom and NAME_TYPE_FLAG must be PRIM, the assertion will succeed only if the 4th record meets both criteria.
Configure a fixed row validation
To configure a fixed row validation, follow the steps in Configure a row validation first.
-
Set the target index number for the row you want to validate in the Row Index field.
-
Define your validation criteria by mapping the actual value, selecting an operator, and providing an expected data.
-
Run the flow.
The tool will validate the configured criteria exclusively against the row at the defined index.
Any row
The assertion succeeds if at least one row in the query response satisfies all defined validation conditions.
For example, if a query returns 10 person records under Any Row mode, the system scans the dataset. If even a single person record contains ENTITY_NAME = ‘Quinn,Tom’ and NAME_TYPE_FLAG = ‘PRIM’, the entire assertion succeeds.
Configure an any row validation
To configure a fixed row validation, follow the steps in Configure a row validation first.
-
Define your validation criteria by mapping the actual value, selecting an operator, and providing an expected data.
-
Run the flow.
The tool will validate the configured criteria against all rows. The assertion succeeds if at least one row meets all the configured criteria.
All rows
The assertion succeeds only if every single row in the query response satisfies all defined validation conditions. If even one row fails a single condition, the entire assertion fails.
For example, if a query returns 10 person records under All Rows mode with a condition checking that NAME_TYPE_FLAG is PRIM, then all 10 records must have a value of PRIM for the assertion to succeed.
Configure an all rows validation
To configure a fixed row validation, follow the steps in Configure a row validation first.
-
Define your validation criteria by mapping the actual value, selecting an operator, and providing an expected data.
-
Run the flow.
The tool will validate the configured criteria against all rows. The assertion succeeds only if all rows meet all the configured criteria.