The Project module enables you to create a personalized testing workspace to avoid overlap in your activities. Depending on your testing requirements, you can customize your workspace by adding items.
Create a project
To create a project, click on the button on the top left pane.
Field
Description
Logo
Logo of the project. The supported file types are png, jpg, and jpeg.
Mandatory: No
Project Name
Name of the project.
Mandatory: Yes
Project Code
Unique identifier assigned to a project.
Mandatory: Yes
Project Description
Description of the project.
Mandatory: Yes
Releases
Shows configured releases. Only 1 release can be active at a time.
Environments
Configured environments for the project. For more information, see Environments.
Global Variables
Configured global variables for the project. For more information, see Global Variables.
Update a project
Select a project to view and edit its details. You can update all details except the Project Code. After you make the modifications, click the Update button.
Search a project
The search feature allows you to filter the list of steps by providing a keyword or the full name of the step. Only the steps that match the provided keyword or name will be displayed in the view.
Versions
Versions allow you to create new versions of an existing project, where all parameters and their values are automatically copied. This enables you to change parameters while keeping the original version.
To create a new version, click the plus icon in the Version section and enter a valid name that has a maximum of 20 characters.
1 - Environments
Overview
The Environments section is where your testing environments are defined. A testing environment can be a development, staging, production, or any other project-specific environment. This section allows you to add, modify, or delete environments according to your needs.
Create an Environment
To create an environment, click Create Environment and enter valid values in the following fields:
Field
Description
Environment Name
Name of the environment. Should be minimum 4 characters long.
Mandatory: Yes
API Base URL
URL of the environment for API or Batch testing.
Mandatory: Yes
Application URL
URL of the environment for UI testing.
You can also specify the target URL in the Service > Uploaded File > url field . In case, different target URLs are specified in the Application URL and Uploaded File > url fields, the system will use the URL specified in the Application URL.
Mandatory: No
Default
Sets the selected environment as default for test runs and templates of an external system. Selecting will override the existing default environment, if any.
Mandatory: No
Authentication
Specifies the authentication details for the test environment. The following are the possible values:
Parameters used to connect to a database. For more information, see Database Details.
Mandatory: Yes
Proxy
Enables the proxy server for the environment. For more information, see Proxy Details.
Mandatory: No
SFTP
Enables the Secure File Transfer Protocol(SFTP) to download and upload files from any server. For more information, see SFTP Details.
Mandatory: No
Authentication Details
The following are the supported authentications for your environment and the additional mandatory settings that you need to provide.
Authentication
Description
BASIC
If you select BASIC authentication, you need to supply the following:
Username — Username to use when connecting to the target test environment.
Password — Password to use when connecting to the target test environment.
ORMB
If you select ORMB authentication, you need to supply the following:
Username — Username to use when connecting to your ORMB environment.
Password — Username to use when connecting to your ORMB environment.
API_KEY
If you select API_KEY authentication, you need to supply the following:
Key — API key to access the API service.
Value — Actual value of the specified API Key.
Add To — Defines how and where the API Key should be added to the API service.
TOKEN
If you select TOKEN authentication, you need to supply the following:
Token — Value of the token to access an application or an API service.
SIGNATURE
If you select SIGNATURE authentication, you need to supply the following:
Access Key — Authorization key to access your account or application.
Secret Key — Password of the Access Key.
NO_AUTH
No authentication type is required.
OCULAR
If you select OCULAR authentication, you need to supply the following:
Username — Username to use when connecting to your EPM.
Password — Password to use when connecting to your EPM.
NONE
No additional details/settings are required.
Database Details
To configure a database, click and enter valid values in the following fields. After adding the details, click Test Connection to ensure that the connection details you configured are correct and working properly. The status will change from Pending to Success or Failed depending on the result of the test connection.
Field
Description
Name
Name of the database to connect to.
Mandatory: Yes
Database Type
Type of the database. The possible values are the following:
POSTGRES
ORACLE
Mandatory: Yes
DB Connection
Specifies the status of the database connection.
Default?
Indicated whether the database is set as default.
Actions
Displays a delete icon that when clicked deletes the selected database.
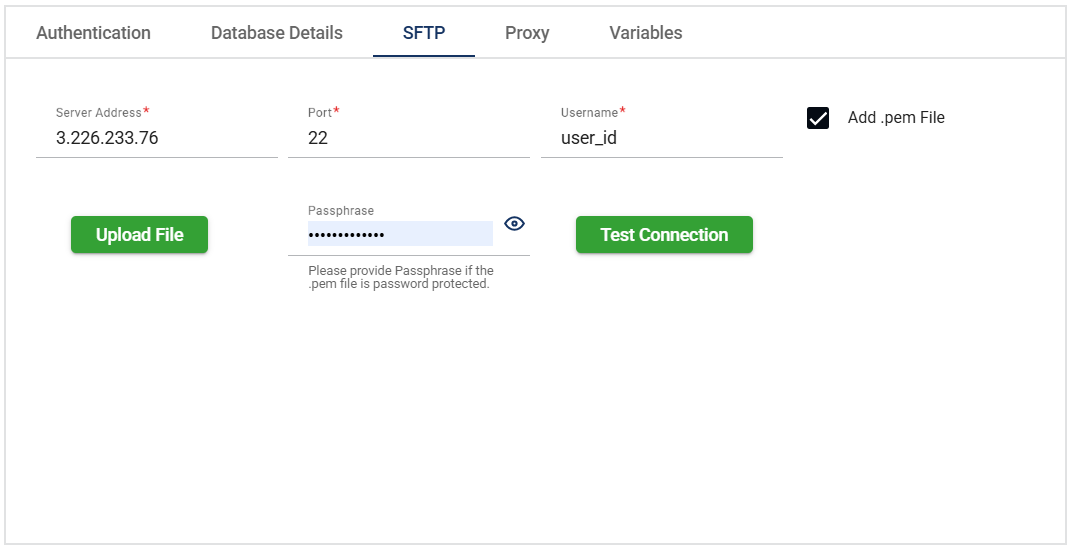
SFTP Details
The Secure File Transfer Protocol (SFTP) allows you to download and upload files from the configured server. To configure your SFTP server, enter valid values to the following fields:
Field
Description
Server Address
Address of the SFTP server.
Mandatory: Yes
Port
Port of the SFTP server.
Mandatory: Yes
Username
Username used to log in to the SFTP server.
Mandatory: Yes
Password
Password used to log in to the SFTP server.
Mandatory: Yes, if authentication is being done without the .pem file.
Add .pem File
A .pem file is a base64-encoded file used to store and share cryptographic keys and certificates securely. There are two methods of authentication of the SFTP —
With .pem file
Without .pem file
If you need to change the attached .pem file, click the Upload File button.
Passphrase
Password to decrypt an encrypted .pem file.
Test Connection
Tests the network connection and validates if the SFTP details are correct.
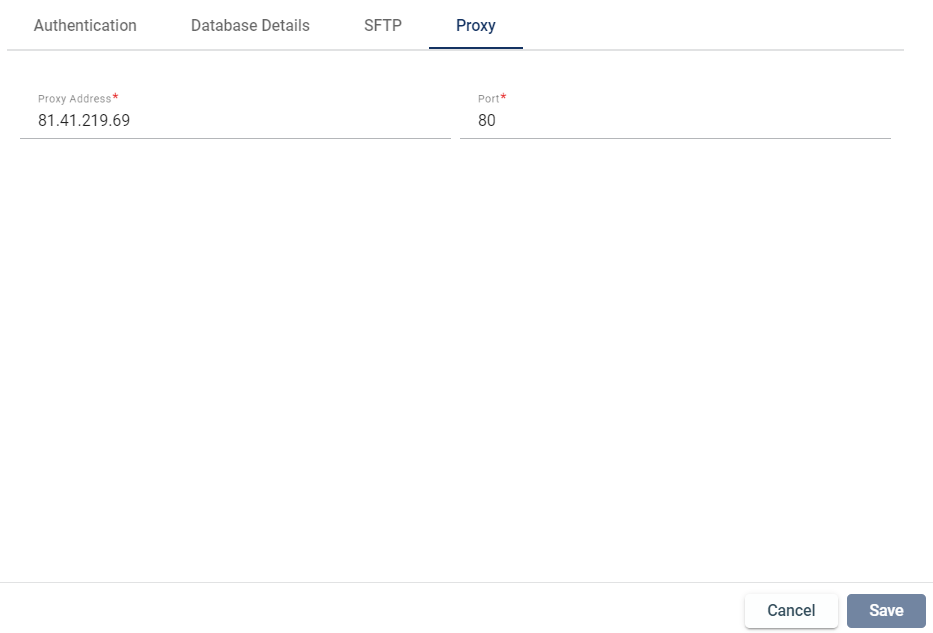
Proxy Details
If you want to enable the proxy server for the environment, enter valid values to the following fields:
Field
Description
Proxy Address
Address of the proxy server.
Mandatory: Yes
Proxy Port
Port of the proxy server.
Mandatory: Yes
Variables
If you want to specify a value that is unique to a specific environment, please enter valid values in the following fields. Make sure that the variable you want to define at the environment level is already defined at the project level.
When a variable is defined with a new value for a specific environment, this new value will replace the default value set at the project level.
However, if a variable is not defined at the environment level, it will use the default value specified at the project level.
Field
Description
Name
Name of the variable.
Default Value
Specifies the default value of the variable.
Value
Specifies other possible values for the variable.
Action
Displays the delete button that allows you to delete the added variable.
You cannot change the values in the Name and Default Value columns. Only the Value column can be modified by directly editing the cell.
2 - Variables
Overview
The variables in the Variables section can be reused across all steps and flows within your project. For example, if you need to automate a login process, you can store sensitive login credentials like username and password as project variables. Instead of manually entering these credentials in every API or UI step, you can reference them using {{username}} and {{password}}, ensuring consistency and simplifying maintenance.
By using project variables, you can easily update values in one place. If you need environment-specific values, for example, different credentials for development or production, you can configure Variables in Environments to manage these settings for each environment, making it easy to switch between them without modifying individual steps.
When a variable is defined with a new value for a specific environment, this new value will replace the default value set at the project level.
However, if a variable is not defined at the environment level, it will use the default value specified at the project level.
Create a variable
To create a variable, follow these steps:
Navigate to the Project > Variables.
Click . A new row will be added to the Variables table.
Optional. Click Is Secret if you want the value to be hidden.
Enter valid values for the Name, Type, and Value columns.
Click Save. If you wish to cancel the creation of a new variable, click X.
Edit a variable
The name of the variable is not editable. You can only modify the type or value of a variable. Once modified, click Save.
Delete a variable
To delete a variable, click the delete icon on the row of the variable you wish to delete.
Search a variable
To search for a variable, you can enter a keyword of the full name or value of the parameter on the Search box beside . Only the variable names that match the provided keyword or name will be displayed in the view.
.png) button on the top left pane.
button on the top left pane.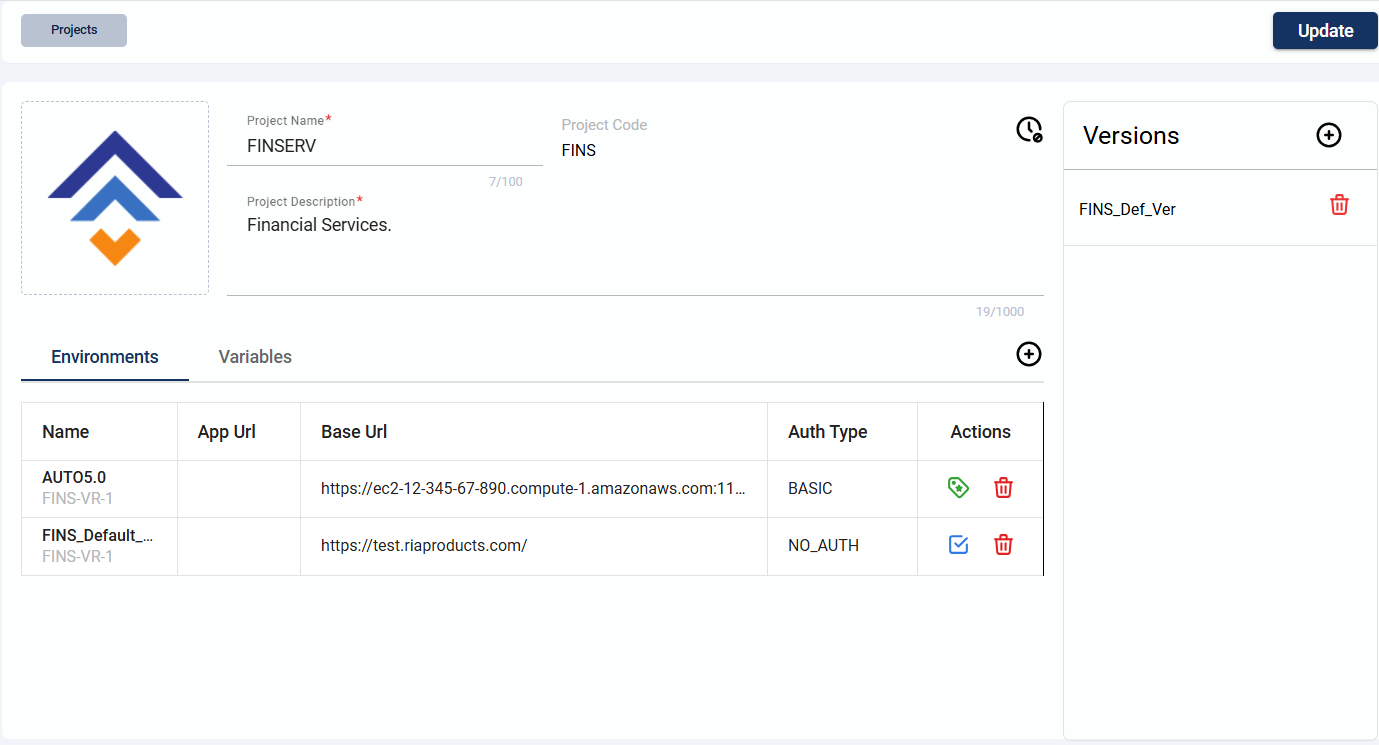
.png)
.png)
.png)
.png)
.png) and enter valid values in the following fields. After adding the details, click Test Connection to ensure that the connection details you configured are correct and working properly. The status will change from
and enter valid values in the following fields. After adding the details, click Test Connection to ensure that the connection details you configured are correct and working properly. The status will change from 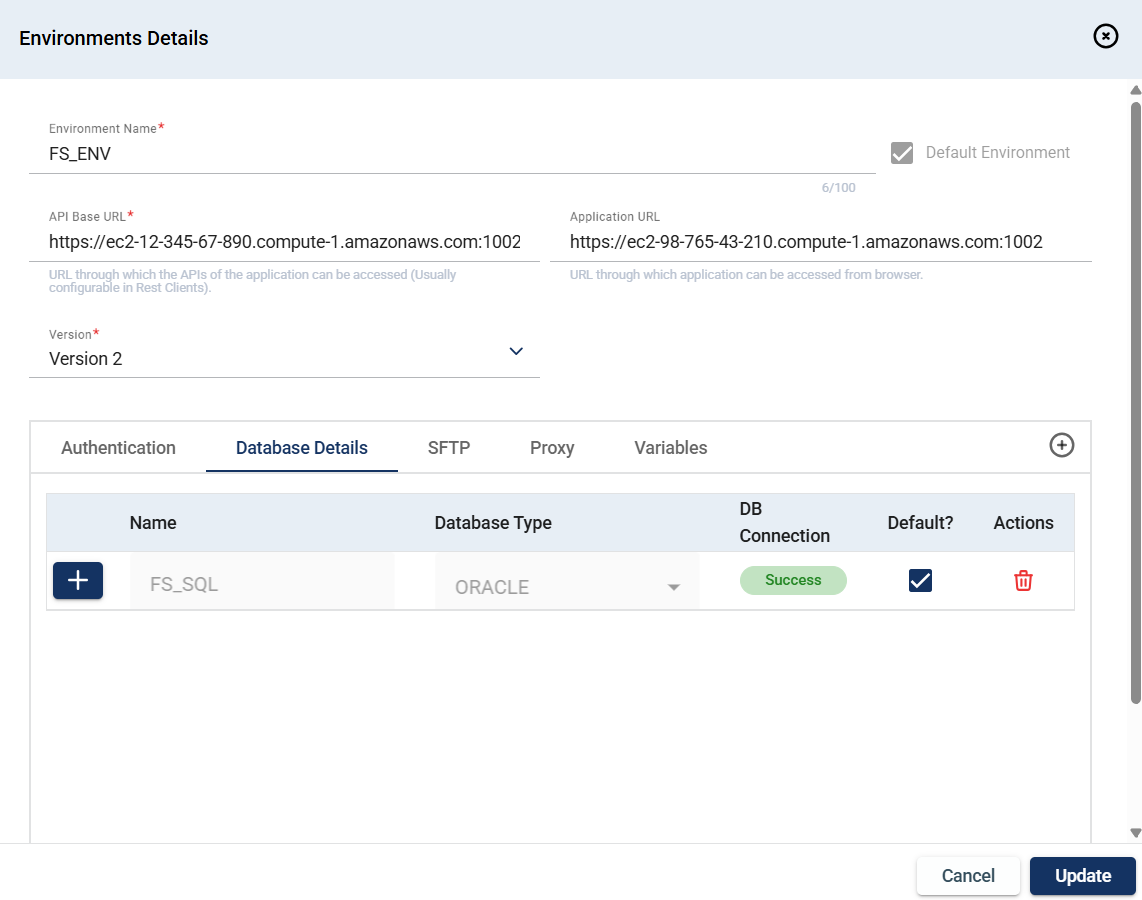
.png)
.png)
.png)