Environments
Overview
The Environments section is where your testing environments are defined. A testing environment can be a development, staging, production, or any other project-specific environment. This section allows you to add, modify, or delete environments according to your needs.
Create an Environment
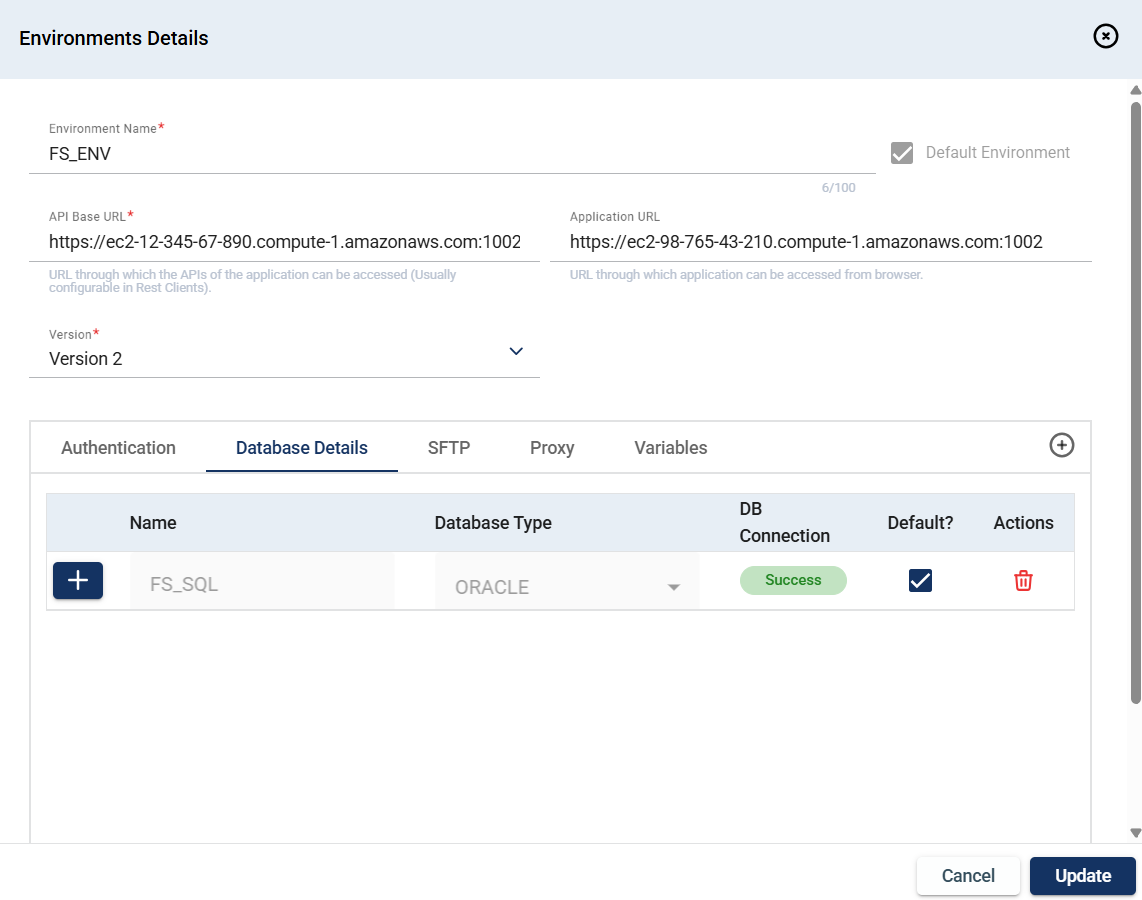
To create an environment, click Create Environment and enter valid values in the following fields:
.png)
| Field | Description |
|---|---|
| Environment Name | Name of the environment. Should be minimum 4 characters long. Mandatory: Yes |
| API Base URL | URL of the environment for API or Batch testing. Mandatory: Yes |
| Application URL | URL of the environment for UI testing. You can also specify the target URL in the Service > Uploaded File > url field . In case, different target URLs are specified in the Application URL and Uploaded File > url fields, the system will use the URL specified in the Application URL. Mandatory: No |
| Default | Sets the selected environment as default for test runs and templates of an external system. Selecting will override the existing default environment, if any. Mandatory: No |
| Authentication |
Specifies the authentication details for the test environment. The following are the possible values:
For more information, see Authentication Details. Mandatory: Yes |
| Database Details | Parameters used to connect to a database. For more information, see Database Details. Mandatory: Yes |
| Proxy |
Enables the proxy server for the environment. For more information, see Proxy Details. Mandatory: No |
| SFTP |
Enables the Secure File Transfer Protocol(SFTP) to download and upload files from any server. For more information, see SFTP Details. Mandatory: No |
Authentication Details
The following are the supported authentications for your environment and the additional mandatory settings that you need to provide.
.png)
| Authentication | Description |
|---|---|
| BASIC |
If you select
|
| ORMB |
If you select
|
| API_KEY |
If you select
|
| TOKEN |
If you select
|
| SIGNATURE |
If you select
|
| NO_AUTH | No authentication type is required. |
| OCULAR |
If you select
|
| NONE | No additional details/settings are required. |
Database Details
To configure a database, click .png) and enter valid values in the following fields. After adding the details, click Test Connection to ensure that the connection details you configured are correct and working properly. The status will change from
and enter valid values in the following fields. After adding the details, click Test Connection to ensure that the connection details you configured are correct and working properly. The status will change from Pending to Success or Failed depending on the result of the test connection.
| Field | Description |
|---|---|
| Name | Name of the database to connect to. Mandatory: Yes |
| Database Type |
Type of the database. The possible values are the following:
Mandatory: Yes |
| DB Connection | Specifies the status of the database connection. |
| Default? | Indicated whether the database is set as default. |
| Actions | Displays a delete icon that when clicked deletes the selected database. |
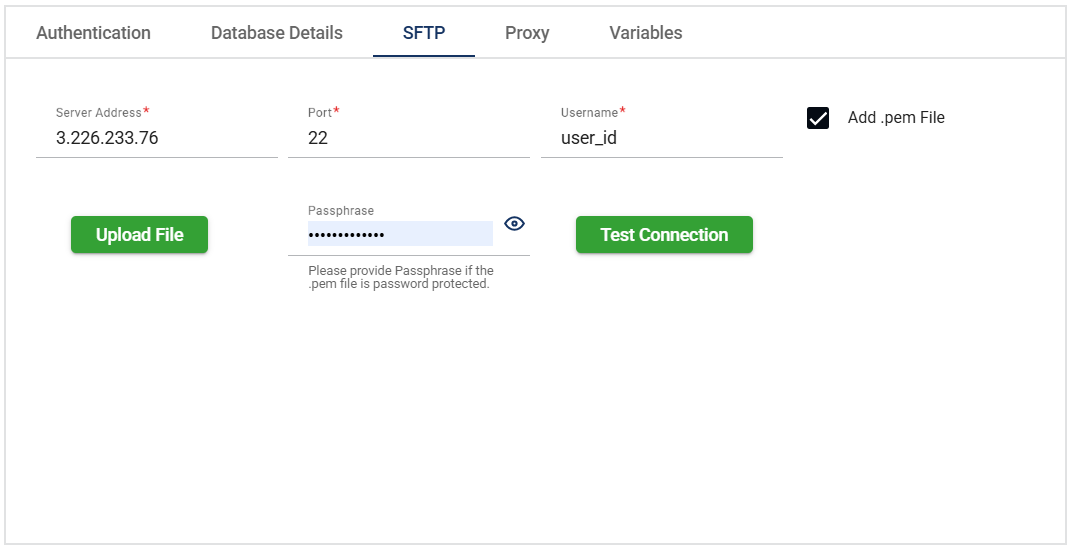
SFTP Details
The Secure File Transfer Protocol (SFTP) allows you to download and upload files from the configured server. To configure your SFTP server, enter valid values to the following fields:
| Field | Description |
|---|---|
| Server Address | Address of the SFTP server. |
| Port | Port of the SFTP server. |
| Username | Username used to log in to the SFTP server. |
| Password | Password used to log in to the SFTP server. |
Add .pem File |
A
If you need to change the attached |
| Passphrase | Password to decrypt an encrypted .pem file. |
| Test Connection | Tests the network connection and validates if the SFTP details are correct. |
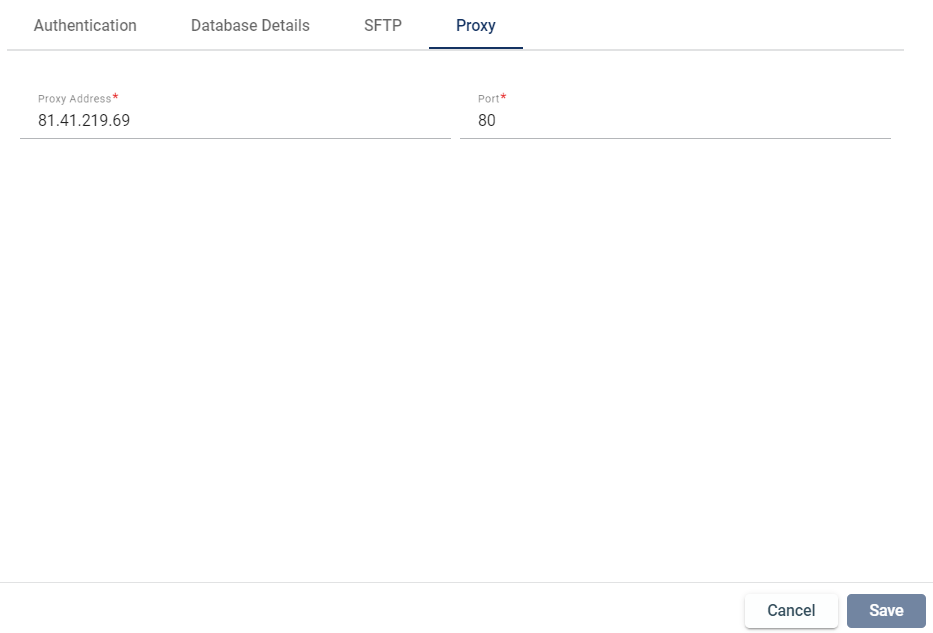
Proxy Details
If you want to enable the proxy server for the environment, enter valid values to the following fields:
| Field | Description |
|---|---|
| Proxy Address | Address of the proxy server. Mandatory: Yes |
| Proxy Port | Port of the proxy server. Mandatory: Yes |
Variables
If you want to specify a value that is unique to a specific environment, please enter valid values in the following fields. Make sure that the variable you want to define at the environment level is already defined at the project level.
However, if a variable is not defined at the environment level, it will use the default value specified at the project level.
.png)
| Field | Description |
|---|---|
| Name | Name of the variable. |
| Default Value | Specifies the default value of the variable. |
| Value | Specifies other possible values for the variable. |
| Action | Displays the delete button that allows you to delete the added variable. |
You cannot change the values in the Name and Default Value columns. Only the Value column can be modified by directly editing the cell.