Users
Overview
Users represent the users of the Products configured for your Organization. The following are the various types of users that identify the level of access across the product suite:
| User Type | Organization | Access |
|---|---|---|
| Framework Admin | Products owners |
|
| Business Admin | Client organization |
|
| Business User | Client organization |
|
Create a user
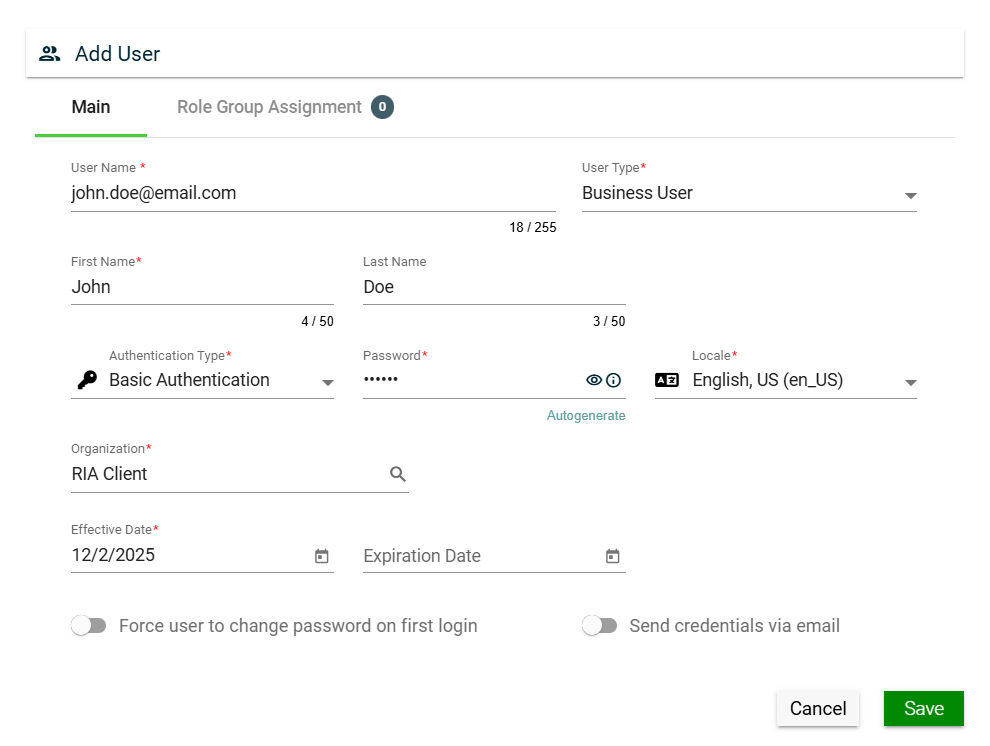
To create a user, click Create New and enter valid values in the following fields:
| Field | Description |
|---|---|
| User Name | Username to be used when loggin in the product. Mandatory: Yes |
| User Type |
Type of the user. The following are the possible values:
When creating a new user using a business user, the user type is automatically populated with |
| First Name | First name of the user. Mandatory: Yes |
| Last Name | Last name of the user. Mandatory: No |
| Company Code | Code of the company where the user belongs to. Mandatory: Yes |
| Authentication Type |
Type of authentication to be used when logging in the product. The following are the possible values:
|
| Password | Password you need to supply when you select Basic Authentication. You can also opt to let the system generate a password for you by clicking the Autogenerate link. To view the password, click eye icon. Mandatory: Yes |
| Locale |
Primary language used in the organization. Mandatory: No |
| Organization | Organization where the user belongs to. Mandatory: Yes |
| Comments | Additional details of the user. Mandatory: No |
| Effective Date | Date when the user will be active. Mandatory: Yes |
| Expiration Date | Date when the user will no longer be active. Mandatory: No |
| Force user to change password on first login | If this setting is enabled, users are forced to change their password on their first login. Default: Enabled |
| Send credentials via email | If this setting is enabled, configured User Name and Password will be sent to the user via email. Default: Disabled |
| Role Group Assignment | See Assign Role Group. |
Assign Role Group
To assign a role group to your user, follow these steps:
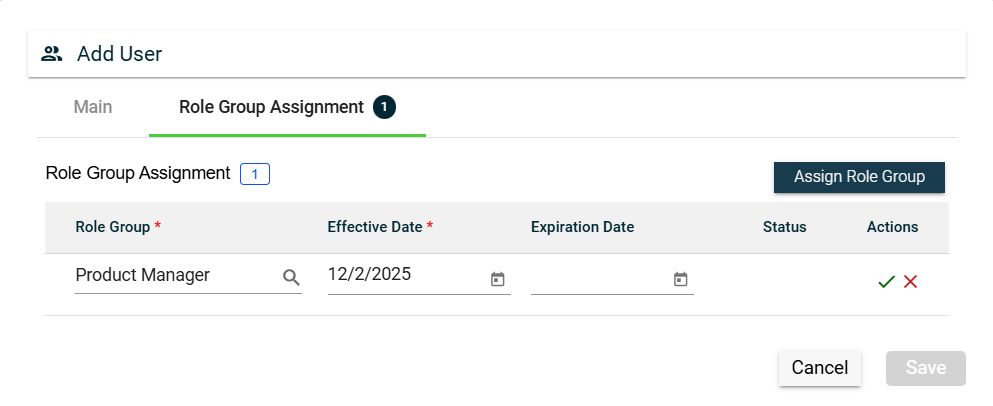
- Navigate to the Role Group Assignment tab.
- Click the Assign Role Group button.
- Search for an available Role Group. To configure a role group, see Role Group.
- Set the Effective Date.
- Set the Expiration Date.
- To save, click the check mark. To cancel the role group assignment, click X.
To assign another role group, follow the steps above.
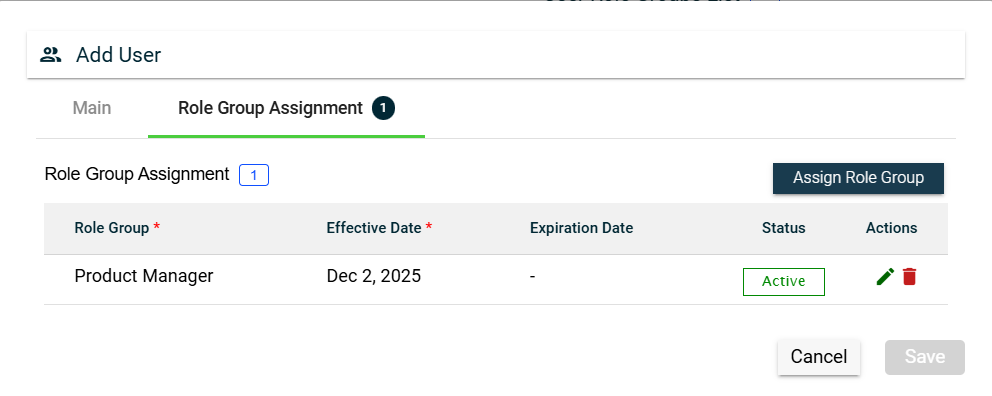
To edit a role group, click ![]() and make the necessary changes.
and make the necessary changes.
To delete a role group, click ![]() .
.
Views
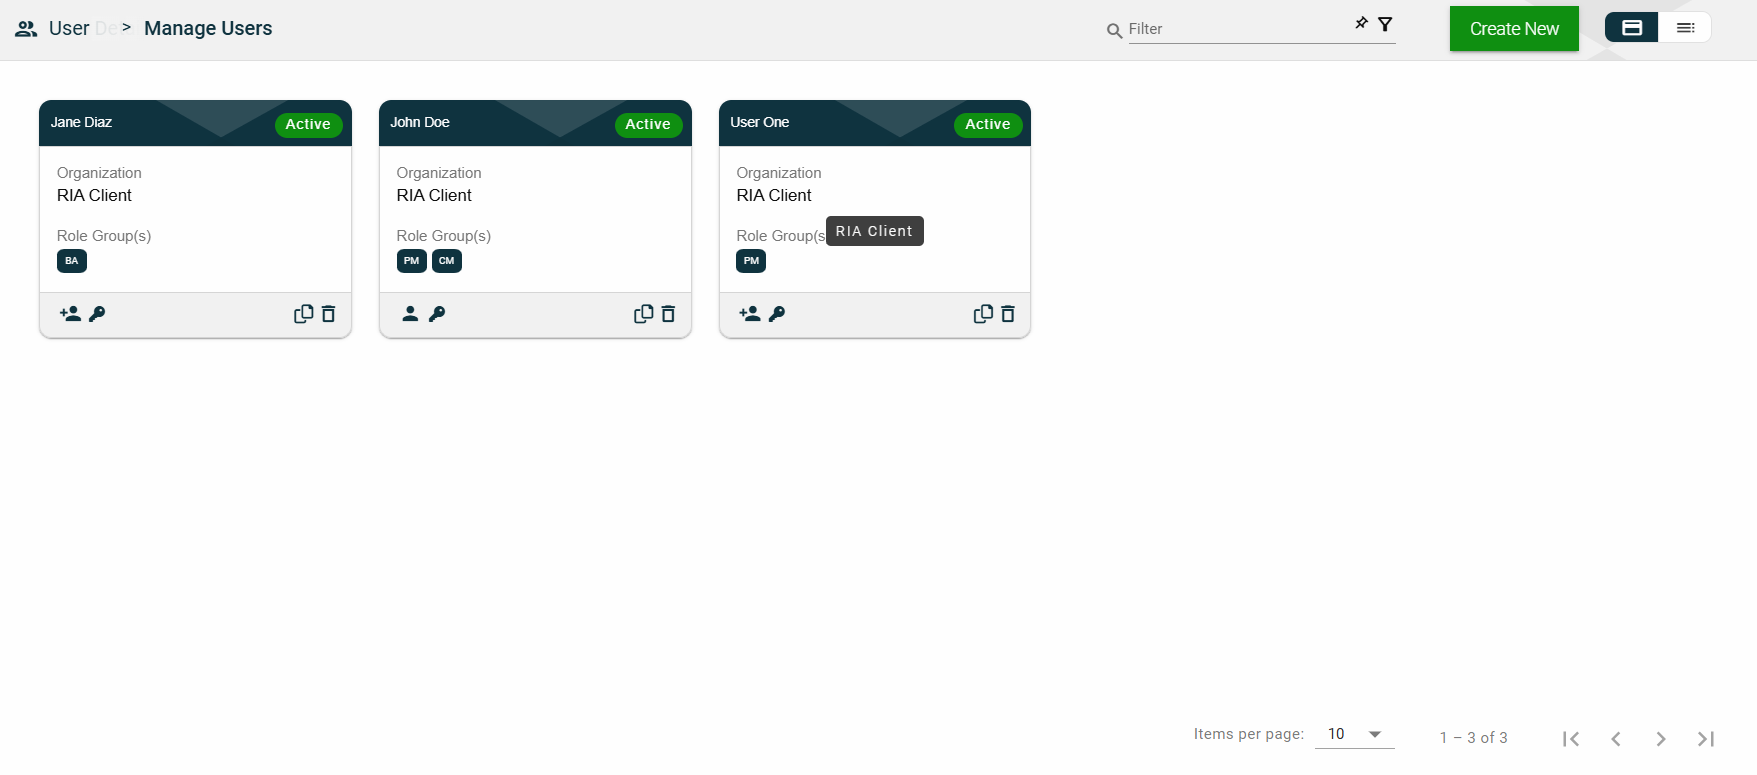
Card View
The card view presents all users in the form of cards, with the user’s first and last names and the status on the card header. The card displays the Organization name and Role Group(s). The card footer displays an icon indicating the user type, a duplicate icon, and a delete icon.
Clicking anywhere on the card, except the duplicate and trash icons, will redirect you to view the User Details.
List View
The list view displays all users in a table format.
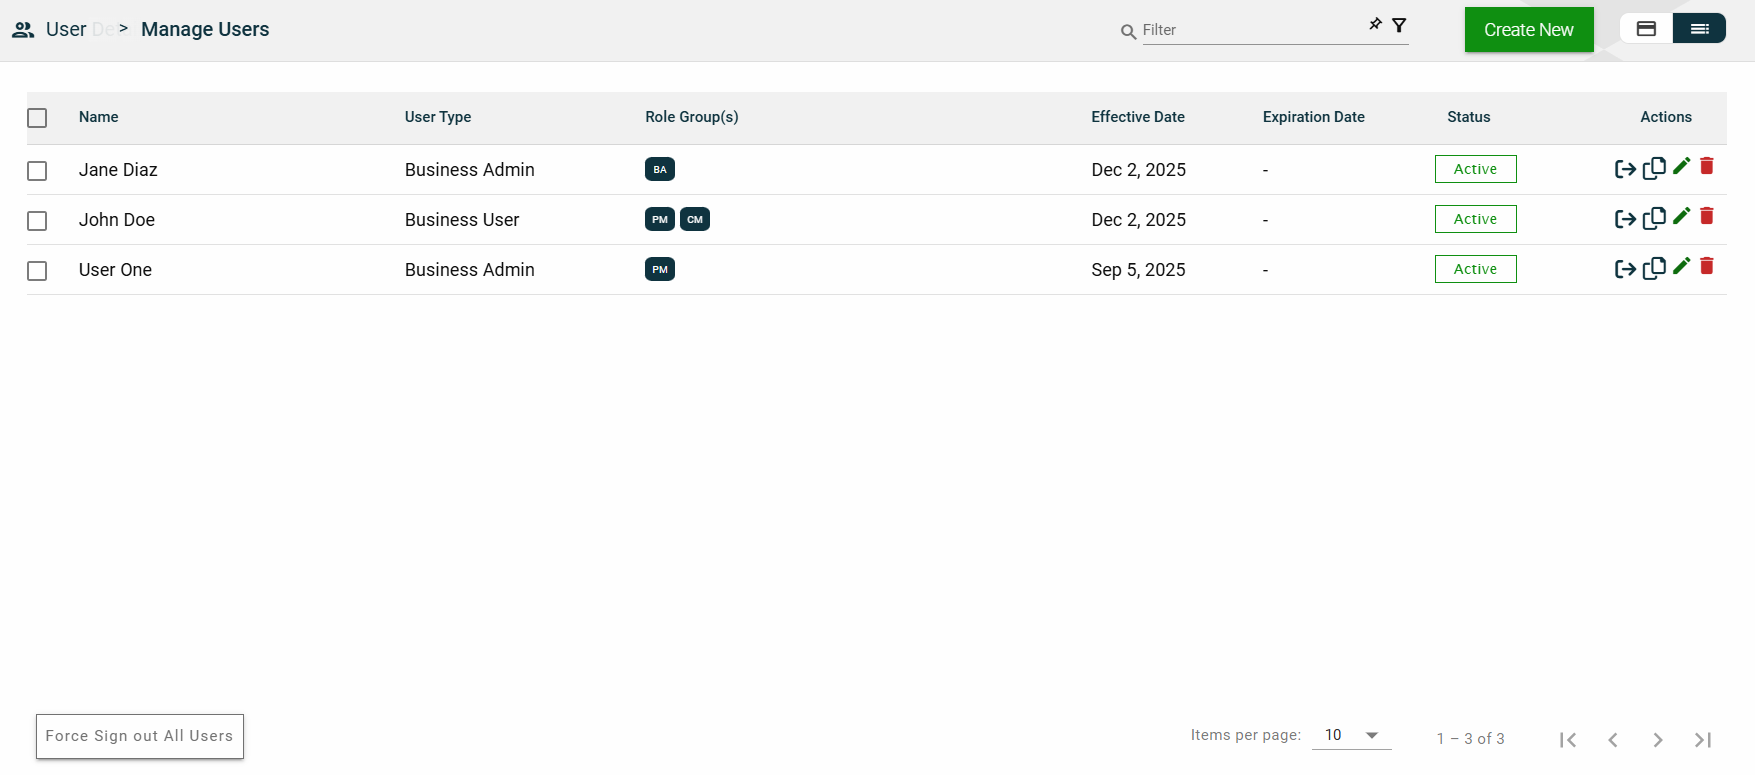
| Column Name | Description |
|---|---|
| Name | Code of the role group. |
| User Type | Type of the user. |
| Role Group(s) | Role groups where the user belongs to. |
| Effective Date | Date when the user becomes active. |
| Expiration Date | Date when the user becomes no longer active. |
| Status | Status of the user. |
| Actions |
Displays the following icons:
|
Filter
To filter the list, you can enter a partial or complete name. For example,
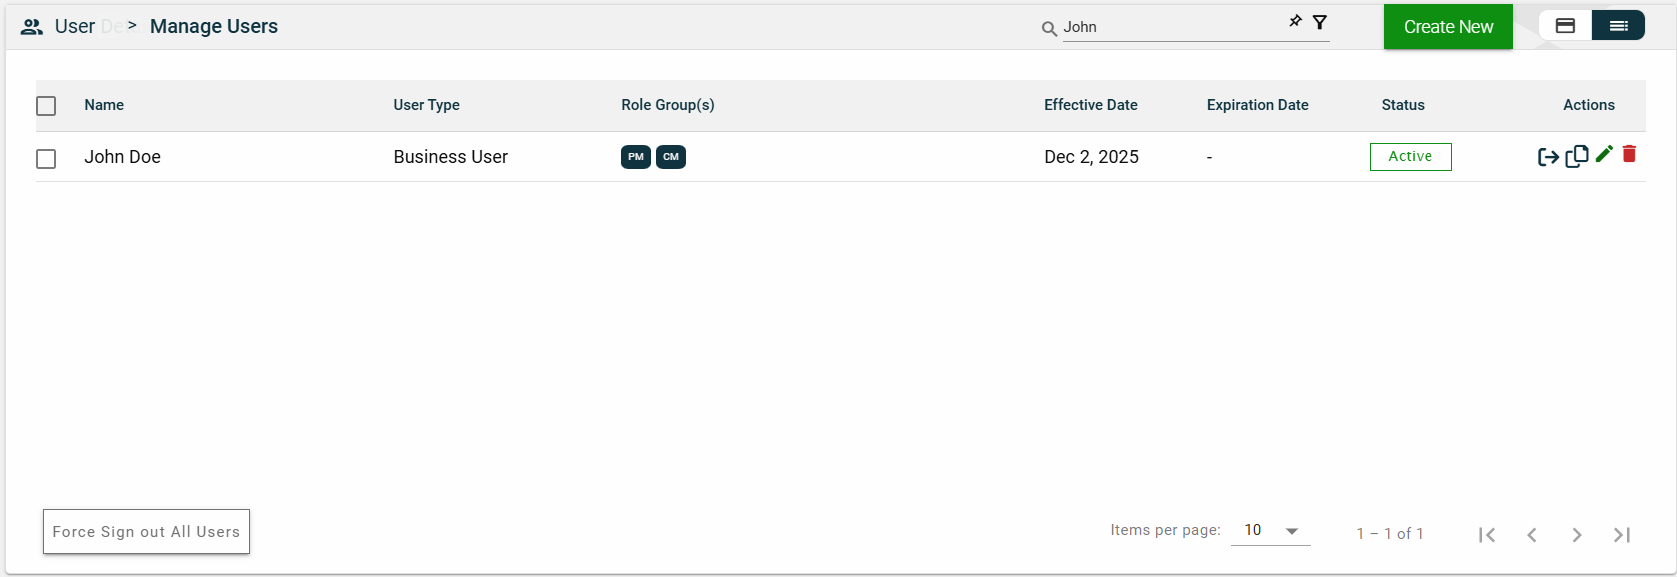
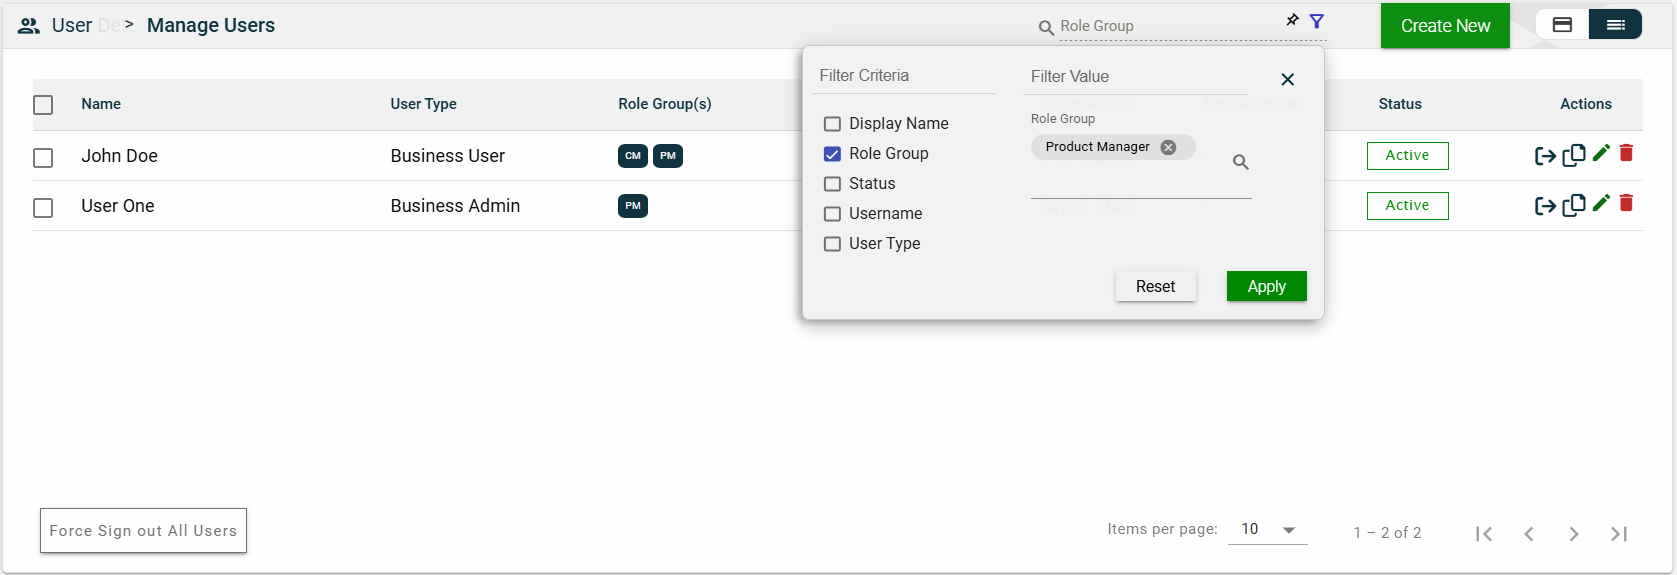
You can also specify a parameter and enter the filter value for it. The following filters are available on both card and list views:
- Display Name
- Role Group
- Status
- Username
- User Type
For example, you can select the Role Group and select a value from the dropdown list.
Sort
The following columns on the list view can be sorted:
- Name
- User Type
- Effective Date
- Expiration Date
- Status
User Details
The User Details tab shows all the information you added when creating a role group. For more information about the fields, see Create a role group. Additionally, this tab allows you to add the following user information:
- Secondary Mail — alternate email address for backup purposes.
- Primary Phone — primary contact number of the user.
- Secondary Phone — alternate contact number of the user.
This tab allows you to update all the fields except for the User Type and Organization. Additionally, you can choose to expire, copy, or delete the selected role group from this tab.
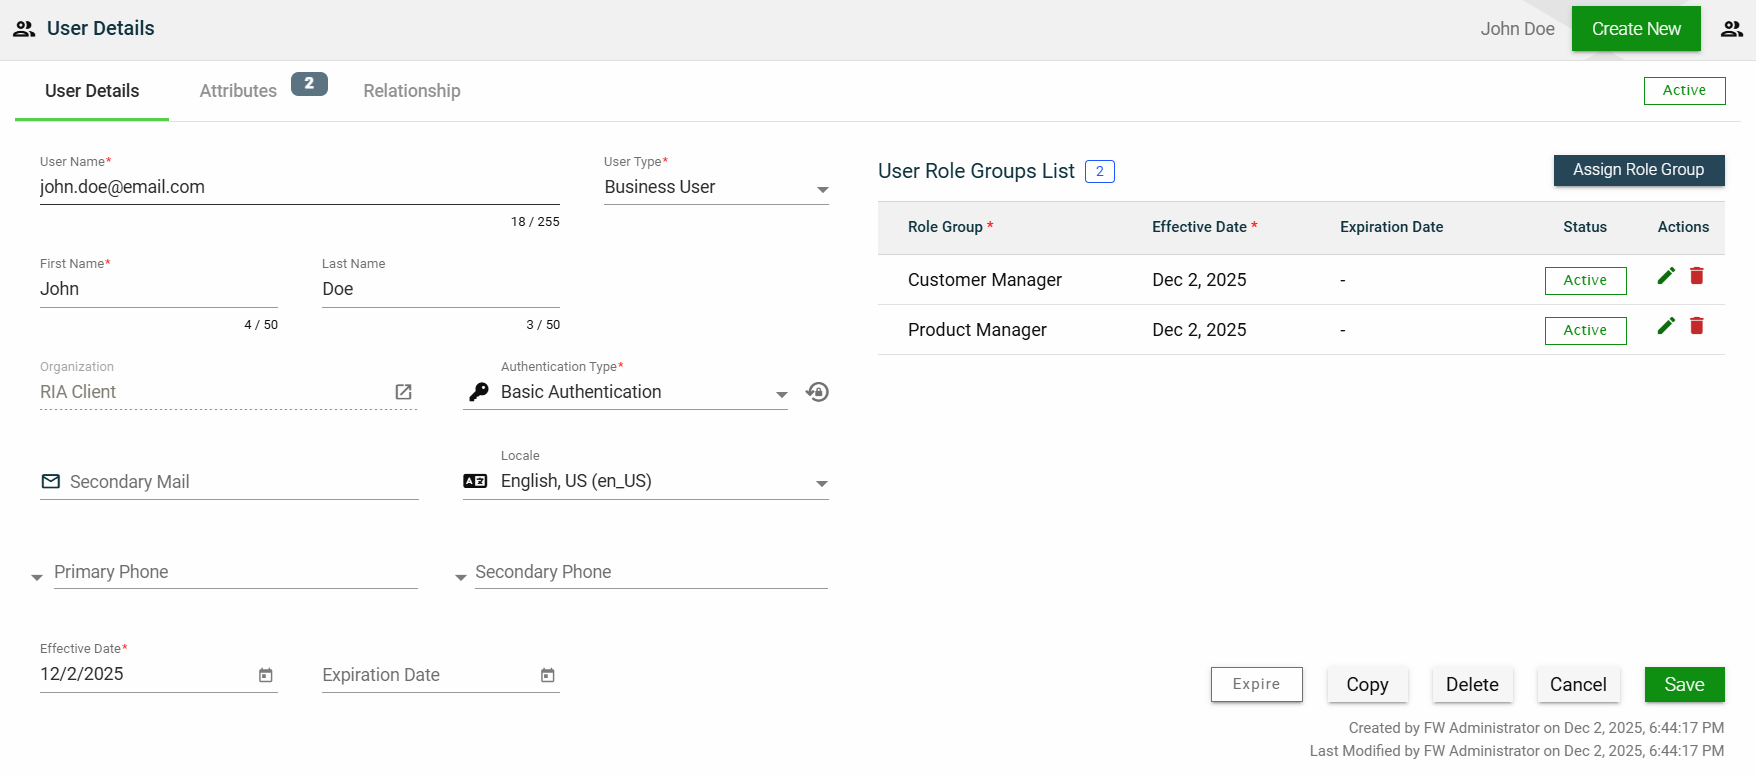
The role groups to which the user belongs are displayed in the User Role Groups List table. You can also add a new role by clicking Assign Role Group.

You can edit the effective and expiration dates of a role group. You can also delete a role group from the list by clicking ![]() .
.

To view the role group details, click on the Role Group hyperlink.
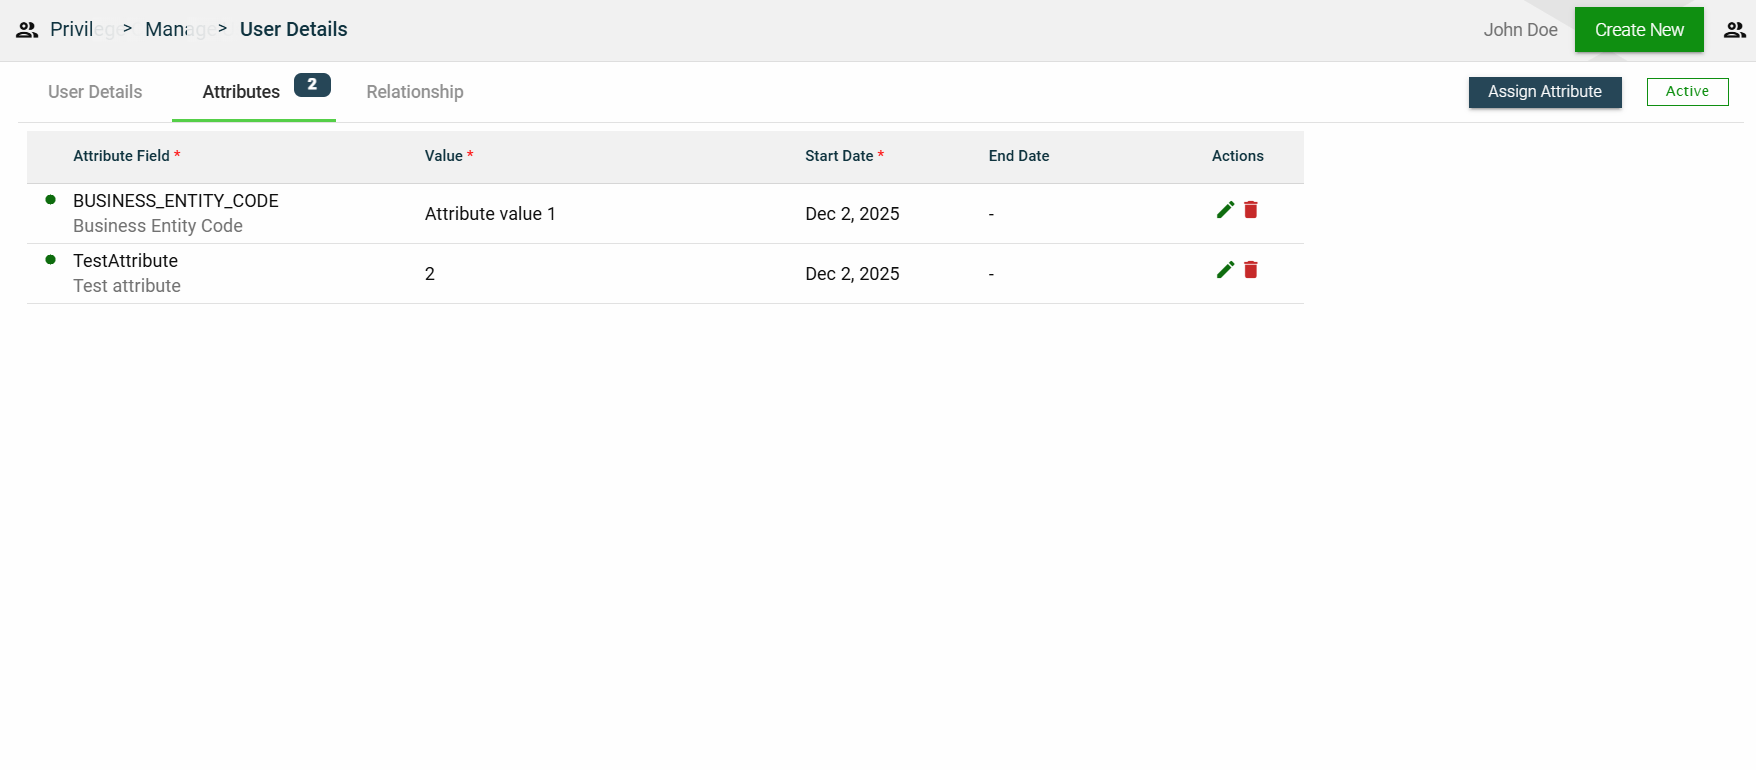
Attributes
The attributes tab displays the properties associated with the user, including their value, effective date, and expiration date. It also allows users to add, edit, or delete an attribute.