Roles
Overview
The Roles module allows you to configure privileges or permissions at the following levels:
- Application privileges
- User privileges
- Low-level security and access control
Create a role
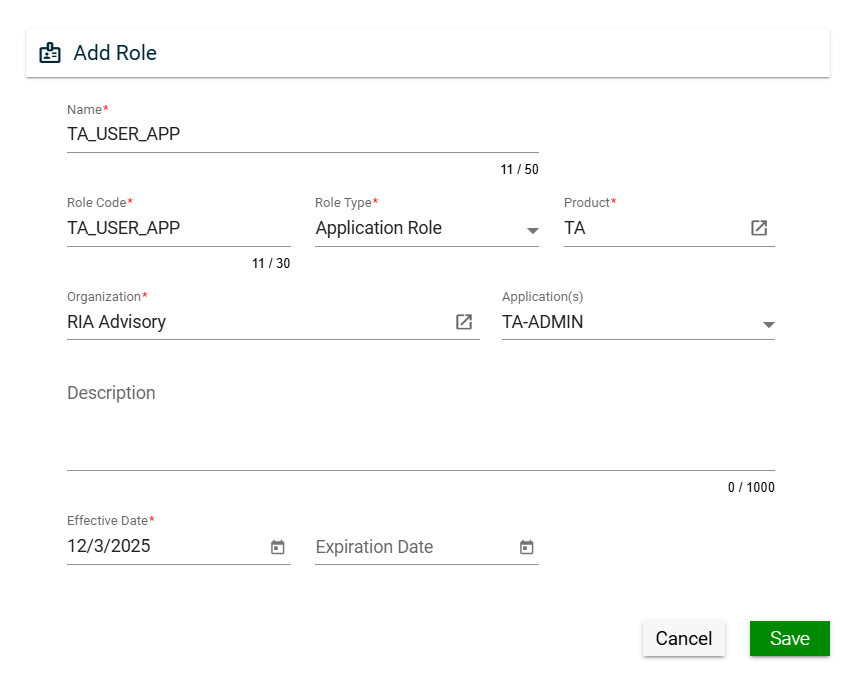
To create a role, click Create New and enter valid values in the following fields:
| Field | Description |
|---|---|
| Name | Name of the role. Mandatory: Yes |
| Role Code | Code of the role. Mandatory: Yes |
| Role Type |
Type of the role. The following are the possible values:
Mandatory: Yes |
| Product | Product for which the role will be applicable. To view the details of the selected product, click the go-to icon. For more information about products, see Products. Mandatory: Yes |
| Organization | Organization for which the role will be applicable. To view the details of the selected products, click the go-to icon. For more information about the organization, see Organizations. Mandatory: No |
| Application(s) | Specific applications for which the role will be applicable. Only the applications associated with the selected product will be displayed in the dropdown list. Multiple applications can be selected for a role. For more information about applications, see Applications. Mandatory: No |
| Description | Additional details of the role. Mandatory: No |
| Effective Date | Date when the role will be active. Mandatory: Yes |
| Expiration Date | Date when the role will no longer be active. Mandatory: No |
Views
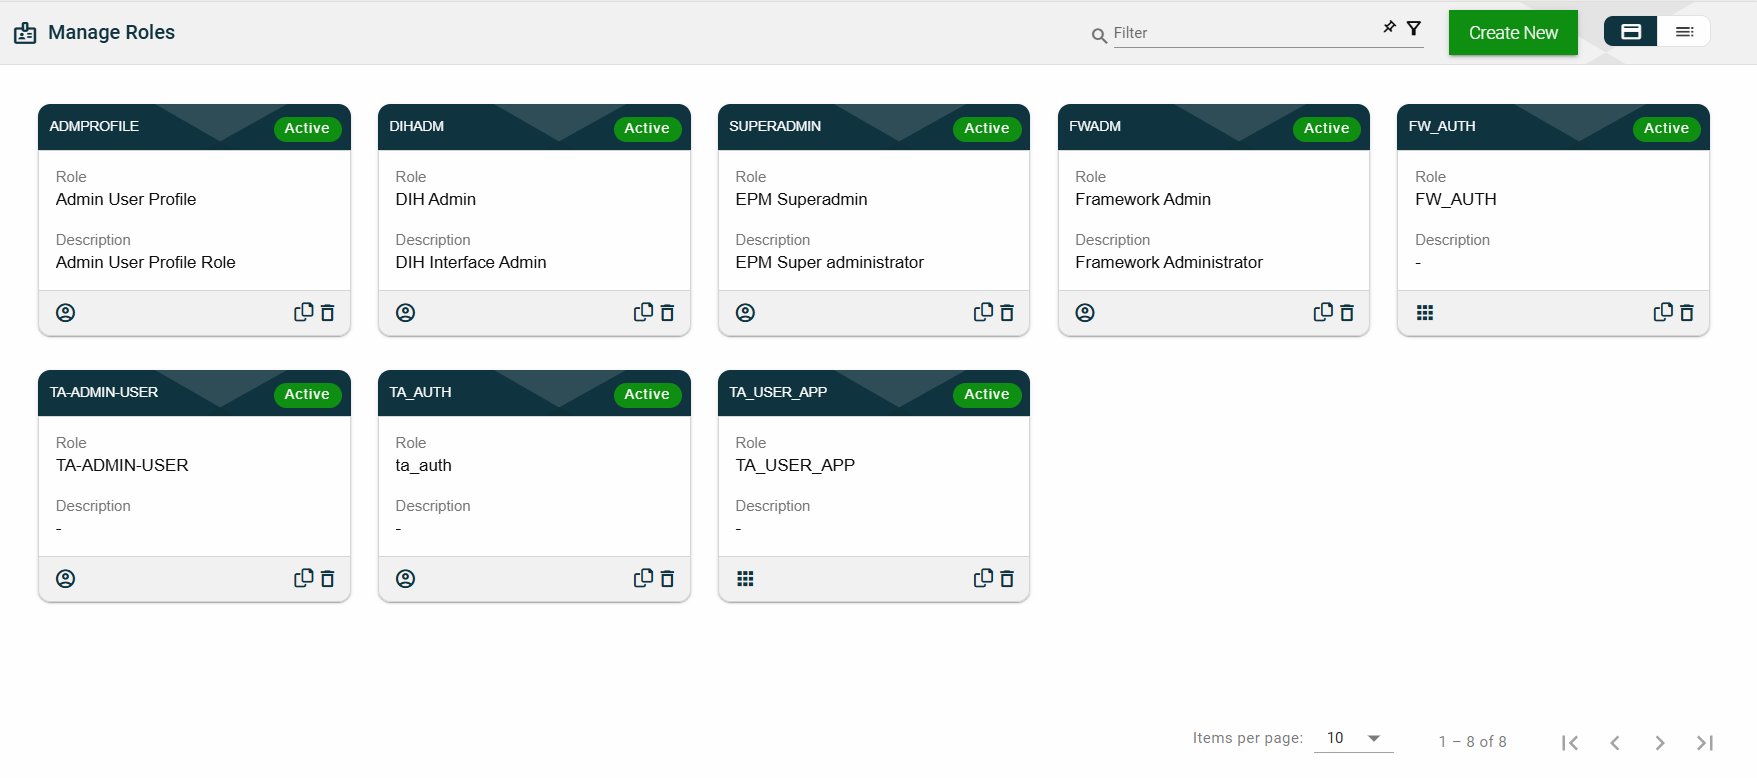
Card View
The card view presents all applications in the form of cards, with the role code on the card header. The card displays the Role and Description. The card footer displays an icon indicating the role type, a duplicate icon, and a delete icon.
Clicking anywhere on the card, except the duplicate and trash icons, will redirect you to view the role details.
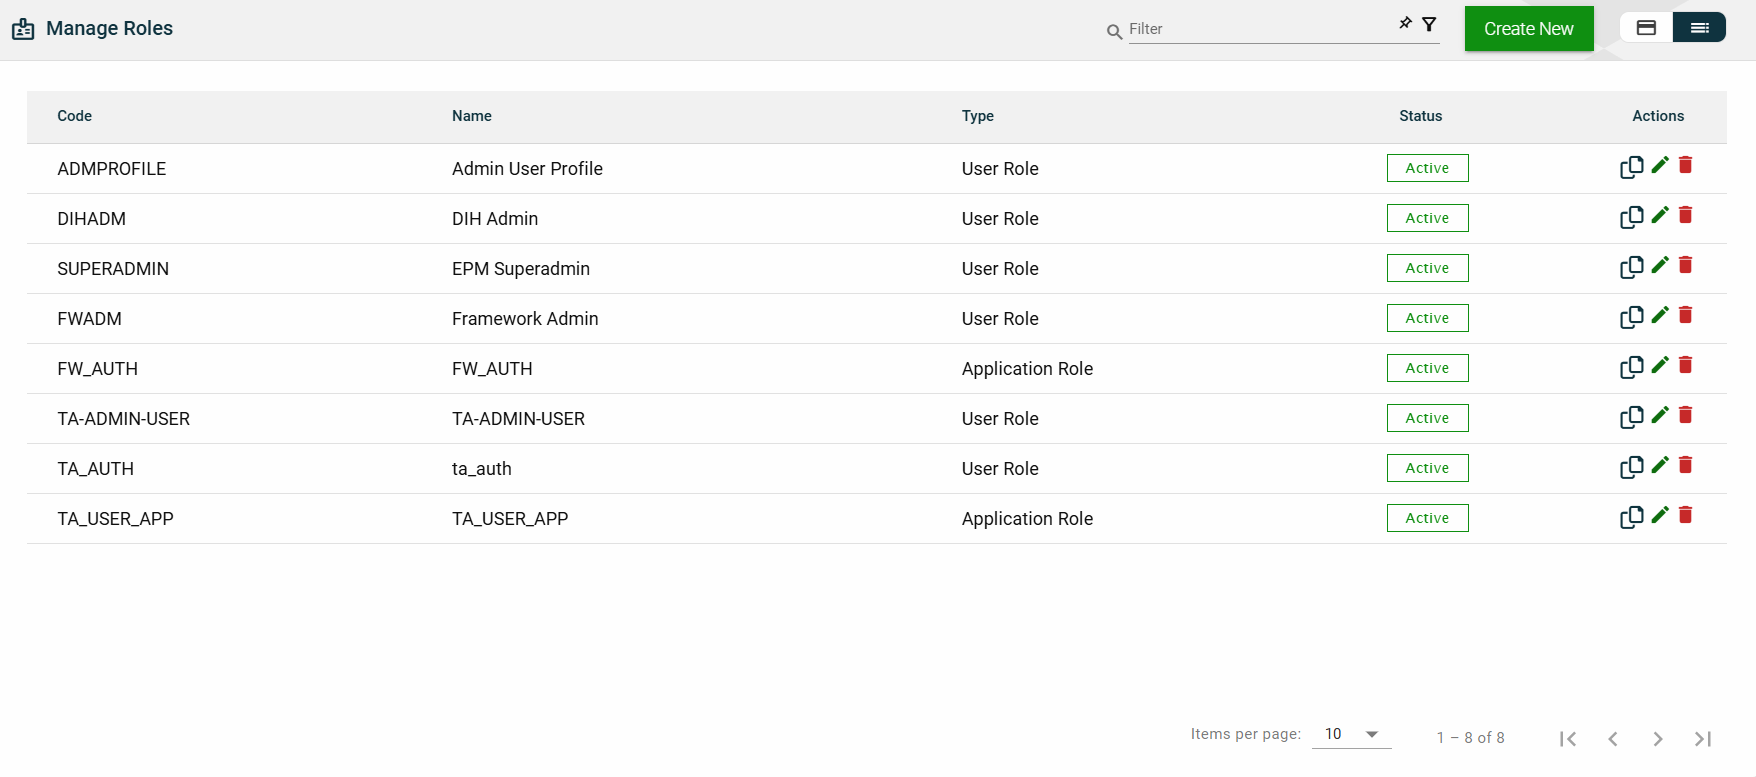
List View
The list view displays all roles in a table format.
| Column Name | Description |
|---|---|
| Code | Code of the role. |
| Name | Name of the role. |
| Type | Type of the role. |
| Status | Status of the role. |
| Actions |
Displays the following icons:
|
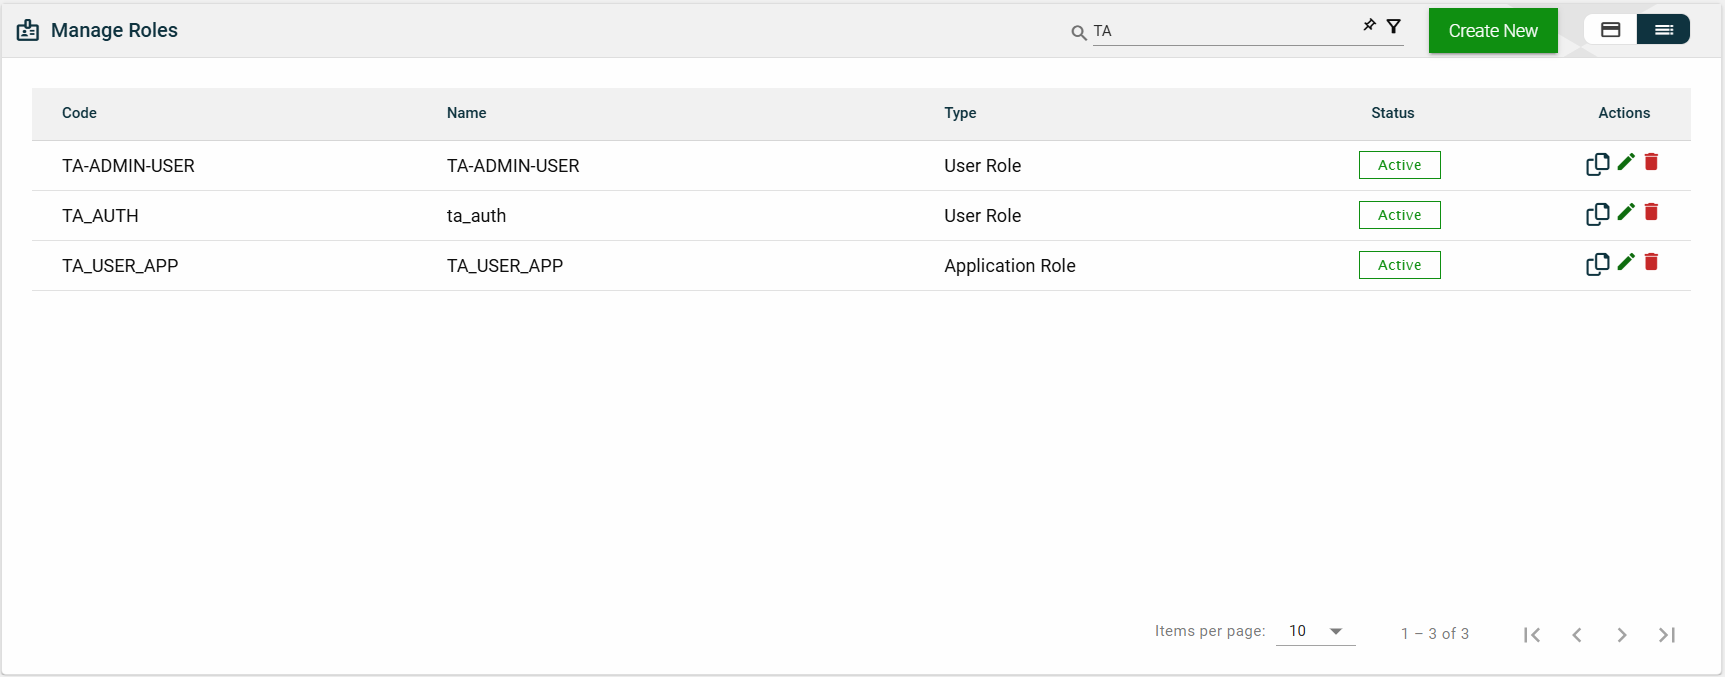
Filter
The following filters are available on both card and list views:
- Effective Date
- Product
- Role Code
- Role Name
- Role Type
For example, entering a partial role name can filter the list.
Sort
The following columns on the list view can be sorted:
- Code
- Name
- Type
- Status
Role Details
Role Details
The Role Details tab shows all the information you added when creating a role. For more information about the fields, see Create a role.
This tab allows you to update all the fields except for the Role Code, Role Type, Product, and Organization. Additionally, you can choose to expire, copy, or delete the selected role from this tab.

This tab also lists all applications that can be accessed with the selected role. You can add an application by clicking Add Application.
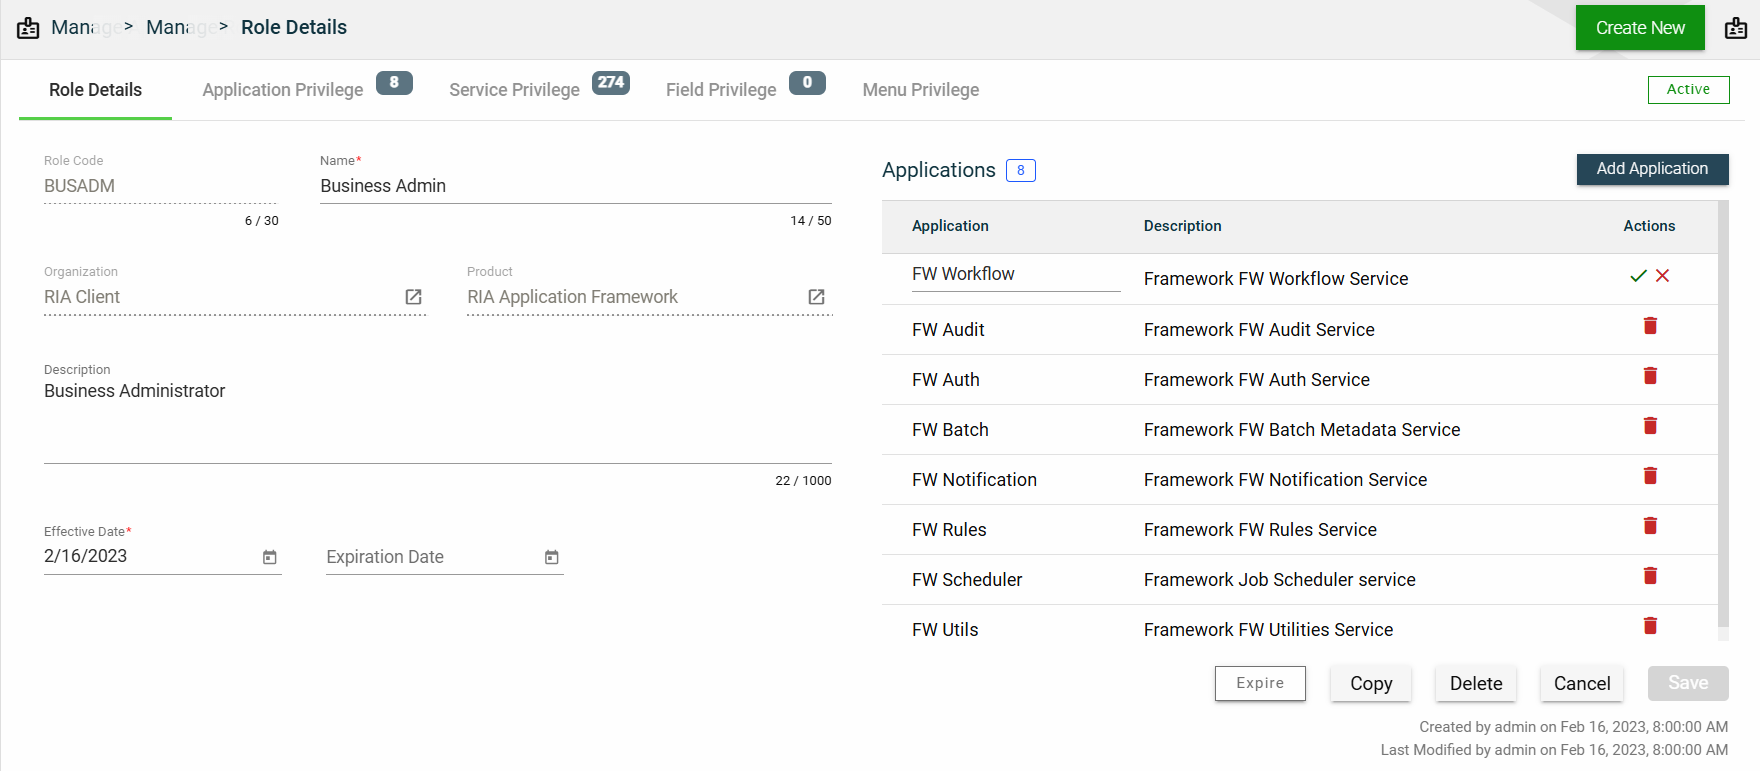
You can also delete an application from the list by clicking ![]() .
.
To view the application privileges, see Application Privilege. To view the application details, click on the Application Name hyperlink.
Application Privilege
This section controls the operation access for each application associated with the selected role. The same applications listed in the Role Details will be the same applications listed in this section.
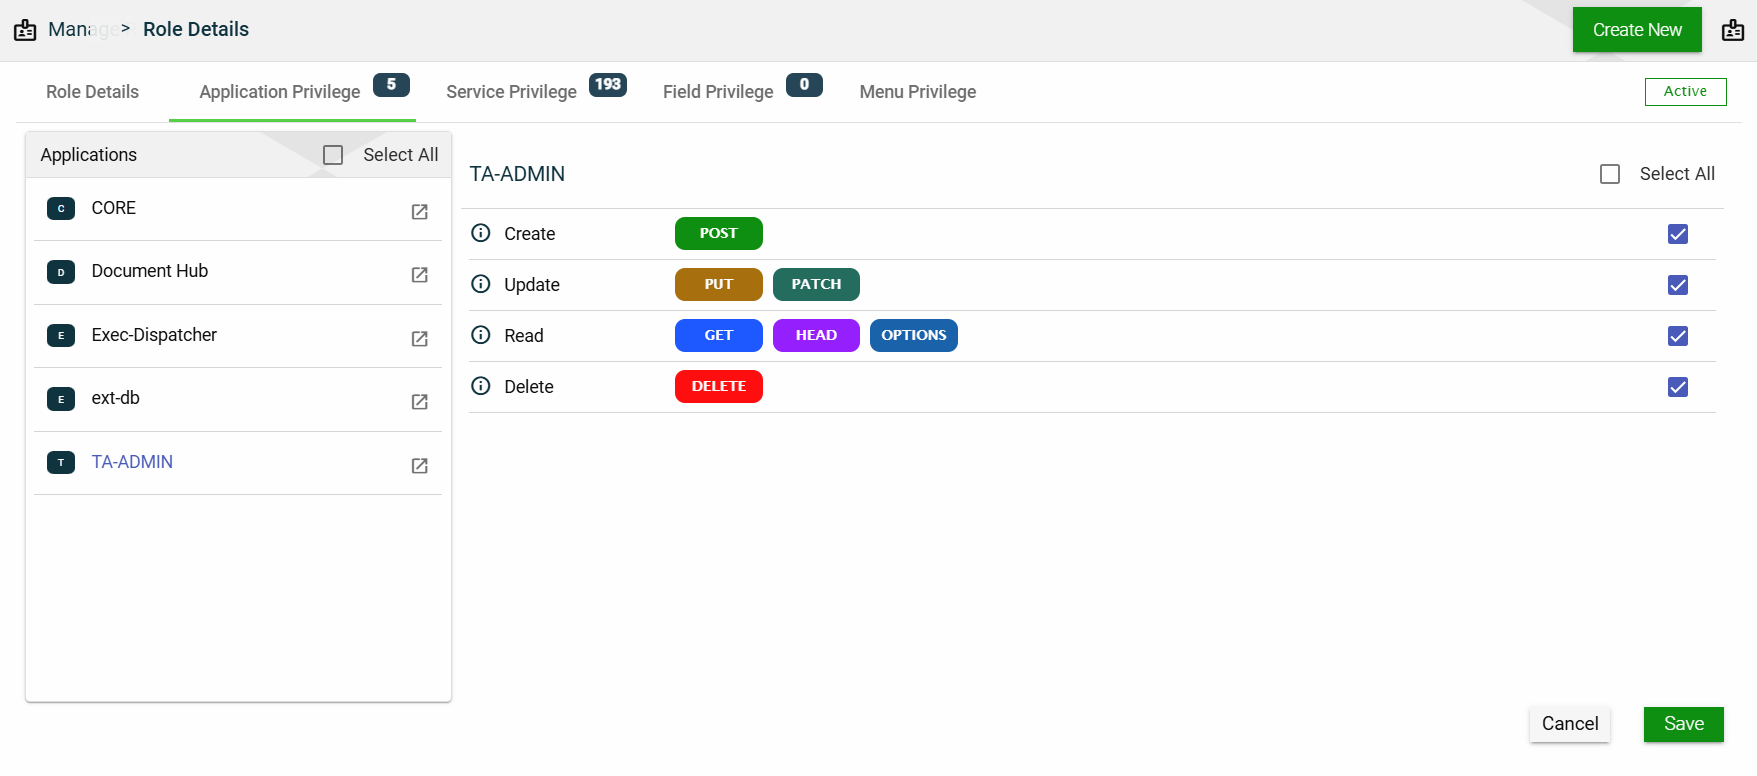
To assign an operation access to an application, follow these steps:
- Select an application.
- Tick all the operation access you want to apply to the selected application.
- Click Save.
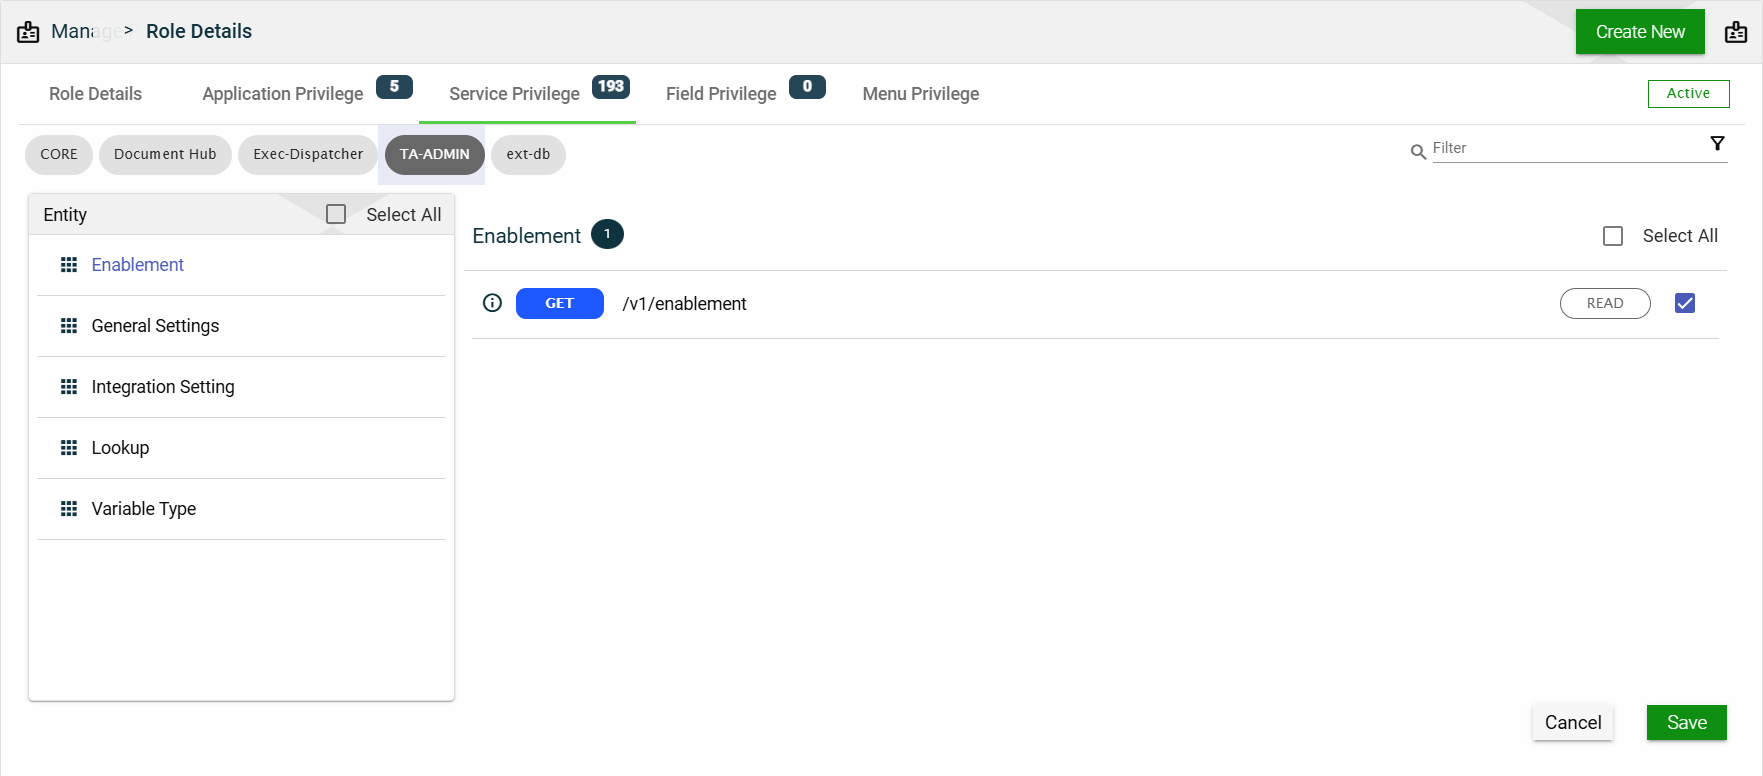
Service Privilege
This section controls access to every single REST service associated with the applications listed in the Role Details.
Each application lists all the entities configured to it. When you select an entity, all the services and the access for each service are displayed.
Field Privilege
This section controls the field-level access of entities associated with the applications listed in the Role Details.
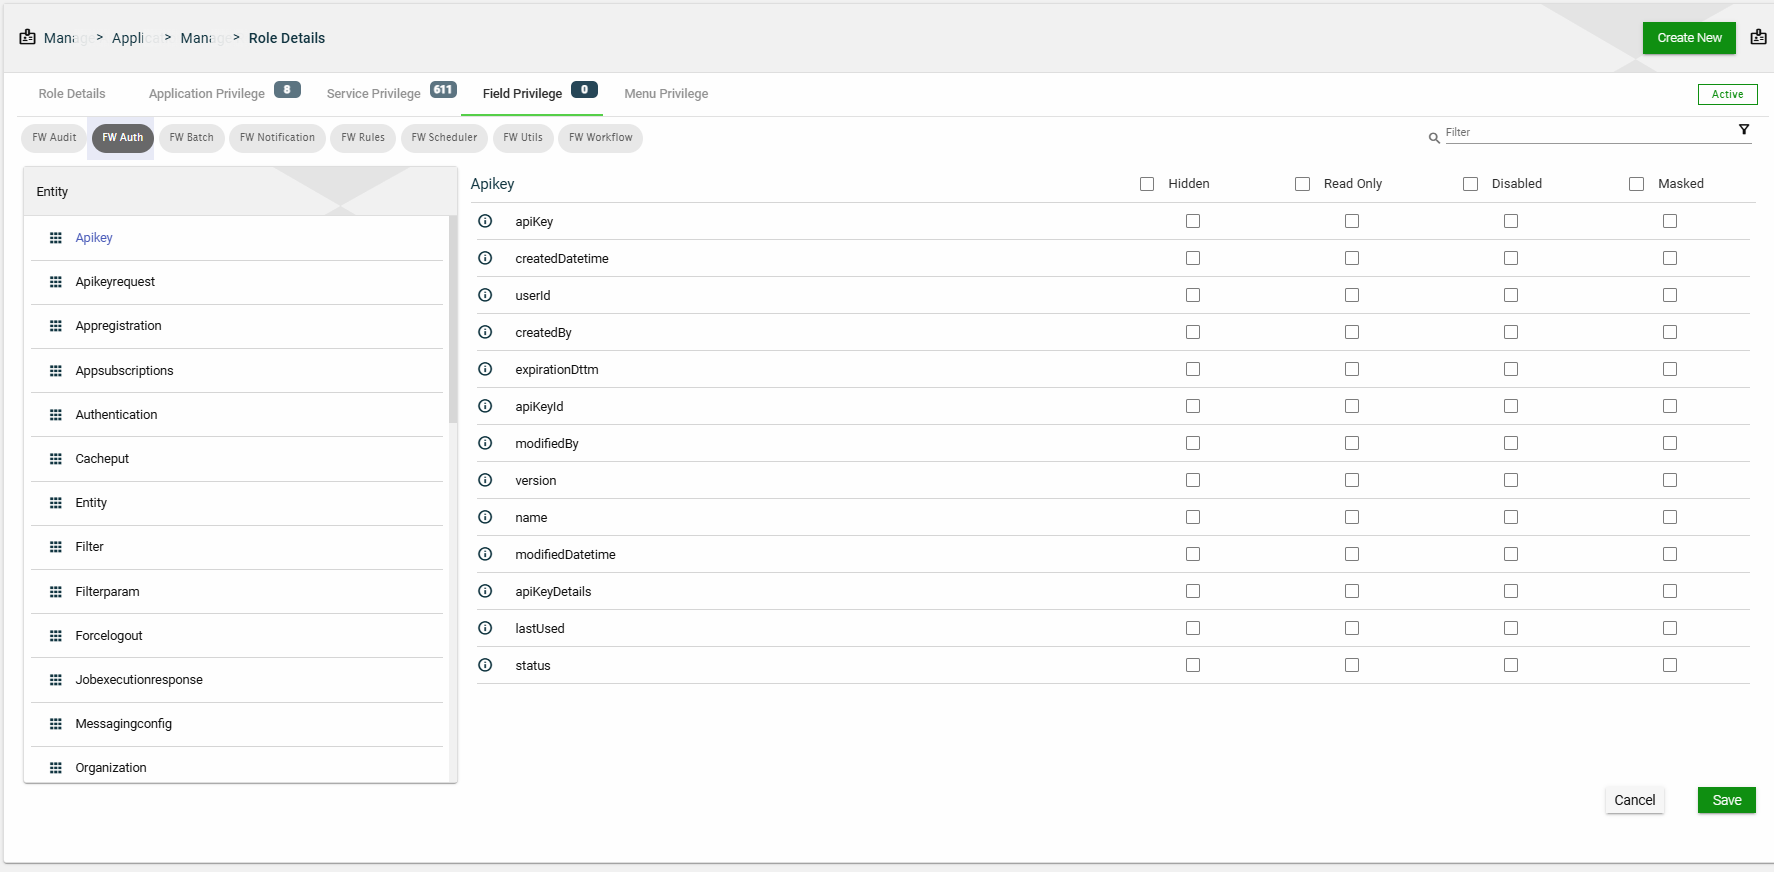
Entities configured with fields are displayed for each application associated with the selected role. When you select an entity, all the fields configured to it are displayed. You have the option to select the following setting:
- Disabled
- Hidden
- Read Only
- Masked
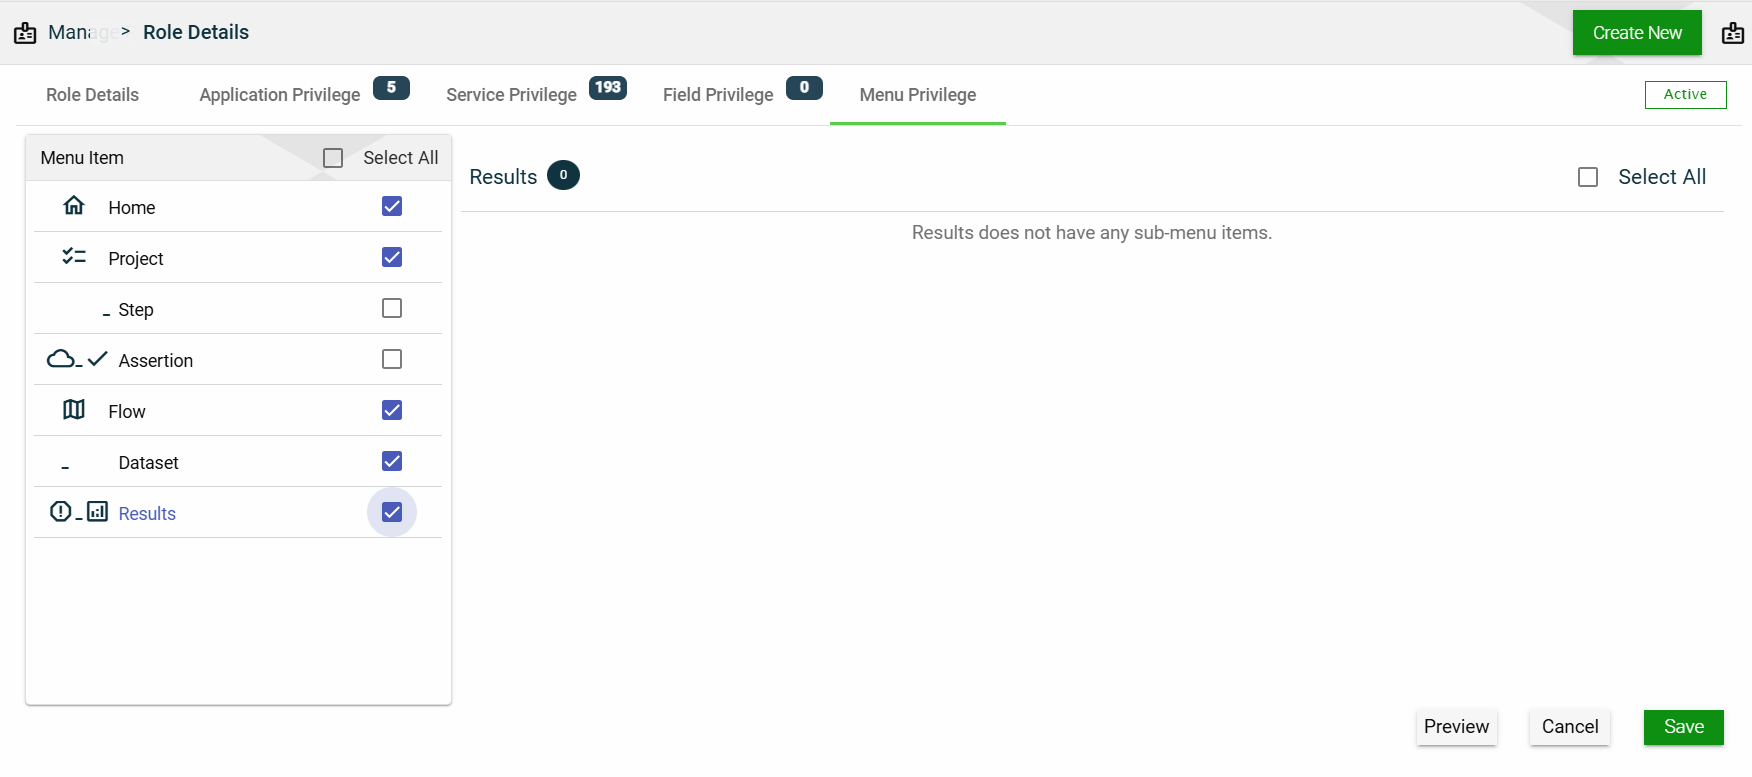
Menu Privilege
This section allows you to manage access to menu items. All available menu items are listed here, and selecting one will show all of its sub-menu items.
To display a menu item to a user with the selected role, tick the checkbox. If you don’t want to display that menu item to the user, untick the checkbox.
If you want to edit the details of a menu item, see Menu Items in Products.