Business TIN Registration
There are two types of tax identification number (TIN) you can register for: an individual TIN and a business TIN.
Taxpayer details
To register for a business TIN, follow these steps:
- Go to the login page.
- Click the Register for TIN button.
-
In the popup window, click Business TIN Registration.
-
Select a registration type in the Registration Type dropdown.
-
Select a language in the Language of Correspondence dropdown.
-
Select a type from the Organization Type dropdown.
-
Select a department from the Applicant’s Department dropdown.
-
Enter values in the following mandatory fields:
- Registered Name
- Trade Name
- Start Date
- Commencement Date
- Company ID Number
- Company Registration Number
- Income Tax Number
- Grant Number
- Business ID Number
- Employer Registration Number
- License Number
- Upload the following files:
- License
- Certificate of Incorporation
- Form C
- Form J
- Power of Attorney
- Deed of Sale
- Founding Documents
- Trust Deed
- Joint Venture Agreement
-
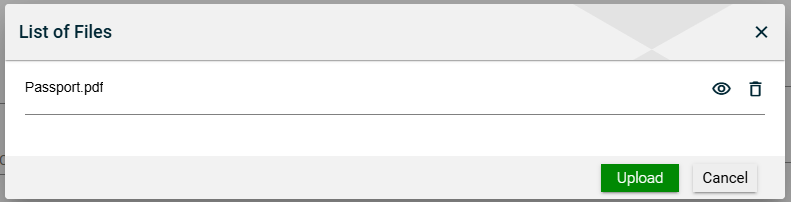
Review the uploaded files. To review an uploaded file, click View. To view an uploaded file, click
 . To delete an uploaded file, click
  .
. -
Click the Cancel button to close the popup.
-
Click the Upload button in the List of Files popup.
Tax Officer Information
The Tax Officer Information section is where you enter information about the tax officer who assisted you in your registration. This information is crucial for recording purposes. Enter values in the following mandatory fields:
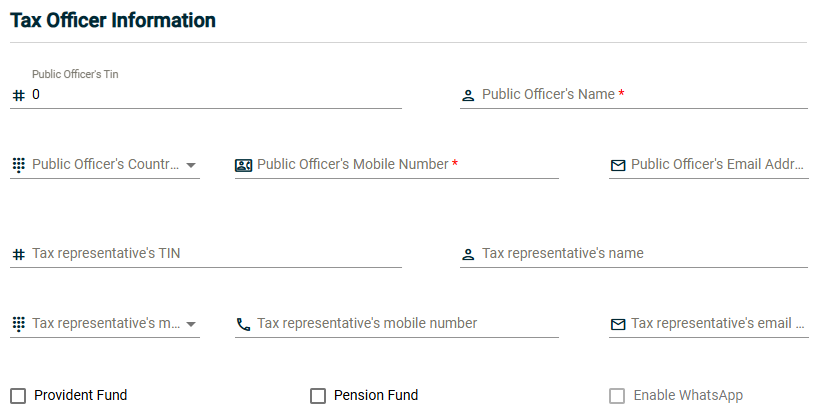
- Public Officer’s Name
- Public Officer’s Number
Business Details
The Business Details section is required for a business TIN. To continue your business TIN registration, follow these steps:
- Select an International Standard Industrial Classification (ISIC) section from the ISIC Section dropdown.
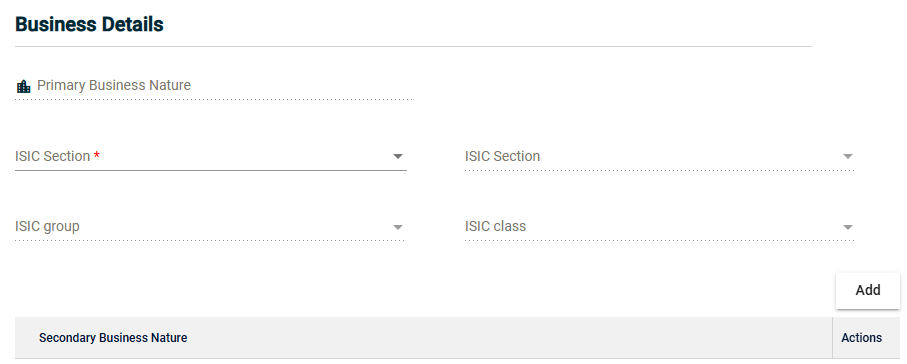
-
Select an ISIC division from the ISIC Division dropdown.
-
Select an ISIC division from the ISIC group dropdown.
-
Select an ISIC group from the ISIC class dropdown.
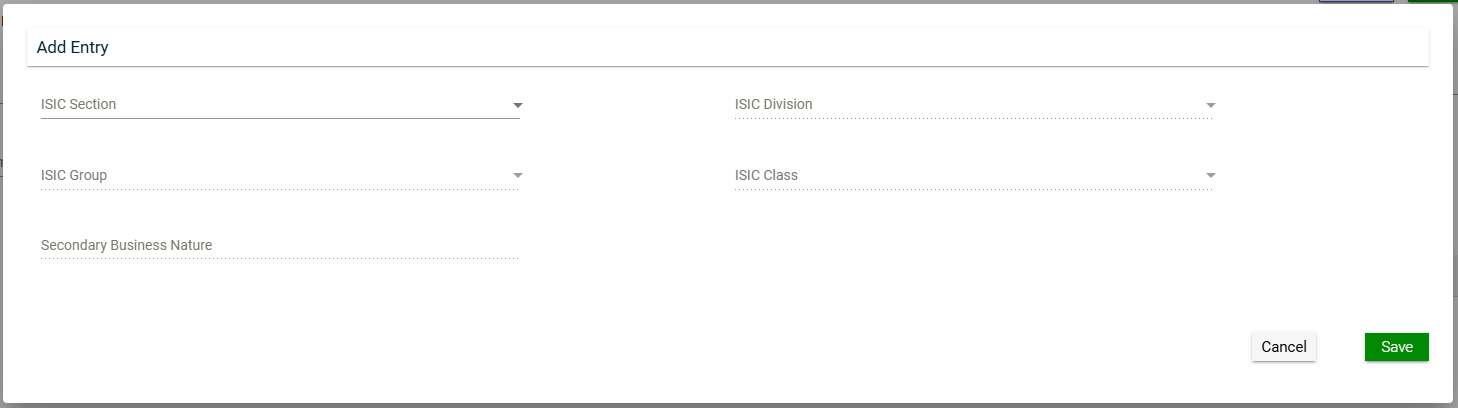
Secondary Business Nature
You can add a secondary business nature to your business.
- Click the Add button before the Secondary Business Nature section.
-
Select an ISIC section from the ISIC Section dropdown.
-
Select an ISIC division from the ISIC Division dropdown.
-
Select an ISIC group from the ISIC Group dropdown.
-
Select an ISIC class from the ISIC Class dropdown.
-
Enter a secondary business nature in the Secondary Business Nature field.
-
Click the Save button.
Once you have added an item, it will be displayed in a table. Each item will have its own row, displaying the TIN, company name, and amount. To edit the details, click ![]() . To remove an item, click
. To remove an item, click ![]() .
.

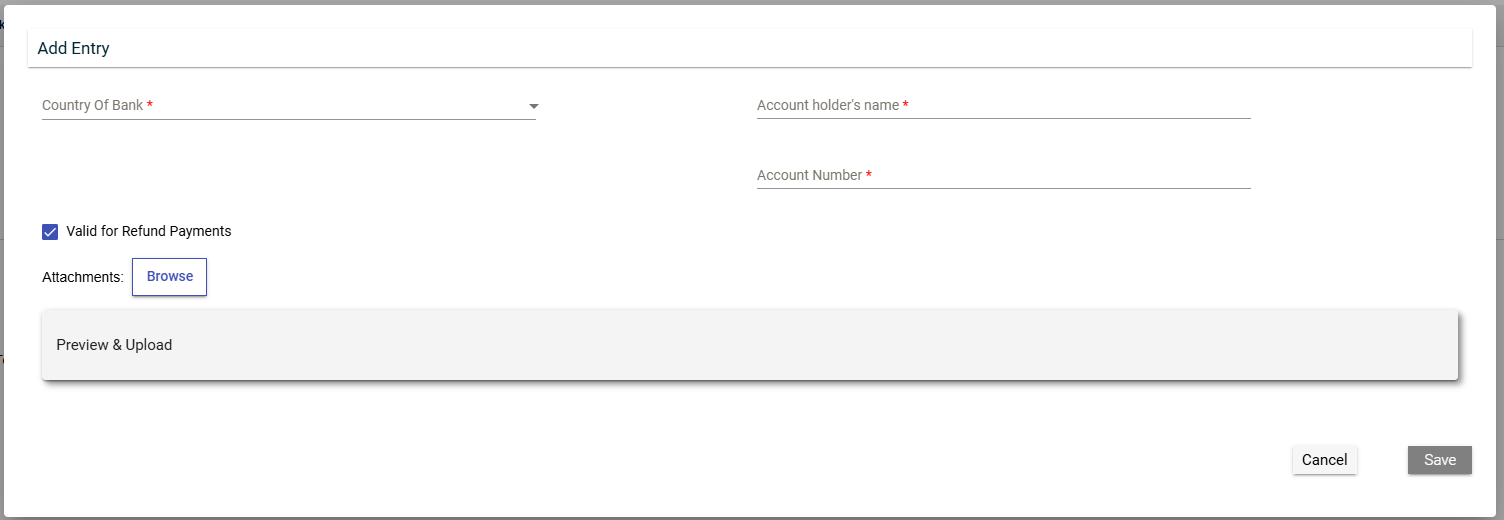
Bank Details
To add bank details to your TIN registration, follow these steps:
- Click the Add button.
-
Select a country from the Country of Bank dropdown.
-
Enter values in the following mandatory fields:
- Branch Name
- Swift Code
- Bank Code
- Account holder’s name
- Name of Bank
- Branch Code
- Account Number
-
Tick the Valid for Refund Payments if the bank accepts refund payments. Otherwise, leave the checkbox blank.
-
Click the Browse button.
-
Select your bank attachment in the file explorer.
-
Click the Open button.
-
Click the View button.
-
Review the uploaded files. Click the Preview & Upload button to view or edit attachments.

-
Review the uploaded files. To review an uploaded file, click
.
To delete an uploaded file, click . -
Click the Save button.
Tax Types
Select tax types applicable to the business.

Physical Address
-
Select a status from the Proprietor Status dropdown.
-
Enter your address in the Address fields.
-
Select a country from the Country dropdown.
-
Click the Browse button.
-
Select your bank attachment in the file explorer.
-
Click the Open button.
-
Click the View button.
-
Click the Preview & Upload button to view or edit attachments.
-
Review the uploaded files. To review an uploaded file, click
.
To delete an uploaded file, click . -
Click the Save button.
-
Tick the Is the Postal Address same as the Physical Address? if the postal address is the same as the physical address. Otherwise, leave the checkbox blank and enter your postal address in the Postal Details section.
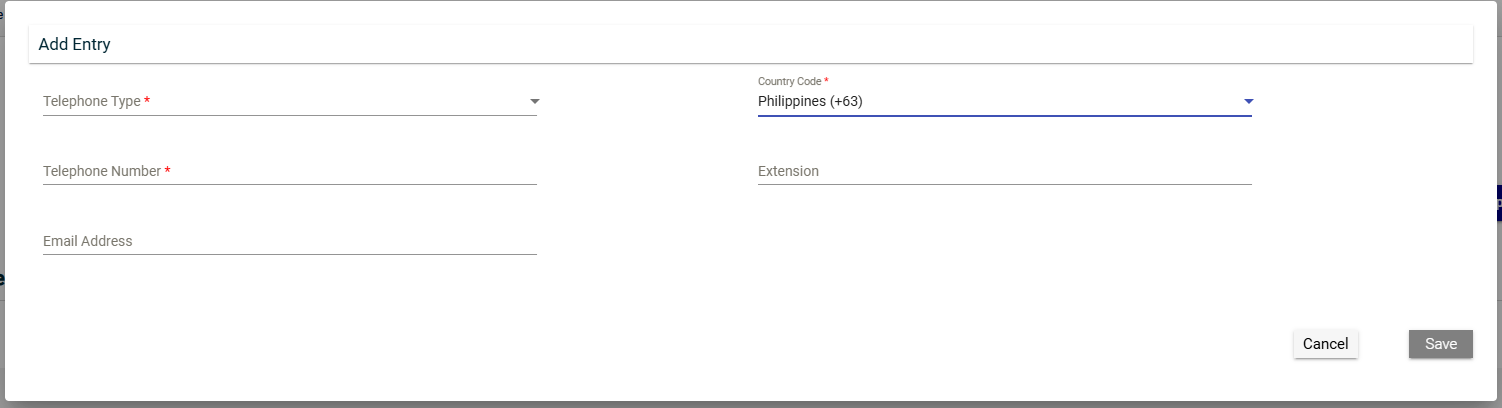
Telephone Number Details
To enter a telephone number follow these steps:
- Click the Add button under the Telephone Number Details section.

-
Select a type from the Telephone Type dropdown.
-
Select a country code from the Country Code dropdown.
-
Enter your telephone number in the Telephone Number field.
-
Enter your email address in the Email Adress field.
-
Click the Save button.
-
Click the Check Duplicates button to check if you have added a number that has already been added.
Once you have added an item, it will be displayed in a table. Each item will have its own row, displaying the TIN, company name, and amount. To edit the details, click ![]() . To remove an item, click
. To remove an item, click ![]() .
.
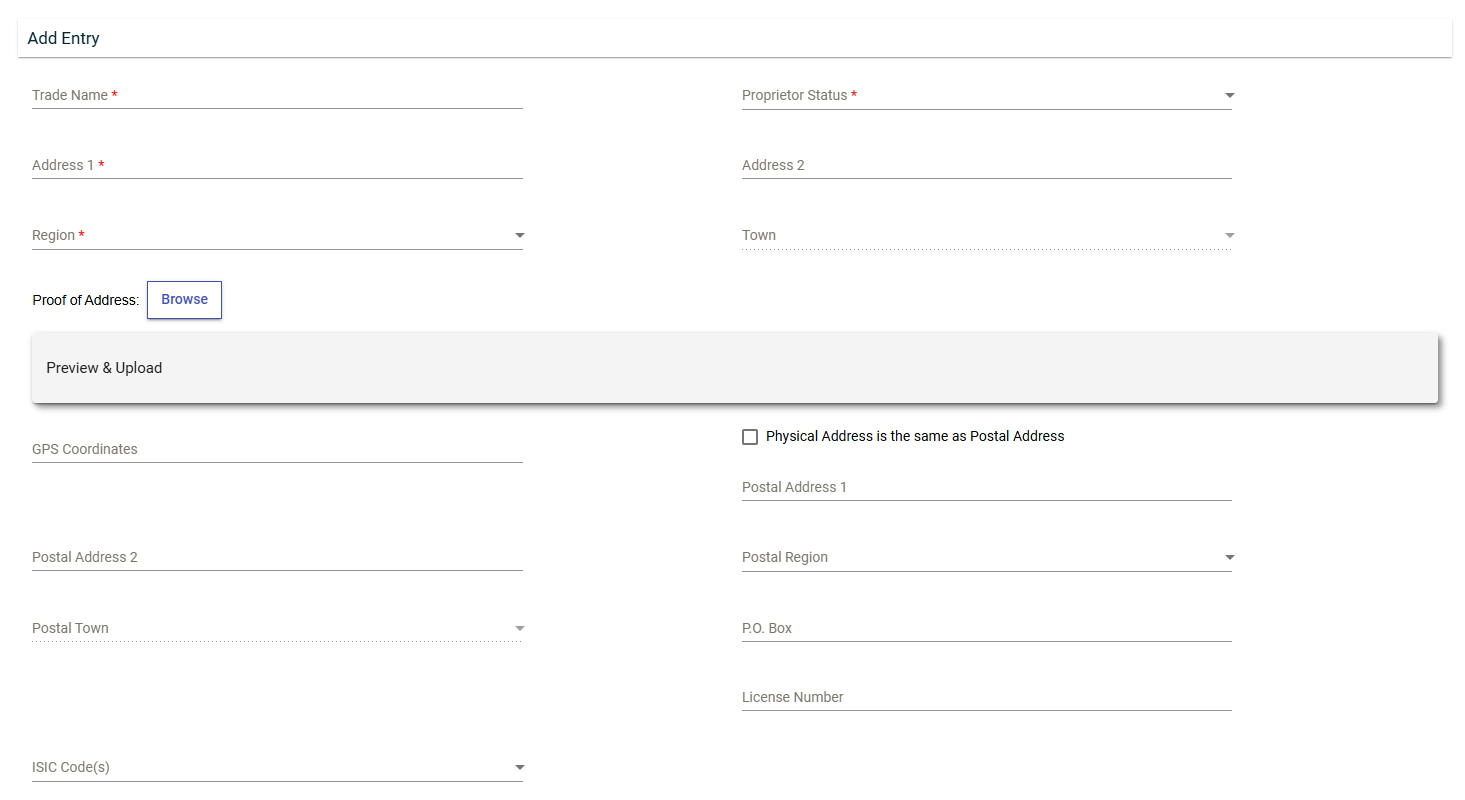
Establishment
To enter an establishment, follow these steps:
- Click the Add button under the Establishment section.

-
Enter the name of the establishment in the Trade Name field.
-
Enter the address of your business in the Address 1 field.
-
Select a region from the Region dropdown.
-
Select a town from the Town dropdown.
-
Click the Browse button.
-
Select your proof of address in the file explorer.
-
Click the Open button.
-
Click the Preview & Upload button to view or edit attachments.
-
Review the uploaded files. To review an uploaded file, click
.
To delete an uploaded file, click .
-
Tick the Physical Address is the same as Postal Address checkbox if the establishment address is the same as the postal address. Otherwise, enter and select the postal details in the corresponding fields.
-
Click the Add Entry button.
-
Enter an email address in the Email Address field.
-
Select a type from the Telephone Type dropdown.
-
Select a country code from the Country Code dropdown.
-
Enter the contact number of the establishment in the Telephone Number field.
-
Click the
 button.
 -
Click the Save button.

Once you have added an item, it will be displayed in a table. Each item will have its own row, displaying the TIN, company name, and amount. To edit the details, click ![]() . To remove an item, click
. To remove an item, click ![]() .
.
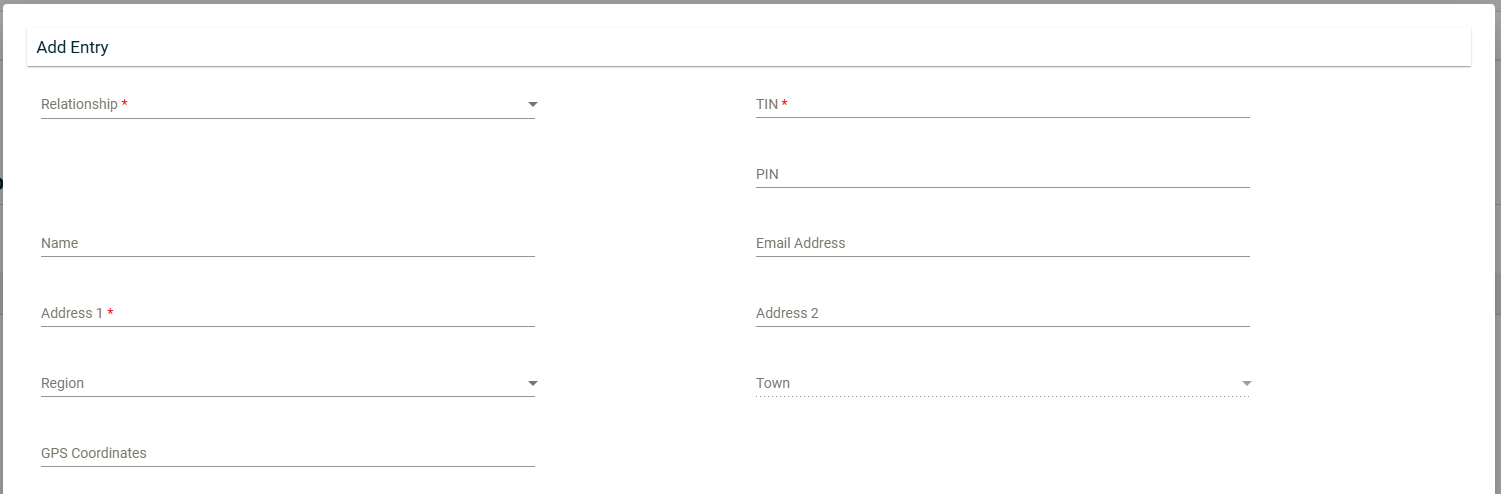
Relationship
To enter a relative, follow these steps:
- Click the Add button under the Relationship section.

-
Select a relationship from the Relationship dropdown.
-
Enter the name of the relative in the Name field.
-
Enter the address of the relative in the Address 1 and Address 2 fields.
-
Enter the town where the relative lives in the Town field.
-
Enter the TIN of the relative in the TIN field.
-
Enter the email address of the relative in the Email Address field.
-
Click the Add Entry button.
-
Select a telephone type from the Telephone Type dropdown.
-
Select a country code from the Country Code dropdown.
-
Enter the contact number of the relative in the Telephone Number field.
-
Click the
button. -
Click the Save button.

Once you have added an item, it will be displayed in a table. Each item will have its own row, displaying the TIN, company name, and amount. To edit the details, click ![]() . To remove an item, click
. To remove an item, click ![]() .
.

Submitting the registration
After filling the fields in the registration form, you can now submit your registration. To submit your registration, follow these steps:
-
Click the Check Form button.
-
Click Submit.