Corporate Income Tax
Overview
Corporate Income Tax must be filed annually, and failure to do so may result in late filing penalties and interest charges. The tax is due for both filing and payment within four months after the end of the financial year.
Reminder notifications are sent 30 and 7 days before the deadline. If you have already filed before the scheduled notification, then you will not receive any reminder notifications. If you fail to file after the 2nd notification, then another set of reminders will notify you.
Any Provisional Tax payments lodged before filing the Corporate Income Tax must be manually entered in the Details of Payment section.
To access the Corporate Income tax form, navigate to Tax Form.
Tax Form - Corporate Income
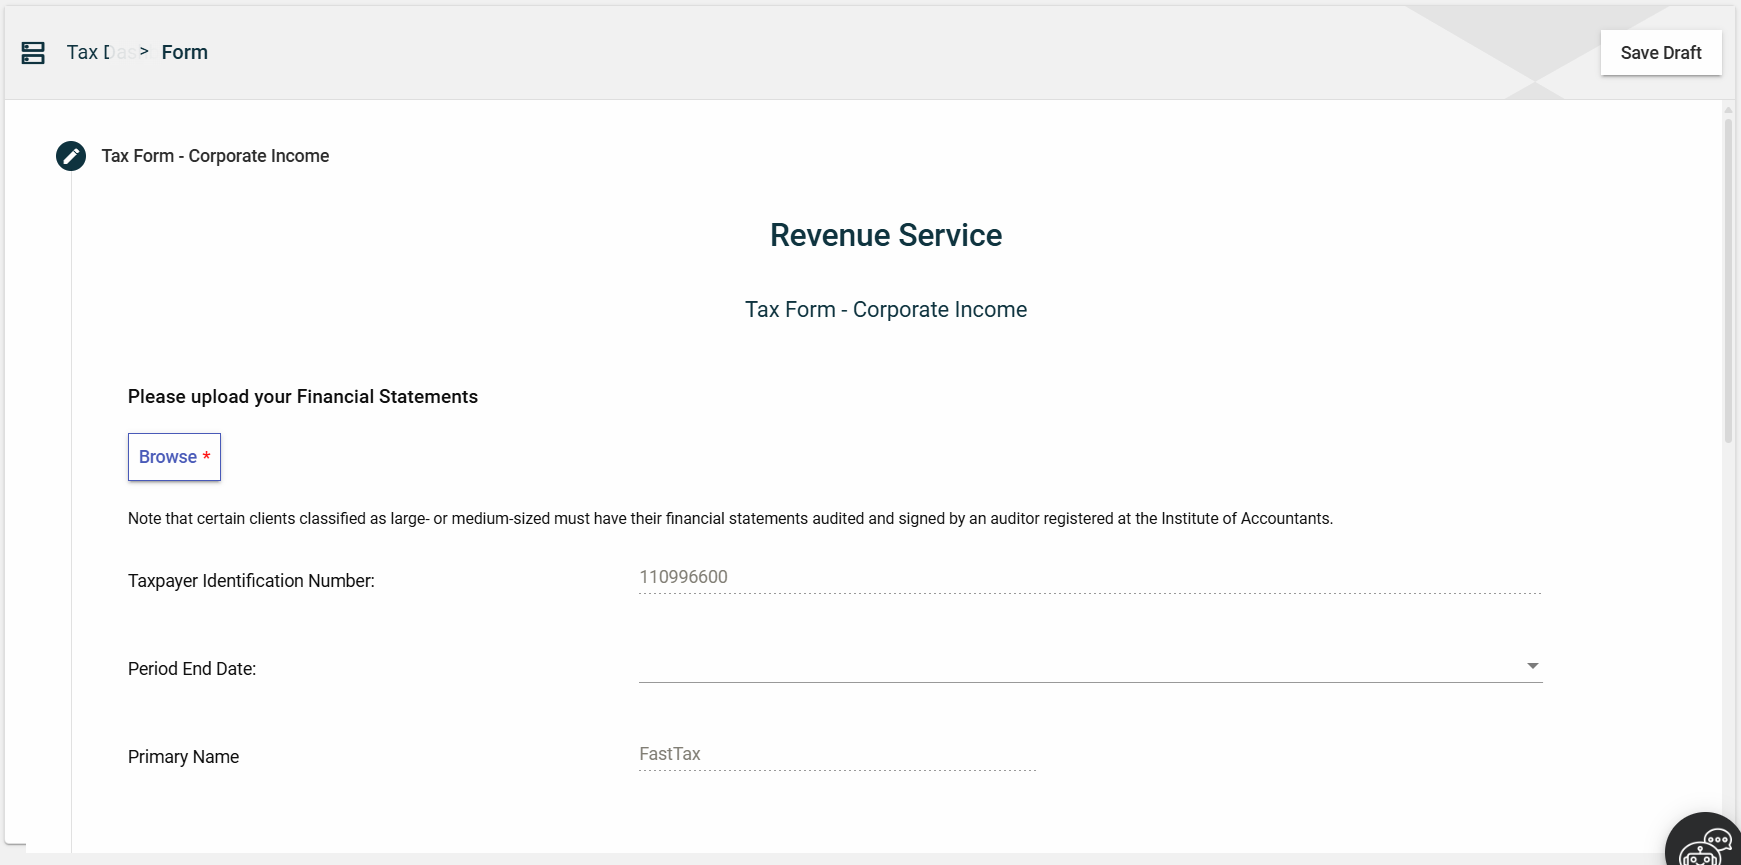
- Click File Upload to select the financial statement files to be uploaded.
- Click Files > Upload to upload the selected files.
- Review the selected files. To review an uploaded file, click
 .
.
To delete an uploaded file, click .
. - Verify that the values in the following fields are correct:
- Tax Identification Number — automatically populated based on the selected TIN.
- Taxpayer Name — automatically populated with the registered name associated with the selected TIN.
- Select a date in the Period End Date dropdown list that shows all due dates of tax obligations associated with the entered TIN.
Statement of Financial Position
Assets
Non-Current Assets
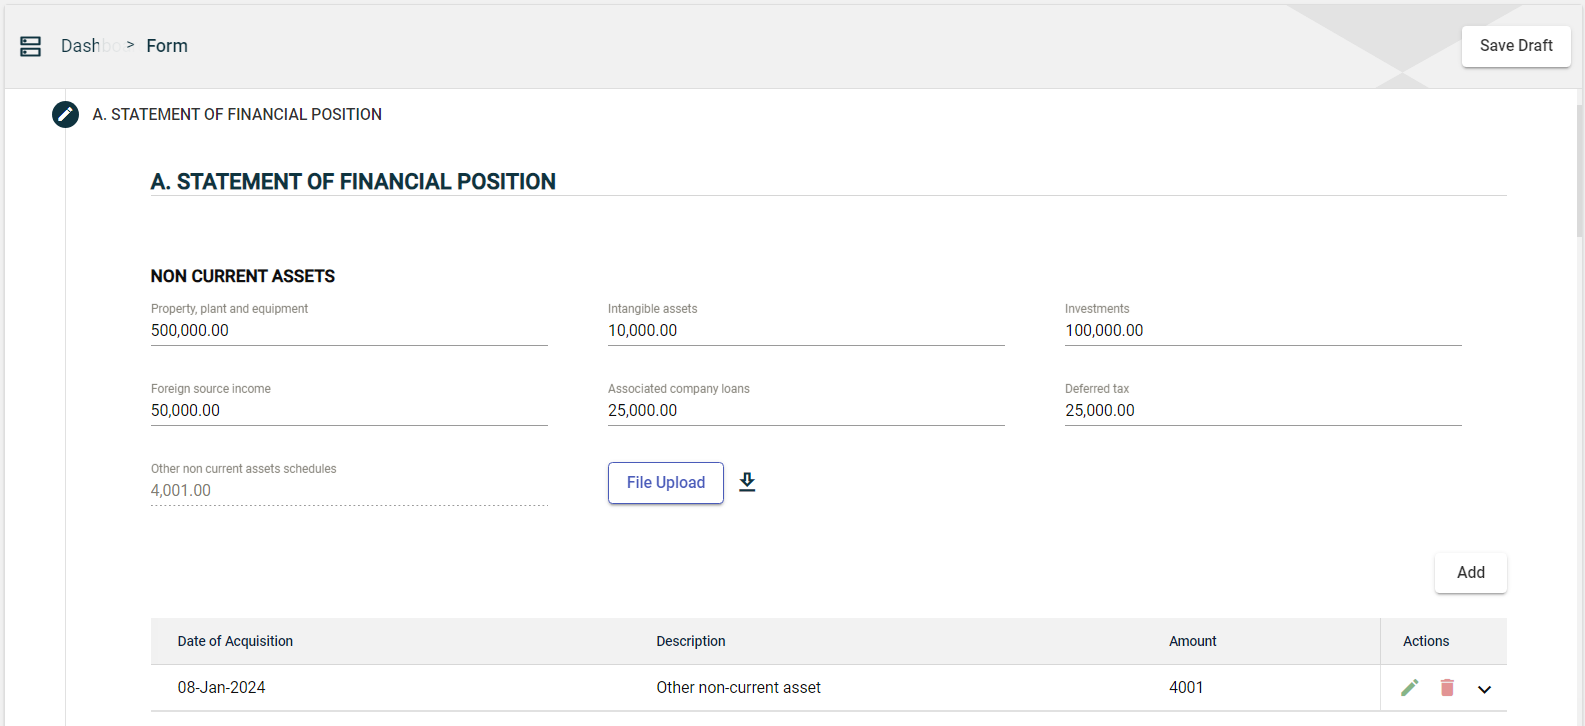
Enter the value of your non-current assets in the following fields:
- Property, plant, and equipment
- Intangible assets
- Investments
- Foreign source income
- Associated company loans
- Deferred tax
You can also upload schedule files by clicking File Upload to automatically capture non-current assets.
If you don’t have a file available, you can download a template file by clicking ![]() . Edit the downloaded template and then upload it.
. Edit the downloaded template and then upload it.
If you have other non-current assets that were not specified in the form, you can add them by following these steps:
- Click the Add button in the NON CURRENT ASSETS section.
- In the popup window, specify the name of your non-current asset in the Description field.
- Enter the amount of the specified non-current asset in the Amount field.
- Click the Save button.
Once you have added an item, it will be displayed in a table. Each item will have its own row, displaying the date of acquisition, description, and value. To edit the details, click ![]() . To remove an item, click
. To remove an item, click ![]() .
.
The total value of all the added non-current assets is displayed in the Other non current assets schedule field of the NON CURRENT ASSETS section.
Current Assets
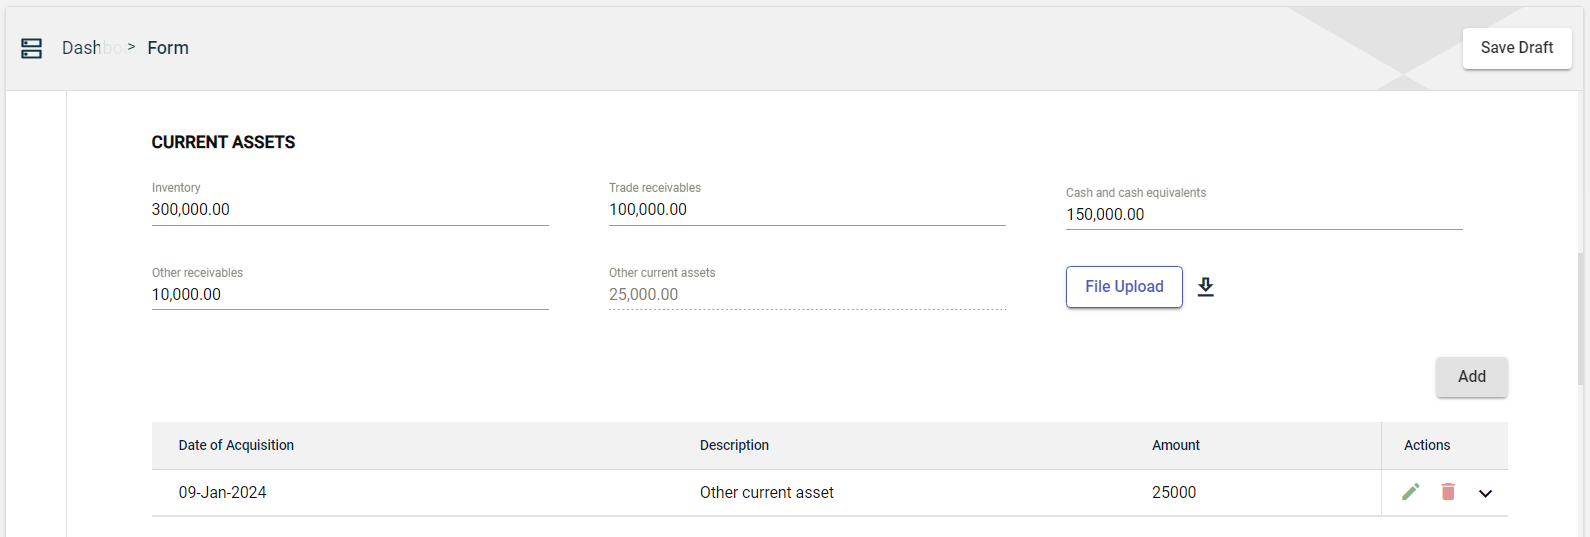
Enter the value of your current assets in the following fields:
- Inventory
- Trade receivables
- Cash and cash equivalents
- Other receivables
You can also upload schedule files by clicking File Upload to automatically capture current assets.
If you don’t have a file available, you can download a template file by clicking ![]() . Edit the downloaded template and then upload it.
. Edit the downloaded template and then upload it.
If you have other current assets that were not specified in the form, you can add them by following these steps:
- Click the Add button in the CURRENT ASSETS section.
- In the popup window, specify the name of your non-current asset in the Description field.
- Enter the amount of the specified non-current asset in the Amount field.
- Click the Save button.
Once you have added an item, it will be displayed in a table. Each item will have its own row, displaying the date of acquisition, description, and value. To edit the details, click ![]() . To remove an item, click
. To remove an item, click ![]() .
.
The total value of all the added current assets is displayed in the Other current assets field of the CURRENT ASSETS section.
Total Assets

The Total Assets field is automatically populated with the value that is calculated as follows:
Total Assets = total amount of non-current assets + total amount of current assets
Equity and Liabilities
Equity and Liabilities
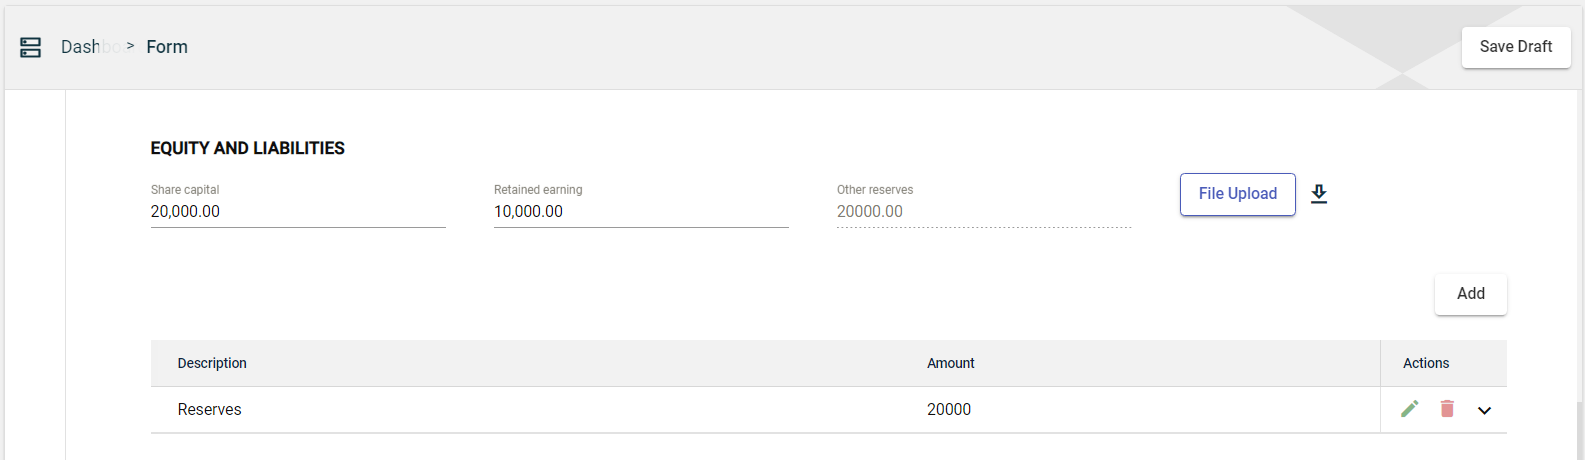
Enter the value of your equity and liabilities in the following fields:
- Share Capital
- Retained earning
You can also upload schedule files by clicking File Upload to automatically capture equities and liabilities.
If you don’t have a file available, you can download a template file by clicking ![]() . Edit the downloaded template and then upload it.
. Edit the downloaded template and then upload it.
If you have other equities that were not specified in the form, you can add them by following these steps:
- Click the Add button in the EQUITY AND LIABILITIES section.
- In the popup window, specify the name of your non-current asset in the Description field.
- Enter the amount of the specified non-current asset in the Amount field.
- Click the Save button.
Once you have added an item, it will be displayed in a table. Each item will have its own row, displaying the description and value. To edit the details, click ![]() . To remove an item, click
. To remove an item, click ![]() .
.
The total value of all the added equities is displayed in the Other reserves field of the EQUITY AND LIABILITIES section.
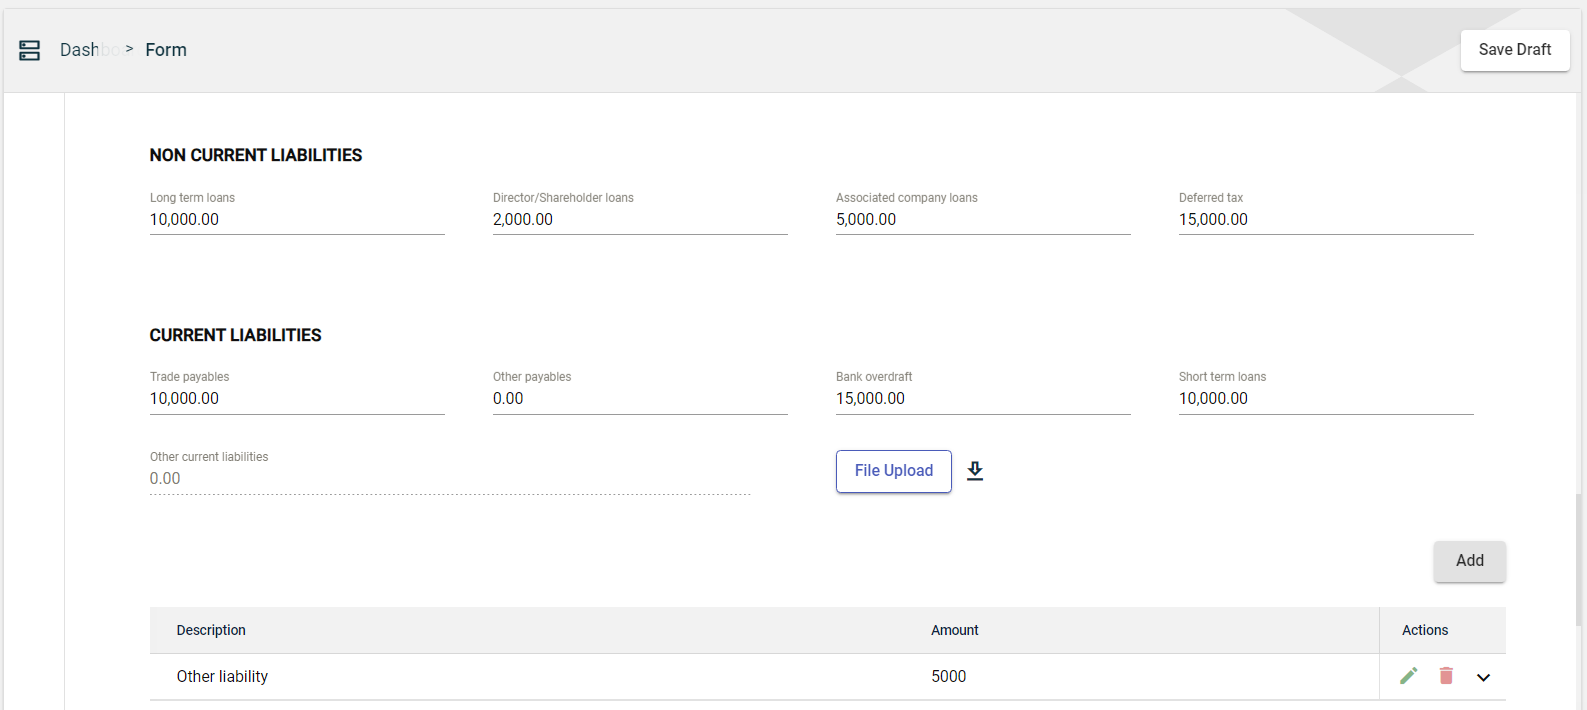
Non-Current Liabilities
Enter the value of your non-current liabilities in the following fields:
- Long term loans
- Director/Shareholder loans
- Associated company loans
- Deferred tax
Current Liabilities
Enter the value of your current liabilities in the following fields:
- Trade payables
- Other payables
- Bank overdraft
- Short term loans
You can also upload schedule files by clicking File Upload to automatically liabilities.
If you don’t have a file available, you can download a template file by clicking ![]() . Edit the downloaded template and then upload it.
. Edit the downloaded template and then upload it.
If you have other current liabilities that were not specified in the form, you can add them by following these steps:
- Click the Add button in the CURRENT LIABILITIES section.
- In the popup window, specify the name of your non-current asset in the Description field.
- Enter the amount of the specified non-current asset in the Amount field.
- Click the Save button.
Once you have added an item, it will be displayed in a table. Each item will have its own row, displaying the description and value. To edit the details, click ![]() . To remove an item, click
. To remove an item, click ![]() .
.
The total value of all the added current liabilities is displayed in the Other current liabilities field of the CURRENT LIABILITIES section.
Total Equity and Liabilities
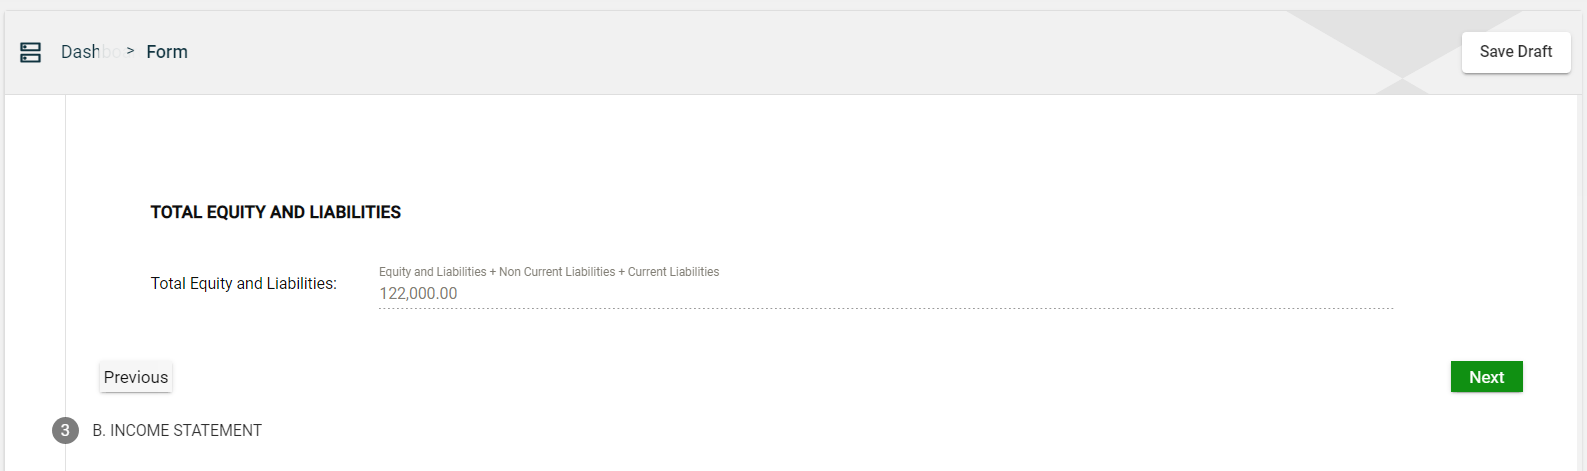
The Total Equity and Liabilities field is automatically populated with the value that is calculated as follows:
Total Equity and Liabilities = total amount of equity and liabilities + total amount of non-current liabilities + total amount of current liabilities
Income Statement
Income
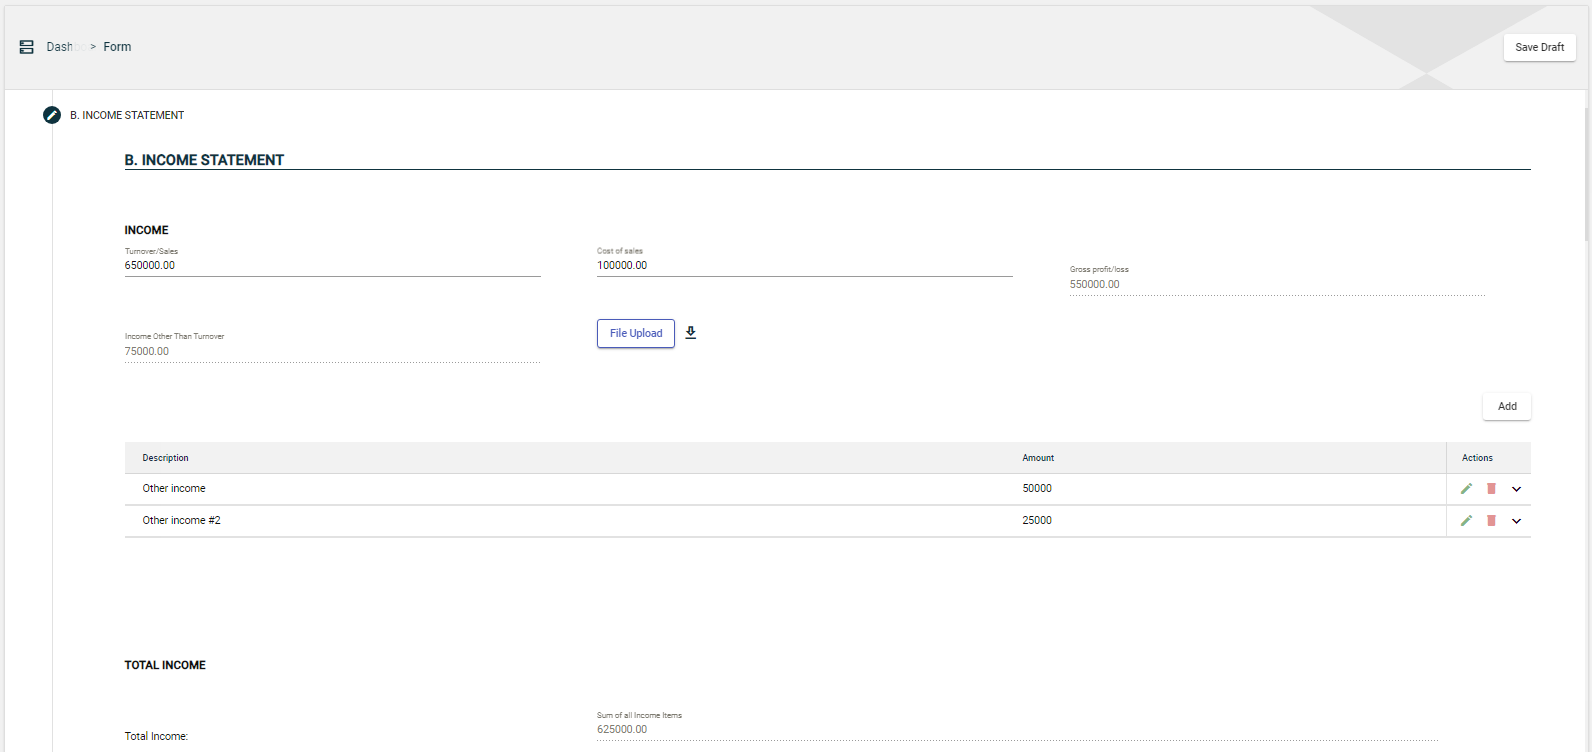
Enter the value of your current income in the following fields:
- Turnover/Sales
- Cost of sales
The Gross profit/loss field is automatically populated with a value that is calculated as follows:
Gross profit/loss = Turnover/Sales - Cost of sales
If you have other income other than the sales, you can add them by following these steps:
- Click the Add button in the INCOME section.
- In the popup window, specify the name of your non-current asset in the Description field.
- Enter the amount of the specified non-current asset in the Amount field.
- Click the Save button.
Once you have added an item, it will be displayed in a table. Each item will have its own row, displaying the description and value. To edit the details, click ![]() . To remove an item, click
. To remove an item, click ![]() .
.
The total value of all the added income is displayed in the Income Other Than Turnover field of the INCOME section.
Total Income
The Total Income field is automatically populated with the value that is calculated as follows:
Total Income = Gross profit/loss + Income other than turnover
Expenditure
Accounting fees

To add an accounting fee, follow these steps:
- Click the Add button in the debts section.
- In the popup window, enter the TIN of the receiver of the accounting fee in the TIN field.
- Enter the name of the receiver of the accounting fee in the Name field.
- Enter the amount of the specified accounting fee in the Amount field.
- Click the Save button.
Once you have added an item, it will be displayed in a table. Each item will have its own row, displaying the TIN, company name, and amount. To edit the details, click ![]() . To remove an item, click
. To remove an item, click ![]() .
.
You can also upload schedule files by clicking File Upload to automatically capture accounting fees.
If you don’t have a file available, you can download a template file by clicking ![]() . Edit the downloaded template and then upload it.
. Edit the downloaded template and then upload it.
The total value of all the added accounting fees is displayed in the Accounting fees field.
Consulting fees
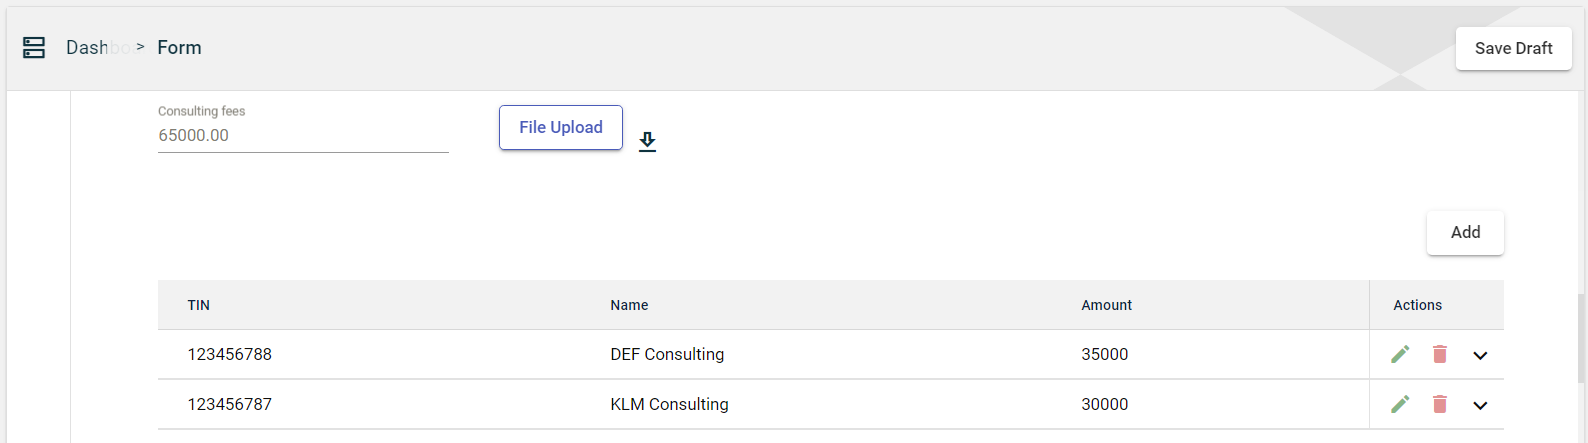
To add a consulting fee, follow these steps:
- Click the Add button in the debts section.
- In the popup window, enter the TIN of the receiver of the consulting fee in the TIN field.
- Enter the name of the receiver of the consulting fee in the Name field.
- Enter the amount of the specified consulting fee in the Amount field.
- Click the Save button.
Once you have added an item, it will be displayed in a table. Each item will have its own row, displaying the TIN, company name, and amount. To edit the details, click ![]() . To remove an item, click
. To remove an item, click ![]() .
.
You can also upload schedule files by clicking File Upload to automatically capture consulting fees.
If you don’t have a file available, you can download a template file by clicking ![]() . Edit the downloaded template and then upload it.
. Edit the downloaded template and then upload it.
The total value of all the added consulting fees is displayed in the Consulting fees field.
Management fees
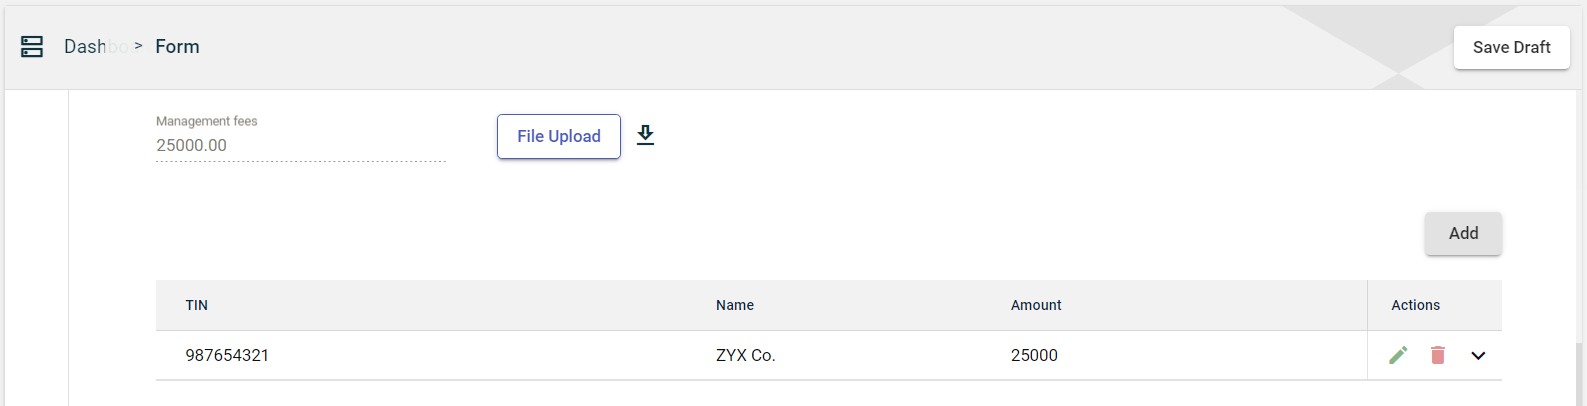
To add a management fee, follow these steps:
- Click the Add button in the debts section.
- In the popup window, enter the TIN of the receiver of the consulting fee in the TIN field.
- Enter the name of the receiver of the consulting fee in the Name field.
- Enter the amount of the specified consulting fee in the Amount field.
- Click the Save button.
Once you have added an item, it will be displayed in a table. Each item will have its own row, displaying the TIN, company name, and amount. To edit the details, click ![]() . To remove an item, click
. To remove an item, click ![]() .
.
You can also upload schedule files by clicking File Upload to automatically capture management fees.
If you don’t have a file available, you can download a template file by clicking ![]() . Edit the downloaded template and then upload it.
. Edit the downloaded template and then upload it.
The total value of all the added management fees will be displayed in the Management fees field.
Commission
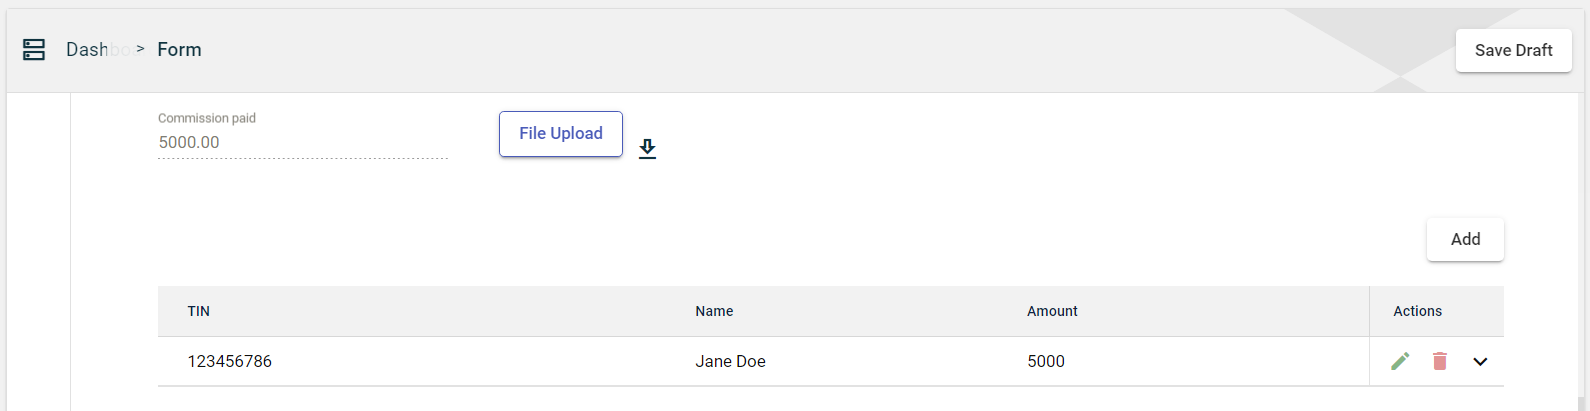
To add a commission, follow these steps:
- Click the Add button in the commission section.
- In the popup window, enter the TIN of the receiver of the commission in the TIN field.
- Enter the name of the receiver of the commission in the Name field.
- Enter the amount of the specified non-current asset in the Amount field.
- Click the Save button.
Once you have added an item, it will be displayed in a table. Each item will have its own row, displaying the TIN, company name, and amount. To edit the details, click ![]() . To remove an item, click
. To remove an item, click ![]() .
.
You can also upload schedule files by clicking File Upload to automatically capture commissions.
If you don’t have a file available, you can download a template file by clicking ![]() . Edit the downloaded template and then upload it.
. Edit the downloaded template and then upload it.
The total value of all the added commissions is displayed in the Commissions paid field.
Provisions, lease, utilities, and maintenance

Enter the value of your provisions, lease, utilities, and maintenance expenses in the following fields:
- Provision for bad debts
- Depreciation
- Director’s fess filed through PAYE
- Electricity
- Entertainment
- Insurance
- Interest/Financial charges
- Lease payment
- Legal costs
- Rates
- Rental paid
If you have expenses related to repairs or maintenance, you can add them by following these steps:
- Click the Add button in the staff expenses section.
- In the popup window, specify the TIN of the payee in the TIN field.
- Enter the name of the payee in the Name field.
- Enter the amount of the specified non-current asset in the Amount field.
- Click the Save button.
Once you have added an item, it will be displayed in a table. Each item will have its own row, displaying the TIN, company name, and amount. To edit the details, click ![]() . To remove an item, click
. To remove an item, click ![]() .
.
You can also upload schedule files by clicking File Upload to automatically capture items.
If you don’t have a file available, you can download a template file by clicking ![]() . Edit the downloaded template and then upload it.
. Edit the downloaded template and then upload it.
The total value of all the added repairs or maintenance fees is displayed in the Repairs/maintenance field.
Royalties and license fees
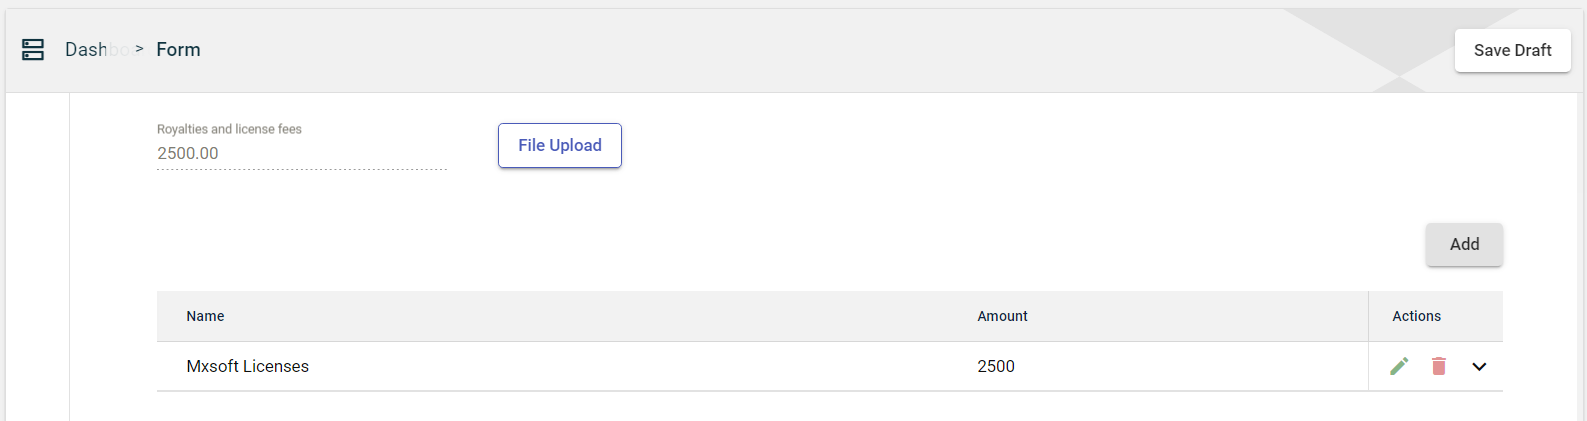
To add a royalty and license fee, follow these steps:
- Click the Add button in the staff expenses section.
- In the popup window, specify the name of the royalty or license fee in the Name field.
- Enter the amount of the specified royalty or license fee in the Amount field.
- Click the Save button.
Once you have added an item, it will be displayed in a table. Each item will have its own row, displaying the name and amount. To edit the details, click ![]() . To remove an item, click
. To remove an item, click ![]() .
.
You can also upload schedule files by clicking File Upload to automatically capture royalties and license fees.
If you don’t have a file available, you can download a template file by clicking ![]() . Edit the downloaded template and then upload it.
. Edit the downloaded template and then upload it.
The total value of all the added royalties or license fees is displayed in the Royalties and license fees field.
Staff expenses
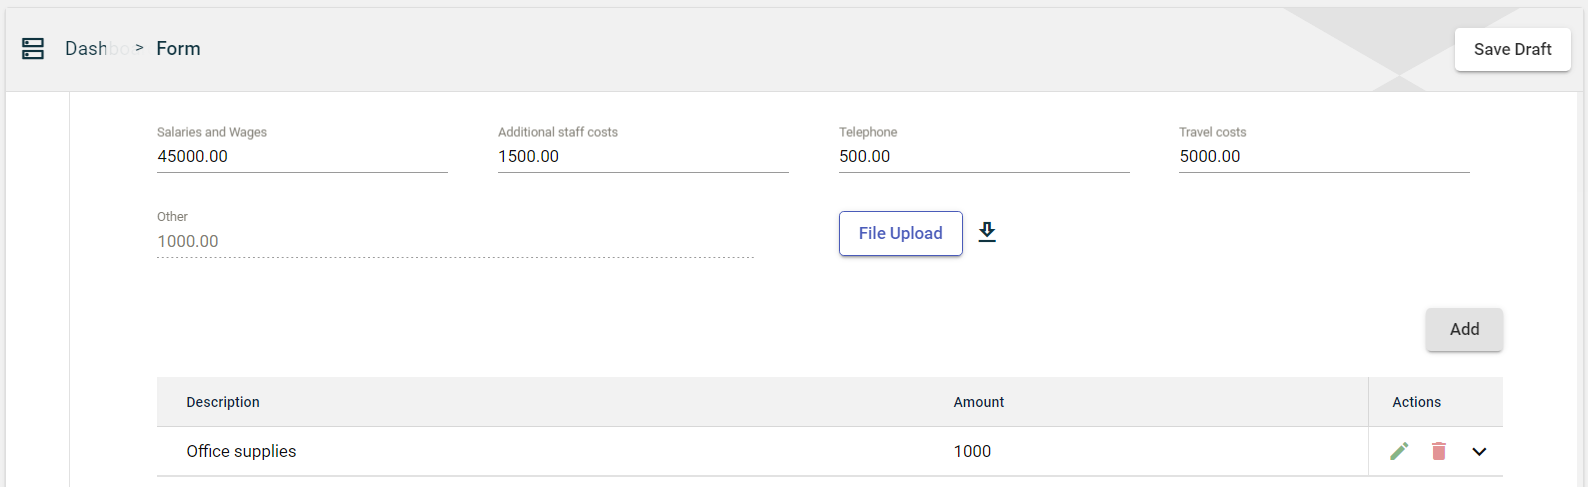
Enter the value of your staff expenses in the following fields:
- Salaries and wages
- Additional staff costs
- Telephone
- Travel costs
You can also upload schedule files by clicking File Upload to automatically capture staff expenses.
If you don’t have a file available, you can download a template file by clicking ![]() . Edit the downloaded template and then upload it.
. Edit the downloaded template and then upload it.
If you have other staff expenses that were not specified in the form, you can add them by following these steps:
- Click the Add button in the staff expenses section.
- In the popup window, specify the details of the staff expense in the Description field.
- Enter the amount of the specified staff expense in the Amount field.
- Click the Save button.
Once you have added an item, it will be displayed in a table. Each item will have its own row, displaying the description and amount. To edit the details, click ![]() . To remove an item, click
. To remove an item, click ![]() .
.
The total value of all the added staff expenses is displayed in the Other field.
Total Expenses

The Total Expenses field is automatically populated with the sum of all expenditure items.
Account profit/loss for the year

The Accounting Profit / Loss For The Year field is automatically populated with the value that is calculated as follows:
Accounting Profit / Loss For The Year = total income - total expenses
Exempt Income
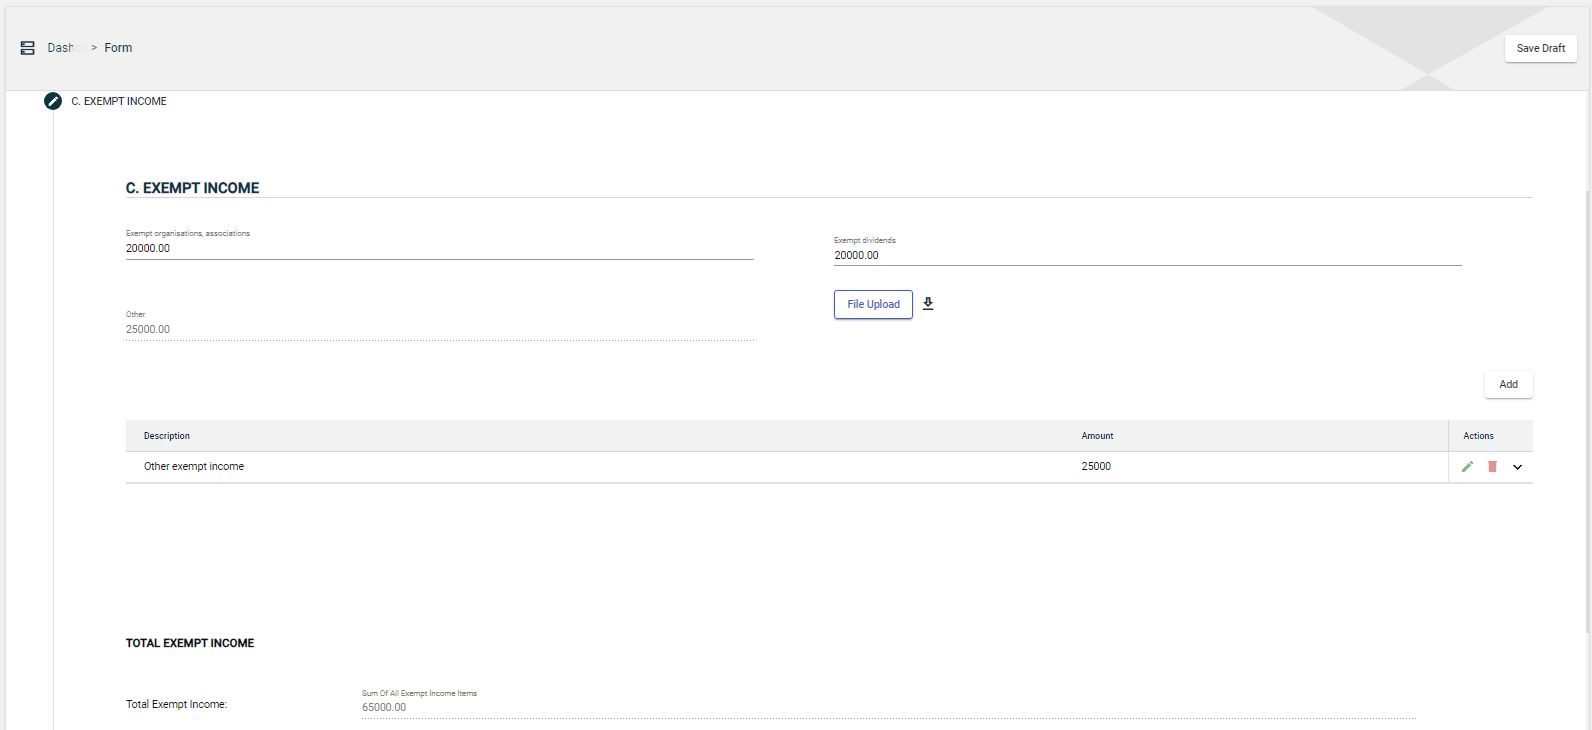
Enter the value of your exempt income in the following fields:
- Exempt organisations and associations
- Exempt dividends
You can also upload schedule files by clicking File Upload to automatically capture exempt income.
If you don’t have a file available, you can download a template file by clicking ![]() . Edit the downloaded template and then upload it.
. Edit the downloaded template and then upload it.
If you have other exempt income that was not specified in the form, you can add them by following these steps:
- Click the Add button in the staff expenses section.
- In the popup window, specify the details in the Description field.
- Enter the amount of the specified exempt income in the Amount field.
- Click the Save button.
Once you have added an item, it will be displayed in a table. Each item will have its own row, displaying the description and amount. To edit the details, click ![]() . To remove an item, click
. To remove an item, click ![]() .
.
The total value of all the added exempt income is displayed in the Other field.
Total Exempt Income
The Total Exempt Income field is automatically populated with the sum of all exempt income items.
Adjustment (Add back)
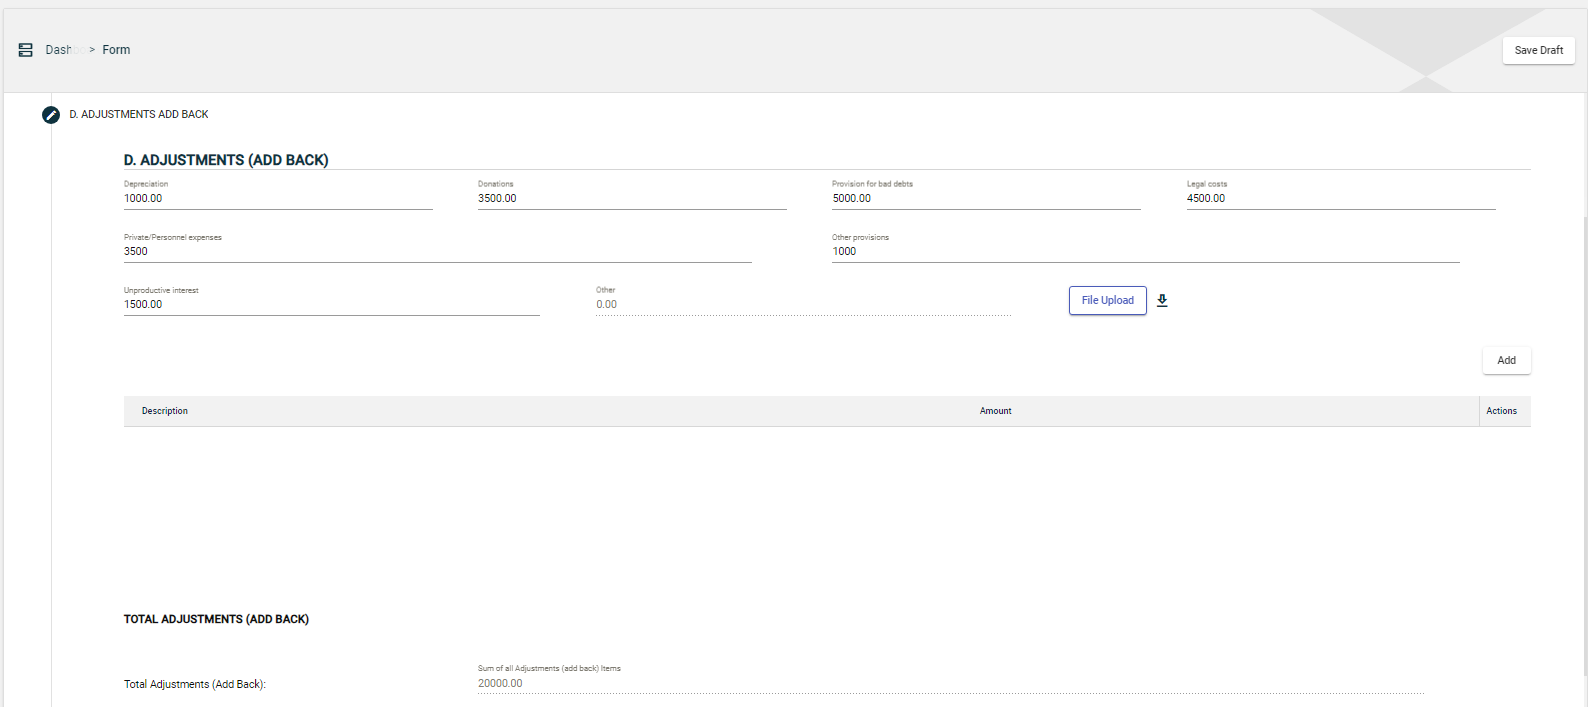
Enter the value of your adjustments in the following fields:
- Depreciation
- Donations
- Provision for bad debts
- Legal costs
- Private/Personnel expenses
- Other provisions
- Unproductive interest
You can also upload schedule files by clicking File Upload to automatically capture add-back adjustments.
If you don’t have a file available, you can download a template file by clicking ![]() . Edit the downloaded template and then upload it.
. Edit the downloaded template and then upload it.
If you have other add-back adjustments that were not specified in the form, you can add them by following these steps:
- Click the Add button in the staff expenses section.
- In the popup window, specify the details in the Description field.
- Enter the amount of the specified add-back adjustment in the Amount field.
- Click the Save button.
Once you have added an item, it will be displayed in a table. Each item will have its own row, displaying the TIN, company name, and amount. To edit the details, click ![]() . To remove an item, click
. To remove an item, click ![]() .
.
The total value of all the added add-back adjustments is displayed in the Other field.
Total Adjustment (Add back)
The Total Adjustment (Add Back) field is automatically populated with the sum of all add-back adjustment items.
Adjustment (Allowable)
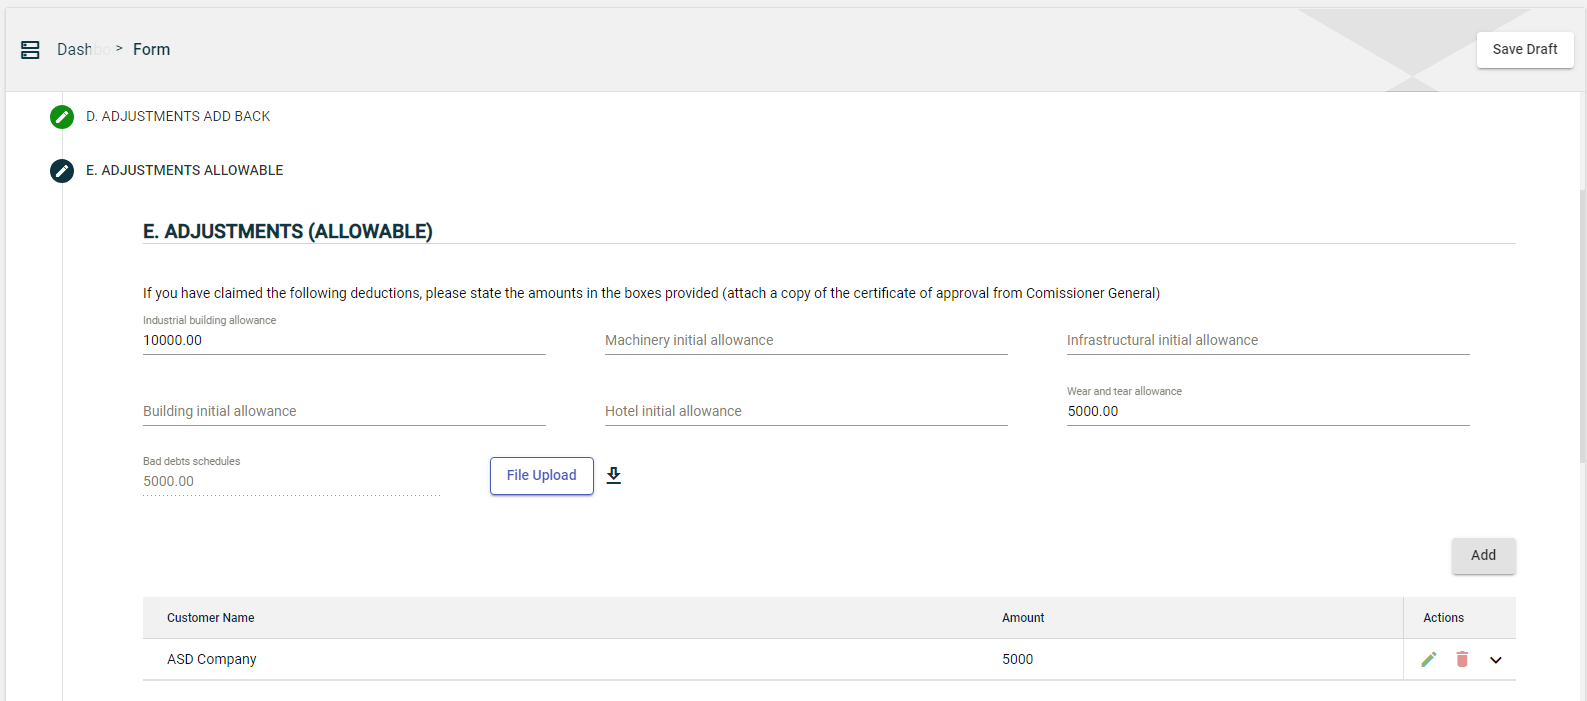
If you have claimed any of the following deductions, enter the amounts in the following fields:
- Industrial building allowance
- Machinery initial allowance
- Infrastructural initial allowance
- Building initial allowance
- Hotel initial allowance
- Wear and tear allowance
You can also upload schedule files by clicking File Upload to automatically capture allowable adjustments.
If you don’t have a file available, you can download a template file by clicking ![]() . Edit the downloaded template and then upload it.
. Edit the downloaded template and then upload it.
If you have a bad debt schedule, you can add it by following these steps:
- Click the Add button in the staff expenses section.
- In the popup window, specify the details in the Description field.
- Enter the amount of the specified bad debt in the Amount field.
- Click the Save button.
Once you have added an item, it will be displayed in a table. Each item will have its own row, displaying the TIN, company name, and amount. To edit the details, click ![]() . To remove an item, click
. To remove an item, click ![]() .
.
The total value of all the added bad debts is displayed in the Bad debts schedule field.
If you have a bad debt schedule, you can add them by following these steps:
- Click the Add button in the staff expenses section.
- In the popup window, specify the details in the Description field.
- Enter the amount of the specified allowable adjustment in the Amount field.
- Click the Save button.
Once you have added an item, it will be displayed in a table. Each item will have its own row, displaying the TIN, company name, and amount. To edit the details, click ![]() . To remove an item, click
. To remove an item, click ![]() .
.
The total value of all the added allowable adjustments is displayed in the Bad debts schedule field.
Other Allowable Adjustments

If you have other allowable adjustments that were not specified in the form, you can add them by following these steps:
- Click the Add button in the staff expenses section.
- In the popup window, specify the details in the Description field.
- Enter the amount of the specified allowable adjustment in the Amount field.
- Click the Save button.
Once you have added an item, it will be displayed in a table. Each item will have its own row, displaying the TIN, company name, and amount. To edit the details, click ![]() . To remove an item, click
. To remove an item, click ![]() .
.
You can also upload schedule files by clicking File Upload to automatically capture other allowable adjustments.
If you don’t have a file available, you can download a template file by clicking ![]() . Edit the downloaded template and then upload it.
. Edit the downloaded template and then upload it.
The total value of all the added allowable adjustments will be displayed in the Other adjustments allowable schedule field.
Total Adjustment (Allowable)
The Total Adjustment (Allowable) field is automatically populated with the sum of all allowable adjustment items.
Assessment to Tax
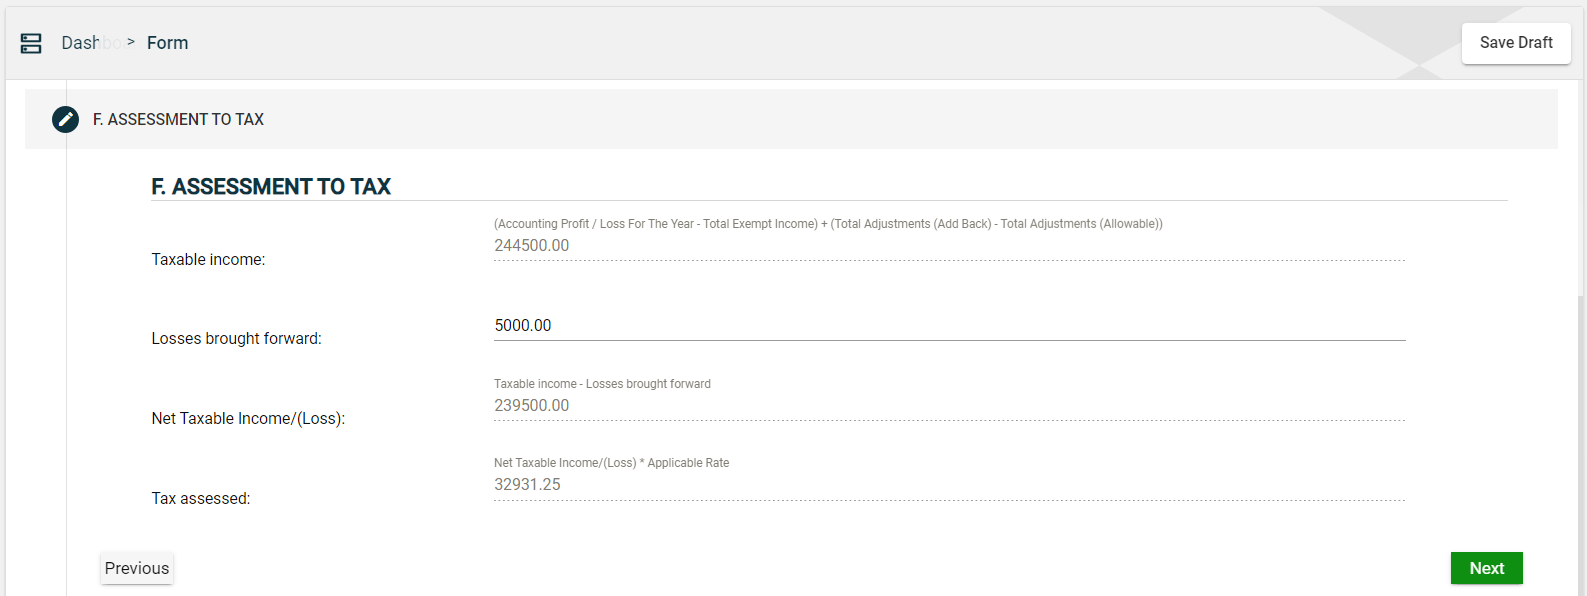
This section of the form assesses tax based on taxable income.
The Taxable Income field is automatically populated with a value that is calculated as follows:
Taxable Income = (Accounting profit or loss for the year - total exempt income) + (total add back adjustments - total allowable adjustments)
If you have any losses brought forward, enter the amount in the Losses brought forward field.
The Net Taxable Income/(Loss) field is automatically populated with a value that is calculated as follows:
Net Taxable Income = Taxable Income - Losses brought forward
If the net taxable is a loss, the value will be displayed as (<net taxable loss>). For example, if your taxable income is 100000 and your loss is 110000, then the next taxable loss is (10000).
The Tax assessed field is automatically populated with a value that is calculated as follows:
Tax assessed = Net taxable income or loss * Applicable rate
Details of Payment
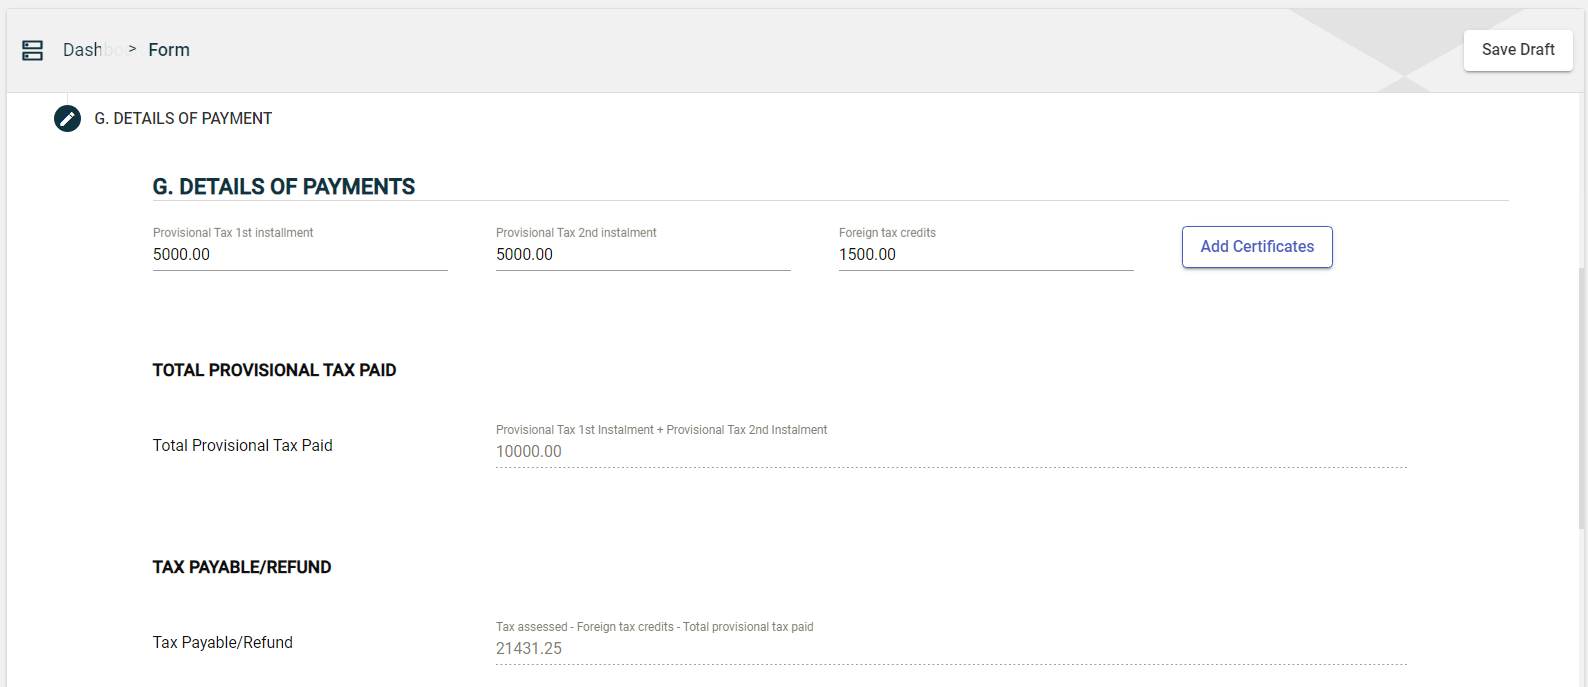
If you submitted a Provisional Tax, enter the amount you paid in the following fields:
- Provisional Tax 1st installment
- Provisional Tax 2nd installment
If you have any foreign tax credits, enter the amount in the Foreign tax credits field.
To attach any supporting documents, click the Add Certificates button.
Total Provisional Tax Paid
The Total Provisional Tax Paid field is automatically populated with the sum of all provisional tax installments.
Tax Payable/Refund
The Tax Payable/Refund field is automatically populated with a value that is calculated as follows:
Tax assessed = Tax assessed - Foreign tax credits - Total provisional tax paid
If you have made any excess payments, you can request a refund or apply the excess payment as a credit to your other tax debts.
Submit a CIT form
After filling out the mandatory fields, follow these steps:
-
If you have excess payments after assessment, then you can choose any of the following options:
- Apply Credit to Other Tax Debts
- Refund
Otherwise, proceed to Step 2.
-
Click Check Form to validate the entered information.
If errors are found, an error message is displayed. Correct the errors before clicking Check Form again to enable the Submit button. -
Once validated, the Submit button will be enabled. Click Submit.
Save a draft
You can now save a draft of the filled-out tax form by clicking the Save Draft button at any time before submitting it.
Pending status.